Warp Empire Battles — collected rules, edge cases, and important restrictions
V1.4 — Last updated 07/01/2026
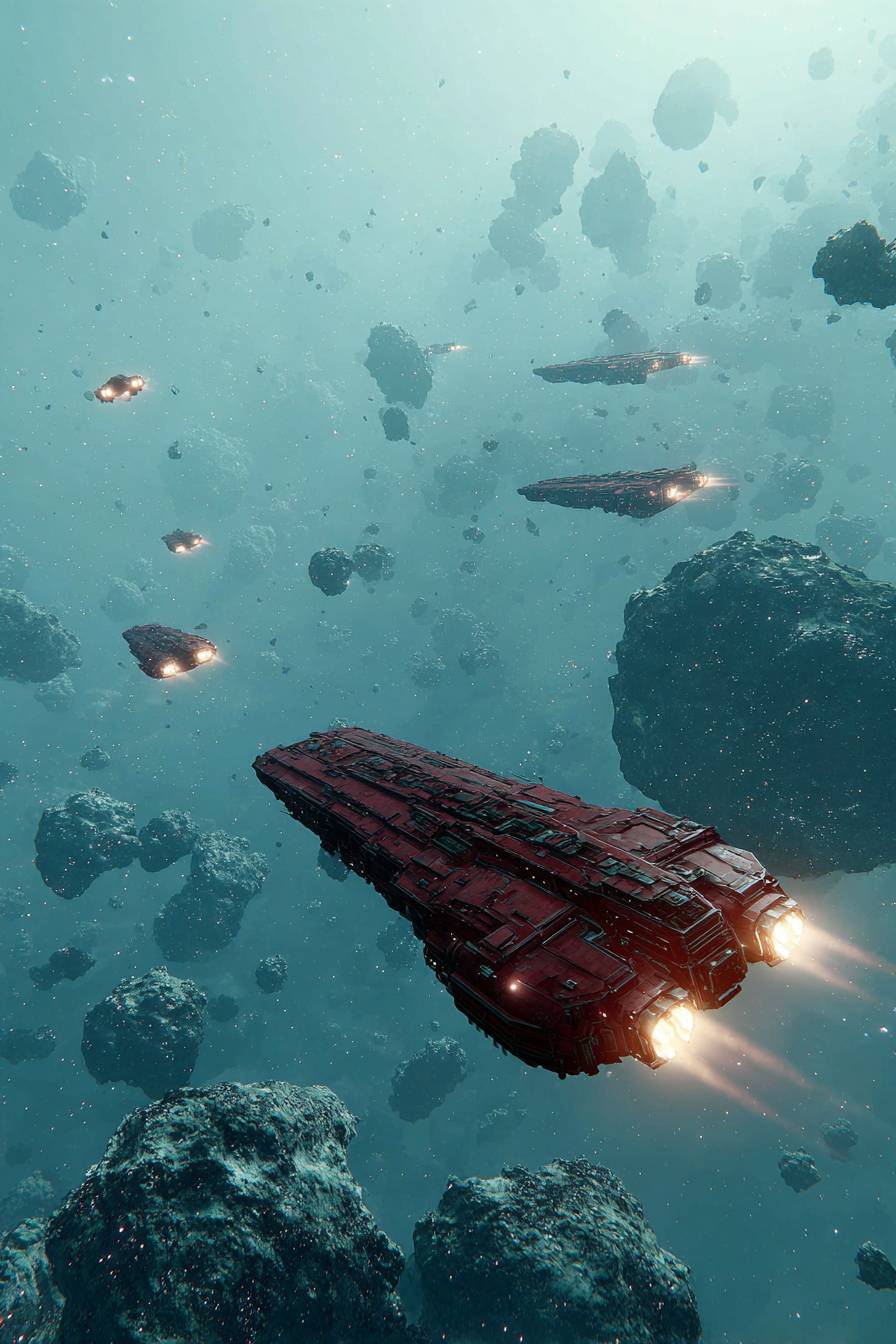
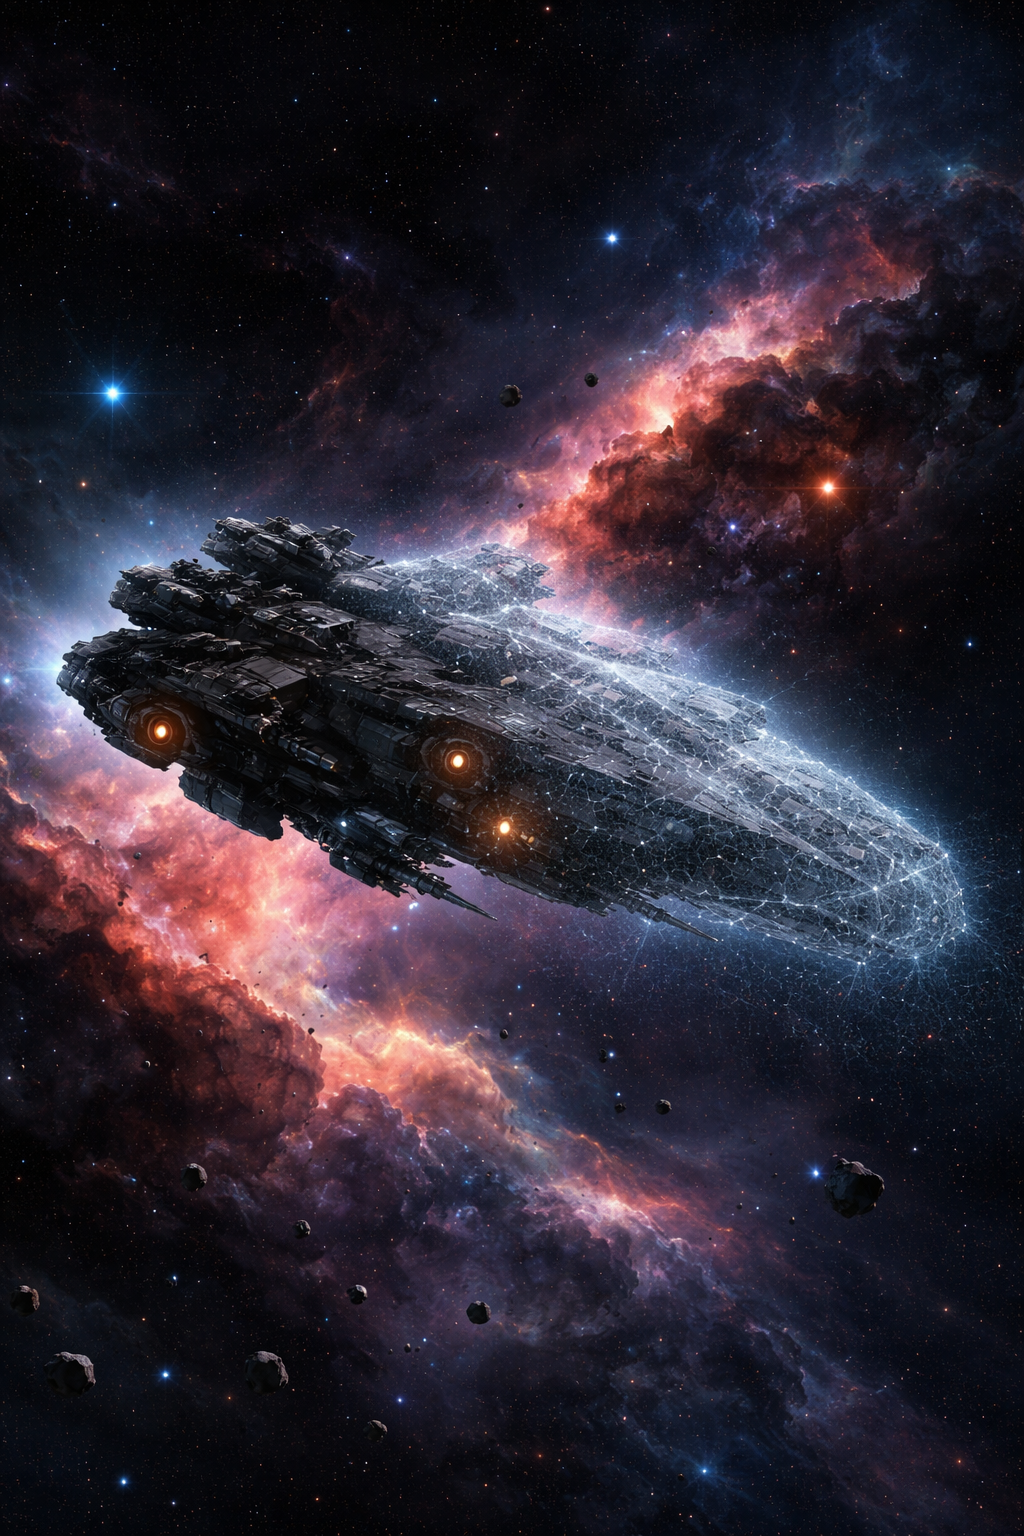
The Galaxy Awakens
Aeons ago, a great galactic war shattered civilization across the stars. The conflict
was so devastating that entire sectors were reduced to silence. Warp lanes went dark.
Worlds that had once traded freely across light-years found themselves isolated, cut off
from neighbors they could no longer reach. Over the millennia that followed, knowledge
faded. Technologies were forgotten. The galaxy slid into a long barbarism, and the war
that caused it passed out of memory entirely.
No one remembered the ancient highways between the stars — until explorers from
a handful of resurgent civilizations ventured beyond their own systems and discovered
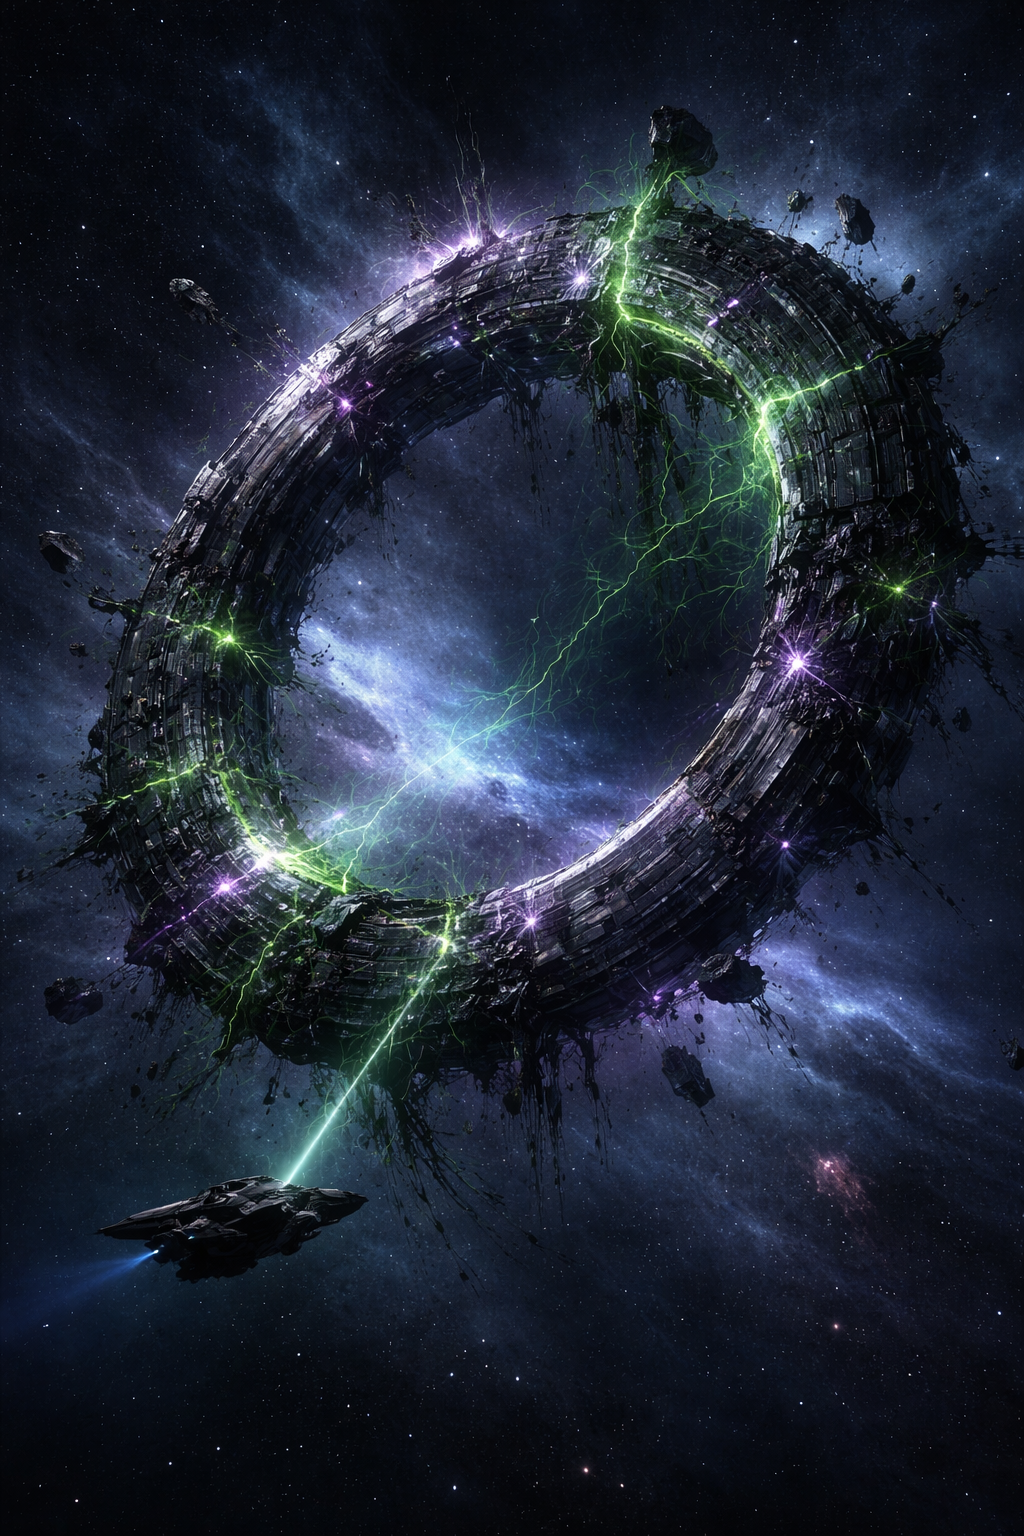
something extraordinary: warp gates. Massive ring-like structures orbiting
near every star, built by a forgotten race in an age no one can date. The gates were
dormant but intact, connected to one another in a vast web-like network spanning the
galaxy. With enough study, engineers learned that a ship equipped with a specialized
warp field generator could activate a gate, opening a near-instantaneous
corridor to the next gate along the network.
This discovery changed everything. Civilizations that had spent centuries rebuilding
on single worlds suddenly had access to the stars again. But expansion brings need:
the advanced industries and infrastructure required to sustain interstellar society
demand far more resources than any one planet can provide. Minerals, population,
production capacity — the hunger for growth is insatiable, and every neighboring
system is a prize worth claiming.
You are one of these resurgent empires. Your scientists have cracked the
secret of the warp gates, and your fleets are ready to push outward along the ancient
lanes. But you are not alone. Other empires have made the same breakthrough, and they
have the same ambitions you do.
Scattered among the stars you will also find independent civilizations
— worlds that have rebuilt enough to field local defense fleets but have not yet
unlocked the secret of the gates. They cannot project power beyond their own system,
but they are far from helpless. Some may welcome you as liberators; others will fight
to the last ship. How you treat them will shape your reputation across the galaxy.
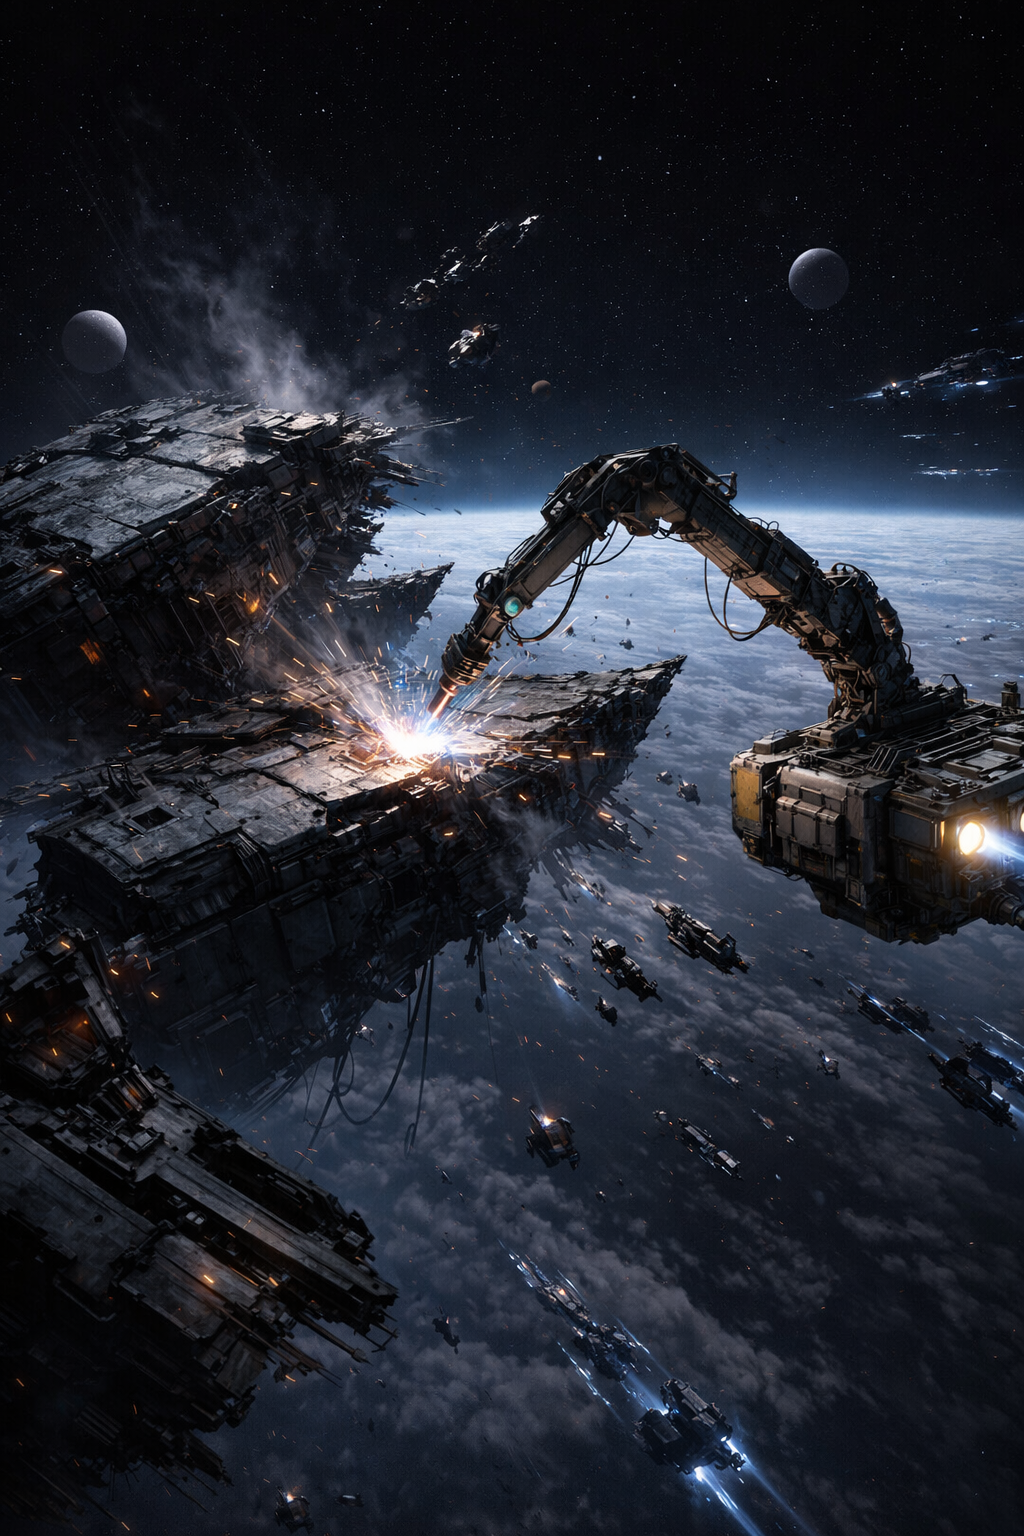
And in the dark spaces between the civilized belts — the Dead Systems and
drifting asteroid fields at the galaxy's edge — pirates lurk. These
lawless fleets prey on any system rich enough to plunder, raiding along the warp lanes
from hidden bases in regions too remote or too dangerous for legitimate settlement.
They answer to no empire and respect no treaty (see Pirates). Left unchecked, a pirate armada can
grow powerful enough to threaten even a well-defended frontier.
Victory
The war ends when one empire establishes dominance. There are three paths to victory:
Galaxy Domination: Control 30% of the galaxy's ownable
systems — Star Systems plus Dead Systems you have claimed with a Starbase
both count (the same 30% applies at every player count). Your empire's reach becomes
undeniable.
Vanquish Your Enemies: Control 3 original home worlds,
including your own, in games of 4–6 players — or 4 including
your own in games of 7+ players (thresholds are set by the players at the
start of the game and don't drop as empires fall). It is a simple ownership
count of the galaxy's original home systems on any turn: your own counts, and every
rival home you hold counts. Crushing your rivals at their seat of power breaks their
capacity to resist.
Victory Points: If neither of the above is achieved by the turn
limit, the empire with the highest Victory Point total wins a marginal
victory. VP are scored as: Home System = 10 (yours and any enemy homes
you hold), Gaia System = 4, Other Star System = 2
(3 if it carries the Avian prestige ability), plus
1 VP per 5 population (rounded up), plus mission rewards
that grant VP, plus combat glory: 1 VP per 50 enemy player ships destroyed
and, in Carrier games, 1 VP per enemy Carrier destroyed. Dead Systems
grant no VP — they count toward Galaxy Domination instead. Territory, prosperity,
and battlefield prowess all matter.
Galactic Ranking
Win or lose, every finished game earns you a score based on how many players
you beat. In a 9-player game, the winner beat 8 rivals and scores 8 points.
Second place beat 7 and scores 7. Last place scores 0.
Bigger games mean bigger scores. Coming in 2nd out of 9 players (7 points) is
worth more than winning a 4-player game (3 points). This rewards commanders who
test themselves in the largest wars the galaxy has to offer.
Your Galactic Ranking in the Hall of Fame is your average score
across all finished games. You need at least 3 completed games to appear on the
ranked leaderboard.
Empires that are eliminated during a game are ranked by how long
they survived — holding out to turn 20 places you above someone knocked out on
turn 5. Empires that abandon a game (AI takeover) receive last place
for that game, scoring 0 points. There is always something to play for, even when the
war turns against you.
Vanquished — Defeat & Ship-to-Pirate Conversion
When an empire loses its last star system, it is vanquished.
All of its surviving ships — fleets still in transit, raiding forces, stragglers
at enemy systems — are absorbed by the galaxy’s pirate empire and drift toward
the nearest Dead System or Asteroid Field. They raise the black flag and
become part of the pirate threat.
Every surviving player receives an in-game announcement naming the
fallen empire and the empire that delivered the killing blow. The vanquished player is
locked out of the game — no orders, no map access — until
the game ends. Once the game finishes, the full map is revealed and the vanquished
player can review the final results.
Victory Rewards
Winners earn credits that can be used to join future games:
Large games (9+ players): The winner earns 2 credits
and the runner-up earns 1 credit.
Smaller games (under 9 players): The winner earns 1 credit.
Skilled commanders can sustain their campaigns through victory alone. The bigger
the war, the greater the spoils.
Strategy Overview — Explore, Expand, Secure
The early game is a race to explore the galaxy and expand your
borders. Every habitable system you claim serves two purposes: it increases your
production capacity (more factories building more ships) and it secures
mineral income to feed those factories and keep your fleet supplied with
Ion-9 crystals.
But production alone won't sustain a growing empire. You need a steady flow of
minerals — the raw material behind everything you build and everything
that keeps your ships in the fight. There are three sources of minerals in the galaxy:
Habitable Systems (Planets A–E):
Your primary mineral source. Each colonized world starts with some minerals on hand and
generates more each turn through its minerals-per-turn rate. Higher-quality planets tend to
produce more. Population not used for production automatically mines minerals, adding to the
stockpile.
Dead Systems:
These blasted worlds carry no population and produce nothing on their own, but some contain
mineral stockpiles — salvageable remnants from the ancient war. Claim a
Dead System by placing a Starbase, and your ships can load the minerals. Once collected,
the stockpile is not replenished — Dead Systems are a one-time windfall, not
a long-term supply line.
Asteroid Fields:
Dangerous but rewarding. Freighters stationed in an asteroid field mine +1 mineral
per turn each (up to their 3-mineral cargo capacity). The risk is real — ships
take debris damage every turn — but a well-protected mining fleet can generate a
reliable stream of minerals from a source that never runs dry.
Nebulas:
These shrouded systems play by their own rules — the swirling clouds warp sensors and
weapons fire, so combat inside a nebula follows its own special rules. They're
also haunted by the ancient war: drifting somewhere in the haze may be
Derelict ships — lost vessels that a patient
commander can find, claim, and restore to service. Keep your ships in the cloud long enough,
and you may turn up more than just trouble.
Smart commanders don't just build fleets — they build supply chains.
Use Freighters to shuttle minerals from mining systems and asteroid operations to your
production centers and home world. A powerful fleet without minerals behind it is a fleet
that will slowly starve.
1. System Types
RULE-001
The galaxy is made up of many different kinds of locations. Some are thriving worlds
with populations and industry; others are barren wastelands or hazardous phenomena left
behind by the ancient cataclysm. Understanding what you'll find at each type of system
is essential before committing your fleets.
1a. Star Systems (Quality A–E)
Star systems are habitable worlds with populations, industry, and natural resources.
Each is rated by quality from A (best) to E (poorest), which determines its
population capacity, industrial base, and growth potential.
Interestingly, the most developed worlds are not always the richest in raw materials.
Higher-quality systems spent centuries building up their infrastructure before rediscovering
the gates — their mines are well-established but increasingly depleted. Lower-quality
systems, while less developed, often sit on untapped mineral wealth that fuels rapid
expansion for any empire willing to invest in their growth.
Quality
Pop Limit
Minerals/Turn
Typical Industry
Growth Rate
Character
A (Gaia)
12
4
4
10%
Rare, powerful — major strategic prize
B
10
2
2–3
8%
Well-developed, strong foundation
C
6
2
2
6%
Moderate — reliable but not exceptional
D
5
2
1
4%
Frontier world — underdeveloped but functional
E
4
3
1
2%
Primitive but mineral-rich — excellent mining outpost
Tip: Don't overlook Class E systems. While their populations are small
and industry is minimal, they produce 3 minerals per turn — more than
any other quality except Gaia Systems. These systems are good for supplying minerals
to your hungry industries at your capital.
Independent systems keep producing: While a system is still independent
(not yet part of your empire), it continues to generate minerals on its own each turn
— those minerals accumulate in the system's stockpile. Class D and E systems are
particularly attractive targets for this reason: a Class D produces 2 minerals
per turn and a Class E produces 3 minerals per turn even while
independent. When the system eventually joins your empire — through diplomacy or
conquest — you inherit the full mineral stockpile that has been building up since
game start.
Most star systems you encounter will be controlled by independent civilizations
— worlds that have rebuilt enough to field local defense fleets but have not yet
unlocked the secret of the warp gates. Their reaction to your arrival depends on your
empire's reputation (see Independent Systems).
1b. Home Systems
Every player begins the game with a home system — a Class B world that
serves as the heart of your empire. Home systems are better-established than typical
colonies, with higher starting population, industry, and planetary defense.
Property
Value
Quality
B
Population
6.0 (limit 10)
Industry
5.0
Minerals/Turn
2
Starting Minerals
20
Planetary Defense
8
D-Sats
2
Starting Fleet
2 CR + 5 DD + 2 Fr + 1 Starbase
Key: Losing your home system doesn't eliminate you from the game, but
the Vanquish Your Enemies victory is won by controlling original home
worlds — 3 including your own in games of 4–6 players,
4 including your own in games of 7+ players. Defend yours and target
your rivals'.
1c. Dead Systems
Scattered across the galaxy are worlds that bear the scars of the ancient war —
planets blasted so thoroughly by the devastating weapons of those forgotten empires that
they can no longer sustain life. Their atmospheres burned away, their surfaces reduced to
irradiated glass, these Dead Systems are silent monuments to the destruction
that ended the previous age.
No population, no industry, no natural mineral production.
Some Dead Systems still contain mineral stockpiles — leftover war
materiel or salvageable debris from the old civilization. However, you must first
claim the system by placing a Starbase before your ships can access
these minerals. Once collected, they are not replenished.
A Starbase is the only way to claim ownership of a Dead System, since
there is no population to conquer or negotiate with.
Dead Systems may harbor pirate fleets — scavengers lurking among
the ruins (see Pirates).
If two or more empires attempt to place a Starbase at the same Dead System on the
same turn, all placements are cancelled and each Starbase is returned to
its Freighter. No one claims the system.
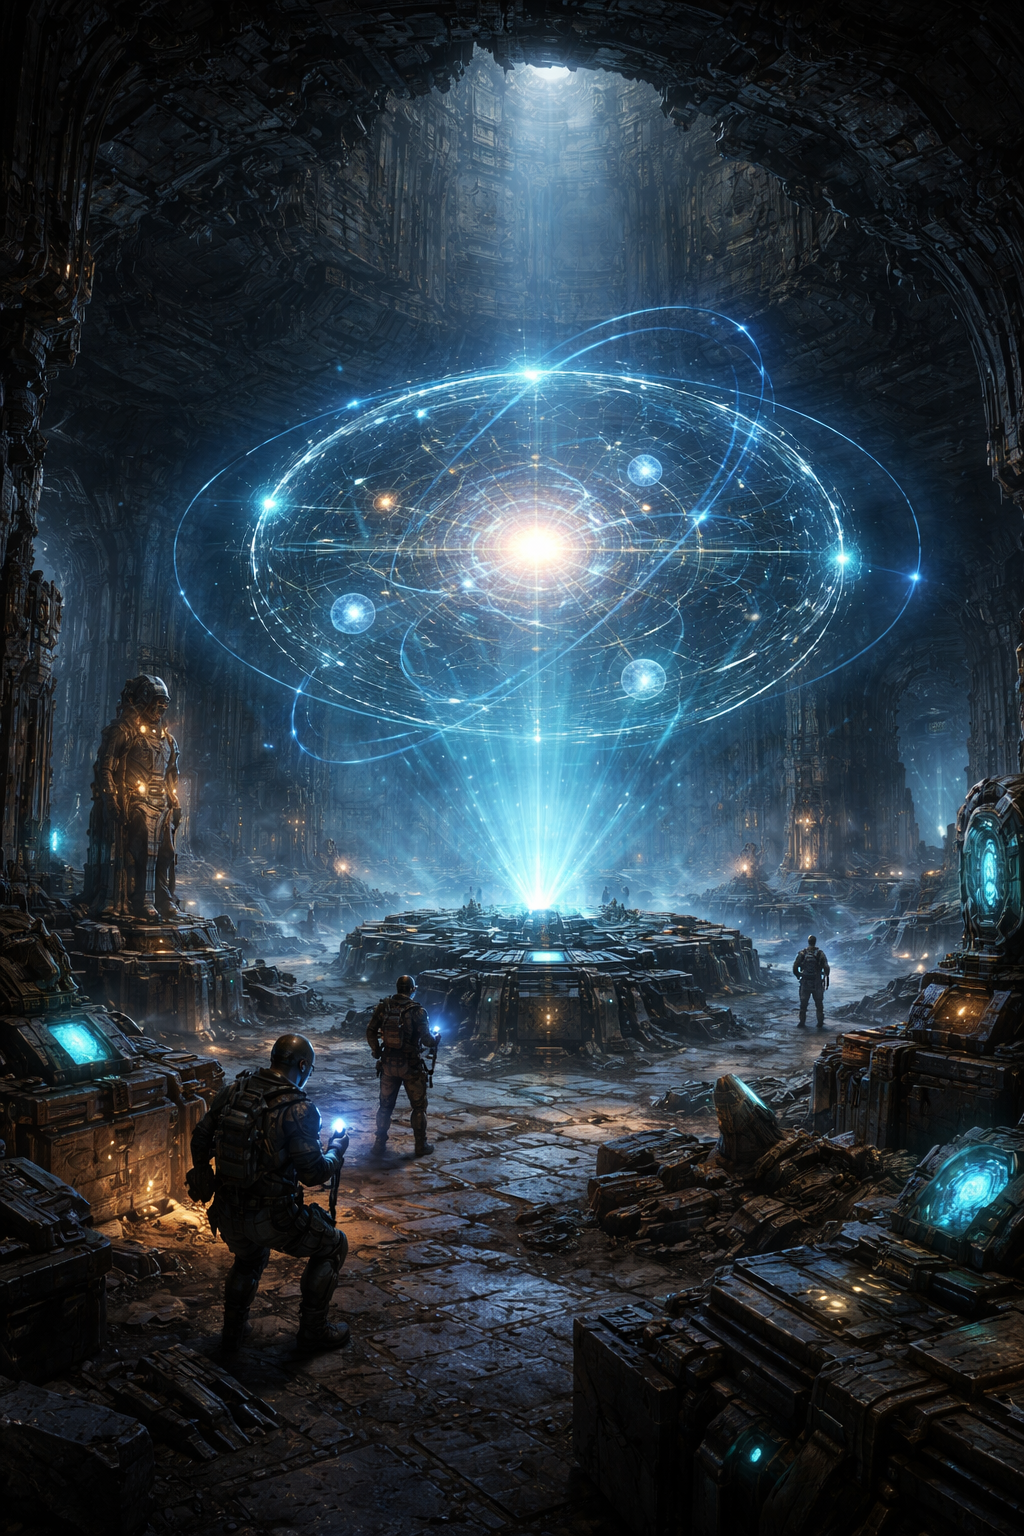
Precursor Archaeology: Dead Systems that harbor pirate garrisons are
often the most promising sites — the pirates were drawn there for a reason. Once you
defeat the pirates and establish a Starbase, your scientists begin excavating the ancient
ruins in search of lost relics and forgotten technologies. Most digs take several turns,
and there is no guarantee: some ruins have been stripped too thoroughly, or their secrets
simply died with the civilization that built them. But when a dig does turn something up,
the Precursors left behind remarkable discoveries — strange artifacts
and reawakened technologies that can grant your empire a powerful advantage, sometimes
fleeting and sometimes lasting.
Tip: Dead Systems make excellent forward operating bases. Placing a Starbase
not only creates a formidable defensive position controlling the surrounding warp lanes,
it also claims the system for your empire — and claimed systems count toward the
Galaxy Domination victory condition. Don't overlook these lifeless worlds;
they can be the difference between falling short and crossing the threshold.
Tip: Look for Dead Systems with pirate fleets — the bigger the garrison,
the more likely the ruins hold something valuable. Clear out the pirates, build a Starbase,
and let your archaeologists get to work. The Precursors left powerful things behind in these
forgotten places. Finding them first could change the course of the war.
1d. Asteroid Fields
Asteroid fields are resource-rich but dangerous locations. Fleets stationed there face
ongoing hazards, and only Freighters can mine minerals from the debris.
Debris Damage:
Ships in an asteroid field take damage from collisions with debris each turn:
Event
Chance per ship
On arrival (entering the field)
5%
Each subsequent turn (stationary)
5%
Each affected ship is destroyed (one hull point or not, it's a debris strike). Carriers are the exception — a debris strike costs a Carrier 1 hull point rather than destroying it outright.
If a Freighter is destroyed, the cargo aboard it is lost with it —
destroyed Freighters are picked at random from the group, and your turn report names what
was lost.
Pirate fleets are immune to asteroid damage.
Fleets that are moving through (not stationary) skip the per-turn 5% check, but still take the 5% arrival hit at their destination.
Freighter Mining:
Freighters stationed in an asteroid field automatically mine minerals:
Each surviving Freighter with free cargo space mines +1 mineral per turn.
Freighters whose cargo hold is full (3 minerals max per Freighter) do not mine.
A Freighter carrying a Starbase package or a population unit counts as full.
Mining happens after debris damage is applied, so only surviving Freighters mine.
Combat restriction: If combat occurs at an asteroid field during a turn,
no mining takes place that turn. Your Freighters are too busy dodging fire
to collect minerals. This applies to all fleets at the location, regardless of
which empires were involved in the fighting.
Movement & Trapping:
Only Cruisers (CR) carry a warp field generator powerful enough to activate the
ancient warp gates for a whole fleet. All other ship types require a Cruiser to tow them
through. Destroyers, Novas, and Carriers carry a small generator that moves only themselves
(a lone Destroyer can still make a one-way probe jump, but it cannot tow anyone else).
Trap warning: If all your Cruisers at an asteroid field are
destroyed — by debris or combat — your remaining ships are stranded.
They cannot leave until a Cruiser arrives to activate the gate for them.
Tip: Always keep spare Cruisers with any asteroid mining fleet. Losing your
only CR to a debris strike means your Freighters (and their cargo) are stuck indefinitely.
Combat in Asteroid Fields:
Missile Ships are nearly useless in asteroid fields, raising their to-hit number from 5 to 10 (on a d10, essentially impossible). The iron-nickel cores inside tumbling asteroids generate chaotic, shifting magnetic fields as they spin. In a dense field, thousands of these rotating metallic bodies create an electromagnetic storm of overlapping anomalies that overwhelms missile guidance systems — targeting locks break within seconds, inertial navigation drifts wildly, and the missiles veer off course into the rocks long before reaching anything living.
All other ship combat stats remain unchanged.
Starbases cannot be placed in asteroid fields.
Pirate fleets may also lurk at asteroid fields. They are immune to debris damage and use
asteroid fields as staging areas for raids into nearby systems (see
Pirates).
1e. Nebulas
Nebulas are dense clouds of interstellar gas and charged particles that drift between
the stars. Ships can pass through freely, but the electromagnetic interference disrupts
targeting systems and makes sustained operations impossible.
+1 to-hit penalty for all ships — targeting through the interference
is difficult.
No ambush allowed — sensor readings are too unreliable to set a trap.
No Starbases can be placed in a nebula.
All fire is resolved simultaneously — ships destroyed in a round still
get to fire that round. Hits are pooled and applied at the end of each phase.
Nebulas have no population, no industry, and no resources.
A Derelict ship may drift hidden in the cloud
— keep ships here to search it out, then claim and restore it (see Appendix D).
1f. Ion Nebulas
Ion nebulas are far more dangerous than ordinary nebulas. The intense ion storms
surging through these regions disable ship shields entirely, stripping away
the energy barriers that normally protect hulls from weapons fire.
All rules from regular nebulas apply (no ambush, no Starbases, +1 to-hit,
simultaneous fire).
All ships are reduced to 1 HP regardless of their normal hit points.
A single hit destroys any ship — Destroyer or Starbase, it makes no difference.
Like ordinary nebulas, an Ion Nebula may hide a Derelict
ship to find and claim (see Appendix D).
Warning: Ion nebulas are the deadliest combat terrain in the game. Every
ship has 1 HP, meaning a single hit destroys even a Cruiser. Battles here are fast
and brutal — bring numbers, not expensive ships.
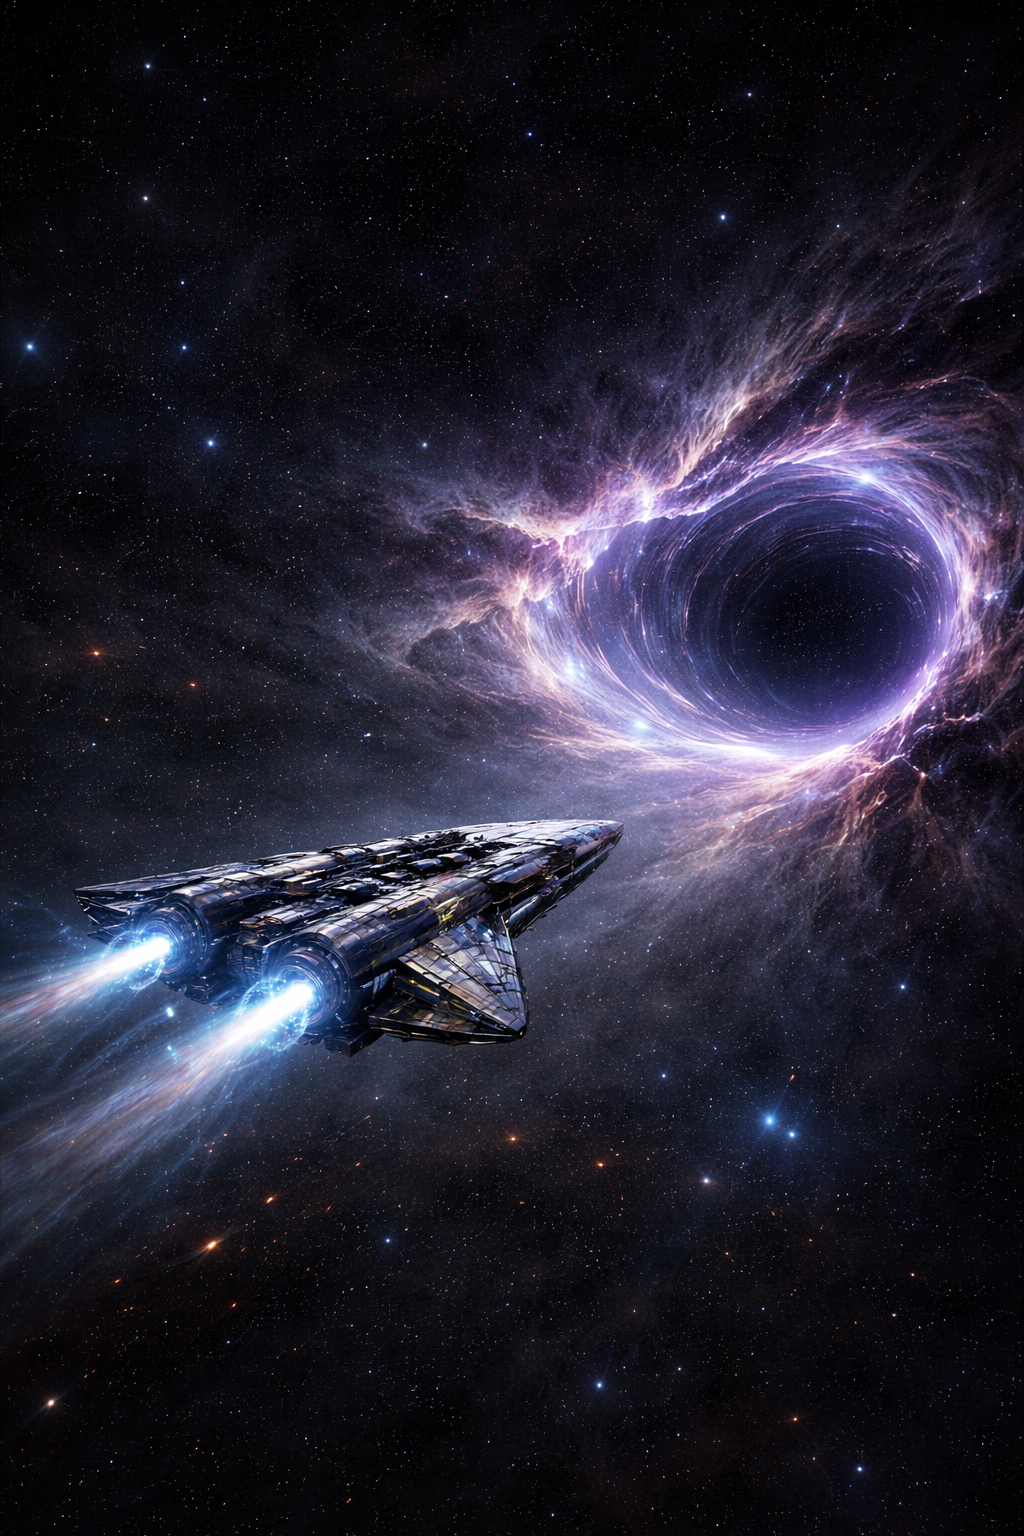
1g. Black Holes
Black holes are gravity wells of absolute destruction. Any fleet that enters a
black hole is instantly and completely destroyed — ships, cargo, and all.
There is no combat and no survivors. The only thing the doomed fleet relays back before it is
lost is the names of the systems bordering the black hole.
Black holes are visible on the star map. Flying into one is entirely avoidable
— and entirely your fault if it happens.
Discovering a black hole (by having it on a connected warp lane) reveals its
position permanently.
There is exactly one black hole per galaxy.
Tip: A black hole adjacent to your territory can be a strategic asset.
Enemies can't attack from that direction, and the warp lanes around it create natural
chokepoints. Just don't accidentally send your fleet through it.
systemsasteroidnebulaminingcombatmovement
2. Independent Systems & Diplomacy
RULE-002
Scattered across the galaxy are independent systems — star systems
controlled by minor factions that are not aligned with any player empire. They have
their own fleets, defenses, and attitudes. How they react to you depends on your
reputation and a bit of luck.
2a. First Contact
When one of your fleets arrives at an independent system for the first time, the race there
sizes you up and settles on a starting attitude. That result is permanent for that
system and specific to your empire — every other player earns their own separate first contact.
In games played with Races (the default), first contact is
deterministic and reputation-free — no die is rolled and your record does not
matter. The race greets you at a fixed relations level set by how its people feel about
the races you already hold (its temperament), not by luck:
Everyone starts at Neutral (5).
A race you already hold welcomes its own kind — +2, a Cordial (7) start.
A race that likes yours opens +1, Warm (6); a wary one −1, Cool (4); a distrustful one −2, Disgruntled (3).
Hold several races and the friendliest applicable attitude wins; the Appealing Race advantage card adds its bonus on top.
No race ever JOINS on first contact — the greeting is capped at Cordial (7). A world joins your empire only later, through ongoing diplomacy or a mission.
How each race greets a fresh Human empire — the opening baseline, before you
absorb any other races:
Greeting
Starting level
Races
Warm
6 (+1)
Avians, Flippers, Cephaloids, Skarn
Neutral
5 (0)
Arachnids, Florans, Greys, Stonies
Cool
4 (−1)
Lizardmen, Overlords, Synths
Disgruntled
3 (−2)
Insectoids
Special cases override the greeting above:
Reviled reputation is the one time your record touches first contact: Highly Civilized worlds refuse a Reviled empire and turn Hostile on sight, while Lawless and Neutral worlds still greet you normally. A fleet that outnumbers a garrison 3:1 intimidates any world (except Gaia) into joining outright. See Reputation.
Gaia (Class A) systems always open Neutral and can be taken by conquest only — see the box below.
So a first contact settles into one of:
A starting relations level (Disgruntled–Cordial) — the faction tolerates you and ongoing diplomacy begins from there.
Angry (2) — a resentful start from same-race resentment (you already took one of their kind by force); diplomacy can still win it back.
Hostile — war at once, its fleet attacking on sight (a Highly Civilized world meeting a Reviled empire).
Join and Rogue Join are earned in ongoing
diplomacy, not on first contact. In Races games you never win a system the turn you arrive; you
climb to a Join over time (Section 2b). When a world finally joins, its
fleet may go rogue — the civilian government joins but the local brass break away as
hostile warlords, so you gain the system and its population while the mutinous fleet keeps attacking your
ships (its new Cruiser deserts to the pirates). Exception — next door to home: if
the joining system is directly adjacent (1 hop) to your Home System, half its garrison
stays loyal and joins you (the defectors are rounded down, so any odd ship stays loyal to you); only the
other half defects. Systems further out defect in full.
Exception — loyal races: a joining
world never goes rogue when it is a Human world (the Humans' special:
their fleets always come over fully loyal, whichever empire absorbs them) or when its race
matches the absorbing empire's own race (nobody defects when joining their own kind).
This loyalty belongs to the joining world, not to your empire — absorbing Human worlds does
not protect later joins of other races, which roll the normal rogue chance.
Classic game (Races off) — reputation-based first contact
With Races disabled, first contact is instead a d10 modified by your current reputation:
Reputation
Hostile
Neutral
Rogue Join
Join
Revered
—
60%
10%
30%
Honored
—
70%
10%
20%
Trustworthy
—
80%
10%
10%
Neutral
—
80%
10%
10%
Questionable
20%
70%
10%
—
Dangerous
30%
70%
—
—
Menacing
40%
60%
—
—
Reviled *
100% *
—
—
—
* In the classic game there are no race
temperaments: at Reviled, every independent system is automatically hostile on contact.
Tip: Absorbing a race doesn’t just grant its ability — it also warms every
world of that race (kinship, a Cordial start), while taking one of their kind by force sours the rest.
Expand along a friendly temperament chain. And avoid needless early
aggression: at Reviled the Highly Civilized half of the galaxy slams its doors, though
the Lawless fringe respects a fearsome name.
Exception — Gaia Systems (Class A): Very high-quality Class A
independent systems are always Neutral on first contact, regardless of your reputation.
These powerful factions cannot be intimidated, but they also won’t attack you on sight.
More importantly, diplomacy will never move them — they are permanent
neutrals that can only be acquired through military conquest.
See Section 2c for full details.
2b. Ongoing Diplomacy
When an independent system is Neutral toward you, diplomacy is ongoing.
Each turn that you have at least one ship stationed there, a diplomacy roll
occurs automatically.
The system tracks a hidden diplomacy level (2–8) that shifts each turn
based on a d10 roll:
In games played with Races (the default):
Effective roll = d10 + your reputation modifier for that race's temperament (see Race Reputation Preferences), plus any advantage-card or same-race kinship bonus
A natural 10 always shifts +1 (toward friendship) — it rises through any penalty, but never more than +1.
Effective roll of 9+ shifts +1 (improving relations).
Effective roll of 1 or less shifts −1 (worsening relations).
Everything else: no change that turn. Each Independent's Diplomacy card shows exactly which
rolls will move relations, given your current modifiers.
Classic game (Races off) — legacy diplomacy shifts
Effective roll = d10 + your flat reputation modifier (capped at +2 benefit).
A natural 10 shifts +2 (toward friendship) if you have no penalties; +1 if any penalty applies.
A natural 1 always shifts −1 (toward hostility), regardless of modifiers.
Effective roll of 6+ shifts +1 (improving relations).
Effective roll of 1 or less shifts −1 (worsening relations).
Everything else: no change that turn.
The diplomacy level has named stages so you can track how things are going:
Level
Status
Outlook
2
Angry
Dangerous
3
Disgruntled
Poor
4
Cool
Below average
5
Neutral
Default starting point
6
Warm
Promising
7
Cordial
Good
8
Friendly
Very good
If the level drops below 2, the faction goes Hostile and declares war.
If the level rises above 8, the faction joins your empire and you gain
control of the system on the following turn. However, there is a 33% chance
that the system's fleet defects to the pirates instead of staying under your
command (a "rogue join"). You still gain the system, but the fleet is lost
— unless the system is directly adjacent to your Home System
(half the fleet stays loyal), or the joining world is Human or of
your own race (the whole fleet stays loyal — see the Rogue Join
and Loyal Races notes in Section 2a above).
Tip: Reputation no longer applies one flat modifier to every
Independent — each race reads your record through its temperament.
Highly Civilized worlds reward a clean record (Honored/Revered give
+2 to the effective roll, Trustworthy +1) and are put off by a bad one.
Lawless worlds are the mirror image — they warm to a fearsome
record (Menacing/Reviled +2, Questionable/Dangerous +1) and distrust a spotless one.
Neutral-temperament worlds prefer a balanced record (+1 from
Trustworthy through Questionable) and cool to either extreme. Each Independent's
Diplomacy card shows the exact modifier it applies — see
Race Reputation Preferences below.
(Revered's own distinguishing perk is a fleet maintenance discount — see
Fleet Maintenance.)
Important: You must keep at least one ship at the system for diplomacy to
continue. If you withdraw all ships, the diplomacy level freezes where it is until
you return.
2c. Gaia Systems — Fiercely Independent
Class A systems — known as Gaia Systems — are the rarest and most
powerful independent worlds in the galaxy. They boast the highest population limits, the strongest
industry, the most defense satellites, and the fastest population growth of any system type. They
are major strategic prizes. They are also the only independent systems that diplomacy
cannot touch.
The rules that govern every other neutral independent system do not apply to Gaia Systems. Every
aspect of the diplomatic process — first contact rolls, ongoing diplomacy shifts, aggression
ripple, pirate-fighting relation bonuses — is either fixed or skipped entirely for these worlds.
Understanding exactly what that means is critical before you build a strategy around one.
First Contact: Always Neutral (one exception — a Reviled tyrant)
When your fleet arrives at a Gaia System for the first time, no d10 is rolled. The outcome is
determined before the dice even hit the table: the system is always Neutral
— no matter how good your reputation, or how bad, up to Menacing. The sole
exception is a Reviled reputation, which is met with hostility even here (see
below).
An empire with Revered reputation does not get a chance for the Gaia System to Join.
Reviled is the one exception: a Gaia System meets a Reviled tyrant with
immediate hostility (and never bows to intimidation regardless). See
Reputation.
At any reputation up to Menacing, the Gaia System’s government acknowledges your
presence and nothing more.
This also means that a Reviled empire cannot use overwhelming force to intimidate a Gaia System
into submission. Even if your fleet outnumbers the Gaia garrison three to one, the defenders will
not surrender. These civilizations are old, proud, and do not yield to tyrants.
Ongoing Diplomacy: Frozen in Place
After first contact, other neutral independent systems enter the ongoing diplomacy cycle —
each turn you station ships there, a diplomacy roll shifts the relationship level up or down until
the faction eventually joins or turns hostile. Gaia Systems are entirely exempt from this
cycle.
No diplomacy roll occurs at a Gaia System, ever.
The relationship level never changes. It starts at Neutral and stays at Neutral.
Stationing ships at a Gaia System has no diplomatic effect whatsoever.
The relationship will not drift Warm, Cordial, or Friendly no matter how long your fleet sits there
or how good your reputation is.
The relationship will not drift Cool, Disgruntled, or Angry from bad luck rolls, because there
are no rolls.
Key Rule: A Gaia System’s relationship level is permanently locked at
Neutral. It cannot improve. It cannot worsen through diplomacy. No amount of time, fleet presence,
or good reputation will ever move it.
Immune to Aggression Ripple
When you attack a Neutral independent system, a solidarity ripple can spread to other neutral
systems you’ve visited, dropping their diplomacy levels (see
Section 2e). Gaia Systems are immune to this ripple.
Even if you go on a rampage against every other independent system in the region, the Gaia
System’s relationship with you does not change as a result.
Immune to Pirate-Fighting Bonuses
Destroying pirate fleets near a neutral system can boost that system’s diplomacy level by
+1 as a reward for protecting the region (see Section 5 — Pirates).
This bonus does not apply to Gaia Systems. Their relationship level is fixed and
cannot be shifted upward by any diplomatic mechanism.
The Only Path to Control Is Conquest
Because diplomacy can never move a Gaia System’s relationship level, the system
will never voluntarily join your empire. There is no diplomatic endgame here. The only
way to take control of a Gaia System is to attack it, destroy its defenses, and invade.
Destroy the fleet. Gaia Systems have large independent garrisons and can support up
to 20 Defense Satellites — the highest of any system type. You will need a substantial
combat force to crack their defenses.
Eliminate the Defense Satellites. D-Sats fire on attacking ships each turn
as long as they survive. Bring enough firepower to eliminate them quickly.
Invade. Once all defending ships are destroyed, land your ground troops.
Gaia Systems have high populations, so expect a tough ground fight.
Pay the reputation cost. Attacking a Gaia System that is Neutral toward you
costs you one reputation step, exactly as it would for attacking any other neutral independent
system. Plan for this before committing — if your reputation is already low, a Gaia
conquest can push you into territory where other systems become even harder to deal with.
Reputation Warning: Attacking any Neutral independent system — including a
Gaia System — damages your reputation by one step. Since Gaia Systems are always
Neutral, you can never make them Hostile first to avoid this cost. Every Gaia conquest is a
reputation sacrifice. Factor this into your long-term strategy.
The One Exception: Cultural Hegemony
There is a single path that bypasses the conquest requirement: the Cultural
Hegemony Tier 4 Political advantage card. When you complete this card, every independent
system in the galaxy — including Gaia Systems — immediately joins your empire. This is
the only diplomatic mechanism that can acquire a Gaia System peacefully, and it is deliberately
rare and difficult to achieve.
Outside of Cultural Hegemony, military force is your only option.
About Gaia Systems
Gaia systems are rare survivors of the great war. They have turned inward to study the arts
and the universe and desire to be left alone. They have built up large enough defenses to keep
Pirates away and until recently — smaller feudal empires such as your own. They judge all
smaller empires and are waiting for a peaceful and benevolent unifier. They will join that
hegemony freely with a shared goal of unifying the galaxy under one Imperium of peace and
prosperity.
2d. Reputation
Your reputation is a permanent, empire-wide score that tracks how you have treated
independent systems. It is shown in the top bar of your player portal. Everyone starts
at Neutral.
First contact with an Independent is now
reputation-free — how a race first greets you depends on its temperament and your
shared history, not your record (see Race Reputation Preferences).
Your reputation instead shapes ongoing diplomacy, and each race reads it differently —
the three numbers below are the roll modifier for Highly Civilized · Neutral · Lawless
worlds. The lone exception is Reviled; see the note beneath the table.
Fleet maintenance −1 crystal/turn (min 1); +3 effective PD vs unrest; pirate diplo capped at Lvl 1, −6 standing penalty (cumulative on top of Honored), cannot Bribe to Raid
Honored
Reputation-free
Highly Civ +2 · Neutral 0 · Lawless −1
+2 effective PD vs unrest; pirate diplo capped at Lvl 1, −3 standing penalty, cannot Bribe to Raid
10% chance/turn of disruptive event; unrest buffer reduced; Cultural Hegemony: +2 extra systems
Menacing
Reputation-free
Highly Civ −1 · Neutral −1 · Lawless +2
20% event chance; pirate diplo +5 standing bonus, can climb to Brother of the Black Flag (Lvl 3) and Bribe to Raid; Cultural Hegemony: +3 extra systems
Reviled *
Highly Civ hostile *
Lawless +2 · Neutral −1 (Highly Civ hostile) *
40% event chance; pirate diplo +10 standing bonus (cumulative — +5 over Menacing), can climb to Brother of the Black Flag (Lvl 3) and Bribe to Raid; Shock Troops: your Freighters deal +1 damage per hit when invading; Fearless PDF: your Planetary Defense units take +1 HP to destroy (both stack with Elite Troops); Cultural Hegemony: blocked entirely
* Reviled reputation — the civilized galaxy slams shut. When you reach
Reviled, how each Independent world reacts depends on its race class.
A fearsome reputation terrifies the civilized but earns grudging respect — or plain
indifference — on the galaxy’s rougher fringes:
Highly Civilized worlds turn on you. First contact is automatic hostility
— no d10 is rolled. Every Highly Civilized system you arrive at goes immediately Hostile and
its garrison attacks your ships on sight (the actual rate is 100%). No such system resolves to
Neutral on first contact, so no Neutral diplomacy cycles ever start with them. A Highly Civilized
system carried over as Neutral from before you became Reviled keeps rolling, at the same
−1 penalty a Highly Civilized world applies at any bad reputation —
for any new contact, no roll happens at all.
Lawless and Neutral worlds still deal with you.Lawless worlds
respect a fearsome reputation and Neutral worlds are unmoved, so both greet
you through the normal first contact even at Reviled. They reach Neutral normally and their ongoing
diplomacy proceeds as usual — their read of your record (favorable for Lawless, indifferent for
Neutral) then plays out through the standard diplomacy cycles (see
Race Reputation Preferences).
Intimidation still works on the lawless. If your arriving fleet outnumbers a
Lawless or Neutral garrison 3:1 or more, the system is intimidated and
auto-joins your empire with its fleet instead of resolving normally. No diplomacy roll is
needed — the system bows to overwhelming force.
Type A (Gaia) override — intimidation does not apply. Quality A
systems are too principled to bow to a tyrant. While you are Reviled, every Gaia
System you visit is automatically Hostile, regardless of how badly you outnumber the
defenders. The 3:1 intimidation exception does not apply to Type A worlds
for Reviled empires.
Cultural Hegemony is blocked. The Tier 4 Political mission
(see Section 10c) cannot be completed at all while
you are Reviled, regardless of how many high-quality systems you control.
The practical effect is that a Reviled empire leans on conquest and the lawless fringes — the
civilized heart of the galaxy is closed to it until reputation recovers (e.g. by destroying pirate
fleets, see Section 5).
Disruptive events — the rot within. Once your reputation sinks to
Dangerous or worse, the galaxy’s contempt begins to corrode your own
empire. Each turn there is a chance — the “event chance” column above:
10% at Dangerous, 20% at Menacing, 40% at
Reviled — of a disruptive event, such as palace corruption draining minerals at your
home system, an officer leaking your fleet’s movements to a rival, or a desertion.
Admiral desertion. The ugliest of these is a desertion. A senior officer,
disgusted with serving a despised regime, turns his coat at your next major battle — an
admiral and the ships loyal to him break from the fleet just before the fighting begins and
sail off to join the pirates. A small slice of the fleet is lost (roughly
5–10%, at least one ship and at most one Cruiser), and any cargo aboard
deserting Freighters is spilled into space. Only fleets of 10 or more ships
are large enough to hide a conspiracy — smaller fleets are safe.
Carriers and installations never desert.Carriers (CV)
are immune — a carrier’s crew and its fighter wing stay loyal and are never lost
to desertion. So are your immobile installations: Starbases,
D-Sats, and Planetary Defense — a starbase plainly
can’t weigh anchor and sail off to the Black Flag. Only mobile warships and freighters
(Cruisers, Destroyers, Missiles, Novas, and Freighters) can be lured away.
The pirates see things upside down. Where the independent races read
your reputation as a measure of trust, the brethren of the Black Flag read it as a
measure of how easy it will be to do business with you. The worse you look to the
independents, the better the pirates like you — Menacing empires earn a +5
standing bonus in pirate diplomacy and Reviled empires
earn a cumulative +10 (another +5 on top of Menacing), and both may
climb all the way to Brother of the Black Flag. Honored empires carry a −3
penalty and Revered empires carry a cumulative −6 (another −3 on top of
Honored); both are capped at Tolerated Patrons (Lvl 1). Climbing high
with the brethren requires a willingness to keep your hands dirty in front of the
galaxy at large; you cannot have it both ways.
What damages your reputation:
Attacking an independent system that is Neutral toward you. Each attack
damages your reputation by one step (e.g. Neutral → Questionable).
Surprise attack on a Neutral human player. Attacking another player's fleet
or system before declaring war on them costs −1 reputation step per pair per
turn. Ambush orders are exempt (see Section 2j).
Breaking a Non-Aggression Pact unilaterally (using End N.A.P. with no
accompanying war declaration) damages your reputation by 1 step. The galaxy
notes which empires tear up their own pacts.
Declaring war on an empire you have, or ever had, a Non-Aggression Pact with this
game damages your reputation by 2 steps. This applies whether the pact
is currently in force or ended cleanly earlier in the game — coming back to attack a former
pact partner is a galaxy-level betrayal.
Using Forced Labor — the home-system build option that squeezes out
+1 BP for an extra mineral (see Section 6a) — costs 1 step
each turn you use it. (An empire already at the lowest tier, Reviled, can keep
using it with no further drop — a small mercy for tyrants.)
Certain missions given by Lawless independent systems can cause a drop in
your reputation (e.g. sacrificing your own people).
What improves your reputation:
An independent system joins your empire through diplomacy. When you
keep a ship present and push a Neutral independent's diplomacy track to level 9, its council
votes to join you — and your reputation improves by one step
(e.g. Questionable → Neutral). An initial reaction roll of Join does
not improve your reputation; only ongoing diplomacy counts.
Only civilized company improves your name: the reward applies only when
the joining race is Highly Civilized or Neutral. Absorbing a
Lawless-race system — by any method — never improves your
reputation. The system still joins normally; the galaxy just doesn't applaud the company
you're keeping.
One step per turn, regardless of how many join: if two or three
systems all vote to join on the same turn, you still only gain one reputation step that
turn. The extra joins are still great — you get the systems, fleets, and population
— but you cannot chain them for multiple rep tiers in a single turn.
Hunting pirates: Your reputation improves by one step each time your
lifetime tally of destroyed pirate ships crosses a milestone — 10, 25, 50, and
100 pirate hulls across the whole game. The galaxy takes notice when an empire has
the courage to take the fight to the pirate scourge. A single big battle can cross more than
one milestone at once (see Pirates — Rewards for Fighting
Pirates).
Forming a Non-Aggression Pact with another human player improves your
reputation by 1 step. Both signatories receive the bonus when the pact takes
effect at rollover. Treaty-signers are seen as builders, not aggressors.
These sources do stack in the same turn. A pirate-kill
milestone, an independent-system join, and a NAP signed on the same turn could move you up three reputation
tiers at once. Only multiple independent-system joins in one turn are capped.
Warning: Reputation never decays on its own. Attacking independent systems
has permanent consequences that can only be undone through patient diplomacy.
The best reputation you can achieve is Revered.
Race Reputation Preferences
The independent races don’t all read your reputation the same way. Every race has a
temperament that decides
which direction of reputation warms it fastest during ongoing diplomacy. This replaces
the one-size-fits-all modifier in the table above: the clean, honorable record that delights a
Highly Civilized race unsettles a Lawless one, and vice-versa. First contact is
unaffected — it is reputation-free. A race’s preference is shown on its portrait
tooltip on the system card, directly above its special ability.
Reputation Pref
Warms fastest when your reputation is…
Races
Peaceful
Highly Civilized
A good record — the better your reputation (up to Revered), the
faster relations climb. A bad record slows them.
HumansCephaloidsAviansOverlordsFlippers
Balanced
Neutral
A moderate record — steer clear of both extremes. The middle tiers
climb fastest; only Revered or Reviled slows them.
ArachnidsFloransSkarnStonies
Aggressive
Lawless
A fearsome record — the worse your reputation, the faster relations
climb (short of Reviled, which closes diplomacy for everyone). A good record slows them.
LizardmenInsectoidsGreysSynths
Tip: The preference only sets which direction is rewarded — the
named special ability each race grants (see its portrait tooltip) is always active. Match your
reputation to the races you most want to win over, and remember that pleasing the Lawless means
displeasing the Highly Civilized.
Same-Race Resentment & Kinship
When you take over an independent system, you gain its race — and how you
came to hold that race colors how the rest of its kind greet you:
Kinship. Win a race over by diplomacy and their kin greet you as friends
— a newly-met world of that race opens warmer (a Cordial start).
Resentment. Conquer one system of a race by force and the other
systems of that same race hear of it — a newly-met world of theirs starts at
Angry.
Hold a race both ways — some by force, some by diplomacy — and the peaceful
tie redeems you, so their kin greet you as friends rather than resent you.
2e. Consequences of Attacking Neutral Systems
If you attack an independent system that is currently Neutral toward you
and score at least one hit, several things happen:
Your reputation is damaged by one step.
That system's reaction flips to Hostile — they will fight you from now on.
Any ongoing diplomacy with that system is destroyed (diplomacy level reset to Hostile).
Solidarity rolls occur at nearby independent systems (see below).
Diplomacy levels at all other independent systems you've visited may drop.
Solidarity: When you attack a Neutral independent system, each adjacent
independent system where you have a Neutral relationship rolls to see if they also
turn Hostile in sympathy. The chance depends on your reputation — the worse your
reputation, the more likely neighbors are to turn against you. This can create a
cascading wave of hostility across the map.
Who Takes Offense — Race Loyalties & Quest Givers
Not every independent system cares when word of your attack spreads. Whether a bystander
drops its relations with you — or rolls solidarity against you — depends on its
race, and on whether it sent you to war in the first place:
Lawless races shrug at lawless behavior. A
Lawless independent system
(Lizardmen, Insectoids, Greys, Synths) doesn’t care that you attacked some
other race’s system. No solidarity roll, no drop in relations — violence
against strangers is simply how the galaxy works, as far as they’re concerned.
Every race protects its own. Attack an independent system and every
other system of that same race takes offense — Highly Civilized, Neutral,
and Lawless alike. Kinship outweighs philosophy: even the most lawless world bristles
when its own people burn.
The quest giver never complains — the single exception to the kinship
rule. If a system asked you to fight — a Blood Debt
giver whose marked rival you strike, or a Warmonger’s Favor giver
urging you to wage war — it will never turn on you for that attack, even when the
victim is its own race. They gave the quest; the blood is on their hands too.
Reputation still pays the bill. These exemptions decide who gets angry with
you locally. Your empire-wide reputation still takes its
one-step hit for attacking a Neutral independent system — whoever commissioned the
attack, the rest of the galaxy saw you make it.
2f. Hostile Independent Systems
Once an independent system is Hostile toward you, there is no going back:
Their fleet will attack your ships on sight every turn.
Diplomacy is no longer possible with that system.
Hostility is per-player — another player may still be Neutral or friendly
with the same system.
The only way to control a Hostile independent system is to conquer it by force
(destroy all defenders, then invade).
Hostile independent systems will command their nearby
independent neighbors to set up ambushes along the warp lanes
back from their territory. If you push a fleet through a hostile
independent's space, expect to be ambushed when arriving at the next
independent system over.
2g. Joining & Integration
When an independent system joins your empire (via a Join reaction roll or completing
diplomacy), the transfer happens on the following turn:
You gain full ownership of the system, its population, and its mineral stockpile.
The system's former defense fleet joins your empire — you gain its ships. (Only a rogue join is different: there the garrison defects to the pirates instead.)
If the join was earned through diplomacy and the joining race is
Highly Civilized or Neutral, your reputation
improves by one step. Absorbing a Lawless-race system never improves
your reputation, by any method — the system still joins normally. Capped at one
reputation step per turn from diplomatic joins — see
Reputation.
Inherited stockpile: Independent systems produce minerals every turn
even before they join you. A Class D or E system that has been sitting independent
since the start of the game may have accumulated a substantial mineral reserve by the
time you acquire it. The longer diplomacy takes, the larger the windfall — patient
empires are rewarded.
Strategy: Peaceful expansion through diplomacy is slower but has compounding
benefits. Each successful integration improves your reputation, which makes future
encounters and diplomacy rolls more favorable. A warlike approach does the opposite —
each attack makes every subsequent independent system harder to deal with.
2h. Independent System Missions (Favors)
Each independent
system you meet offers a single ongoing favor — a small task voiced in its people's
own character. There is nothing to accept or decline: the favor is always active, and every bit
of progress you make raises that system's relations toward
Joining your empire. Favors run until the system joins; you never lose
one by ignoring it.
Favors come in two shapes:
Ongoing favors pay a little relations each time you do what they ask
— defend their skies, study a nearby nebula, avenge a pirate raid, deliver resources,
and so on. Enough of them and the system joins on its own.
Join quests are a single deed whose completion is the join
— conquer the rival system they’ve marked (it counts the moment you own it,
no matter who was holding it), build them a Carrier, and the like.
You can see a system's current favor on its card in the Diplomacy panel
(the Indies filter), alongside its relations bar.
Delivering population or minerals — the menu changes for you. Some
favors ask you to bring them population (settlers) or minerals
(ore tribute). Normally you can only Load/Unload cargo at a system you own — so
at an independent system running one of these favors, the Load/Unload option
is replaced by a one-click Deliver 1 Pop. or
Deliver Minerals action (in both the system card's menu and its Orders
block). To use it:
Load the population or minerals onto a Freighter at one
of your own systems.
Move that Freighter to the independent system that wants it.
When it arrives, open the system and click Deliver 1 Pop. /
Deliver Minerals — it unloads the cargo and credits the favor
(minerals pay +1 relations per 2 delivered).
If a Freighter is sitting over such a system with the right cargo aboard and you haven't queued
the delivery yet, the game reminds you when you Submit.
2i. Player-to-Player Communication
The sections above cover diplomacy with independent systems.
Diplomacy with other players is entirely up to you.
The Comms panel in the game UI lets you write short
free-form messages (up to 160 characters) to empires you have met —
proposals, threats, trade offers, or anything in your own words. Messages are delivered when
the turn processes (limit one per recipient per turn), and you can edit or delete a message
any time before it is delivered. Formal actions like Non-Aggression Pacts and war declarations
are made on the Diplomacy panel (Section 2j),
not by message.
For free-form, real-time conversation, W.E.B. can create a private
Discord channel for your game where you can write your own messages, negotiate in your
own words, and scheme to your heart’s content. See
Appendix B — Discord Integration
for details on how game channels work, who has access, and privacy policies.
2j. Player-to-Player Formal Diplomacy
Every pair of player empires has a formal diplomatic state, visible in the
Diplomacy panel. The state changes at turn rollover, not instantly, so
both sides have at least one turn's warning before a transition takes effect.
State
Effect
Neutral
Default. No combat restrictions between you. You can attack each other's systems freely.
War
Active war declared. It imposes no combat restriction, but it is not cosmetic: attacking a player you're at War with is “fair” — whereas firing on a player you're merely at Neutral with is a surprise attack that costs you +1 reputation and a Lifetime-Credibility hit (see the surprise-attack rule below). Shown to all players.
N.A.P. (Non-Aggression Pact)
A signed pact between two empires, visible to all players. Neither side's ships can fire on the other, and neither side triggers Ambush fire. No intel is shared — both empires retain full fog of war.
Actions
Action
From State
Effect at Rollover
Declare War
Neutral
State becomes War at rollover, and that is when the target is notified — queuing the declaration is invisible to them, and you can cancel it any time before the turn processes (a cancelled declaration never happened, and does not count against your peaceful record). You must End a Non-Aggression Pact first before you can declare war on that empire.
Propose Peace
War
If the other empire also proposes peace (or accepts), state becomes Neutral at rollover. Proposals expire after 2 turns. A 5-turn commitment must be met before you can propose peace — you cannot end a war declared less than 5 turns ago.
Propose N.A.P.
Neutral
If the other empire also proposes (or accepts), state becomes N.A.P. at rollover. Proposals expire after 2 turns.
End N.A.P.
N.A.P.
State returns to Neutral at rollover. A 5-turn commitment must be met before you can end it — you cannot end a pact signed less than 5 turns ago.
Cooldowns
Two cooldowns prevent diplomatic whiplash:
After peace is agreed — neither empire may declare war again for
5 turns. The Declare War button shows the remaining turns.
After a Non-Aggression Pact ends — neither empire may propose a new
pact for 5 turns. The Propose N.A.P. button shows the remaining turns.
Cooldowns are shown on the Diplomacy panel and enforced server-side — the buttons
disable automatically when a cooldown is active.
Surprise Attacks — Declare First or Pay the Price
Declaring war takes effect at the end of the turn, after combat
resolves. That means the turn you queue a war declaration, you are still Neutral
during that turn's battles. If your fleets attack an enemy system on the same turn you declare,
the galaxy sees it as a Surprise Attack:
You pay -1 reputation per Neutral human-player empire you attacked
that turn — charged once per victim per turn, no matter how many
battles you fought against them (your Reputation worsens — see
Section 2d).
The victim and any third-party empires who have met you are notified — the galaxy
remembers who struck without warning.
Ambush orders are exempt — ambushes represent a pre-placed trap
rather than a formal offensive, so they do not count as Surprise Attacks.
Attacking a War target costs no aggression. Attacking an empire you have a
Non-Aggression Pact with is blocked outright.
The clean play is to declare war first and attack the following turn:
your declaration lands at rollover, the state flips to War, and from the next turn onward
your offensives carry no reputation penalty. Surprise Attacks are available — they're
not prevented — but they come at a cost that follows you across the rest of the game.
2k. Sending Minerals to Other Players
You can gift minerals to any met human-player empire directly from the
Diplomacy panel. Each empire's card has a Send button; click
it, enter an amount, and confirm. The transfer is queued as an order and resolves at turn
rollover — you can cancel it any time before then.
How it works
Minerals are drawn from your capital. If you lose your capital before
rollover, the transfer is cancelled and nothing is sent.
The recipient receives the minerals at their capital at rollover. If they
lose their capital before then, the transfer is cancelled and you keep your minerals.
Transfers are abstract — no freighter, fleet, or warp-lane route is
required. Treat it as a diplomatic bank wire, not a physical shipment.
Your maximum send is your capital's minerals on hand minus what your capital
needs to feed its own production this turn. Minerals reserved for your own factories can
never be gifted away.
If you queue multiple transfers to different empires in the same turn, they all draw
from the same pool — the Send form shows what's left after other pending sends.
Restrictions
You cannot send minerals to an empire you are at war with. If war is
declared between you and the recipient before rollover, the transfer is cancelled.
You can only send to empires you have met.
One pending transfer per recipient per turn — cancel the existing
order first if you want to change the amount.
If your capital has fewer minerals on hand at rollover than the amount queued (e.g. you
spent them on production), the transfer is cancelled and nothing is sent.
Both sender and receiver see an event-log line after a completed (or cancelled) transfer.
No mid-turn preview is shown to the recipient — they only learn of it when it arrives.
2l. Lifetime Credibility — Your Reputation Across All Games
Reputation (Section 2d) tracks how you have behaved in this game. Lifetime
Credibility is a separate score that tracks how you have treated other human
players across every game you have ever played. Other players see your tier
next to your empire name in the Diplomacy and Comms panels — so if you build a reputation as a
treaty-honorer or a serial backstabber, that reputation follows you from game to game.
Lifetime Credibility is only affected by your dealings with other human players.
Independent and Pirate interactions do not change it. Practice / solo games do not change it.
Co-op alien invader games do not change it. Only ranked, multiplayer human-vs-human actions matter.
The Eight Tiers
Everyone starts at Pragmatic (0 points) — the neutral middle. Your points
can climb up or fall down without limit. Long histories of good behavior build a cushion that
absorbs occasional bad acts; long histories of betrayal take a long, slow climb to repair.
Tier
Point Range
What It Means
Loyal Friend
20+ points
You consistently honor pacts and resolve conflict cleanly. A trusted ally across many games.
Honorable
10 to 19
Strong record of treaty-keeping with occasional pragmatic warfare.
Dependable
3 to 9
Generally reliable. Your word can be taken at face value.
Pragmatic (default)
−2 to 2
The neutral middle. New players start here. Your dealings have been balanced.
Opportunist
−9 to −3
Willing to pick fights when it suits you. Treaties last only so long as they help.
Schemer
−20 to −10
Has burned treaties to seize an opening. Trust at your own risk.
Treacherous
−40 to −21
Pacts mean nothing to you. Other players sign with you at their peril.
Diabolical
−41 or worse
A serial backstabber. Recovery will take many games of disciplined diplomacy.
Color key: each tier has its own color in-game. Broadly:
greens for the trusted tiers (Loyal Friend, Honorable, Dependable, and the Pragmatic default) ·
yellow for Opportunist (one step below neutral) ·
orange/red for the bottom tiers (Schemer, Treacherous, Diabolical) — so you can recognize a player's standing at a glance.
What earns you Credibility points
+1 — Forming a Non-Aggression Pact with another human player (both
signatories earn the point when the pact takes effect at rollover).
+1 — Finishing a game (natural game-end only) without ever
declaring war on another human player.
+1 — Finishing a game (natural game-end only) without ever
firing on another player without first declaring war. Ambush orders are exempt —
they do not disqualify you from this bonus.
+1 — Finishing a game (natural game-end only) without ever
breaking a Non-Aggression Pact.
A perfect pacifist who never declares war, never breaks a pact, and never fires without a
declaration earns the full +3 end-of-game bonus in addition to any +1's they
earned along the way for signing pacts.
What costs you Credibility points
−1 — Declaring war on a player you never had a
Non-Aggression Pact with this game. A clean, telegraphed declaration costs a single point.
−1 — Firing on a human player's fleet or system without first
declaring war (per pair, per turn). Ambush-stance fire is exempt (see
Section 2j).
−2 — Unilaterally breaking a Non-Aggression
Pact (End N.A.P. with no war declaration).
−3 — Declaring war on a player you have, or ever had, a
Non-Aggression Pact with this game. The galaxy remembers who came back to attack a
former pact partner.
War declarations are always either −3 (had a prior pact) or −1 (never had
one) — never both. Breaking a pact and declaring war are separate actions: if you
End N.A.P. one turn and Declare War on a later turn, you pay both costs (−2 then −3).
Declaring war while still in a pact pays only the −3.
Where you can see it
Your own tier: visible on your Portal Profile page, in
your Diplomacy panel header right below your in-game reputation, and on
hover over your own empire name anywhere in-game. The hover shows both your
tier name and your exact point total.
Other players' tiers: visible only in-game, as a chip
next to their empire name in the Diplomacy panel and the Comms message
headers. Hovering the chip shows their tier name and exact point total.
AI-controlled empires (whether always-AI or human-then-AI-takeover) show
[AI] instead of a tier — the rating system doesn't apply while AI is in
control.
Privacy: Your Lifetime Credibility tier is tied to your empire name in
that game, never to your display name. No public leaderboard or Hall of Fame surface
shows your credibility. Other players can only judge you through the empires you choose to play.
AI takeover details
If your empire goes inactive long enough that the AI takes over, the trust system
stops counting individual actions for or against you from that point forward.
Any Credibility points you earned or lost while you were still in control — signing pacts,
breaking pacts, declarations of war, firing without warning — are kept in your lifetime
ledger. The AI's later moves do not add or subtract anything.
However, the three end-of-game peaceful bonuses (+1 each) require you to finish the
game yourself. If your empire is taken over by the AI at any point, you forfeit all
three bonuses for that game, even if no warlike action ever occurred during your tenure.
Finishing what you started is part of the reward.
Strategy: Lifetime Credibility is a slow-moving signal. One bad game won't ruin
a long good record; one good game won't lift you out of a deep negative. Other players reading
your tier are seeing the weight of everything you have ever done in W.E.B., so play
each diplomatic move with that long arc in mind.
An ancient, long-forgotten race once built a vast network of warp gates near
the stars of every inhabited system. These gates are connected in a web-like pattern
— the warp lanes shown on your star map. The gates still function, but they
require a warp field generator to activate. Once a gate is powered up, nearby
ships are accelerated along the warp lane to the gate at the destination star almost
instantaneously. Most of the travel time is actually spent generating the warp field
and activating the gate.
Movement is always one hop per turn: you pick a connected system and your
ships jump there when the turn processes.
Restoring the Ancient Network — Active Warp Lanes:
The warp gates were originally designed to stay permanently open, held alive by
massive computer intelligences that calibrated both ends of every lane in real time. When
the ancients vanished, those calibration computers fell silent and the lanes collapsed
into dormant rings of metal — passable only by ships carrying their own portable warp
field generator (Cruisers, Novas, and lone Destroyer probes).
Your engineers have rediscovered the secret. By building a Starbase at a
system, you install a reactor and AI core powerful enough to restore one end of an
ancient gate's calibration. To light up a lane you need a Starbase at both ends of
that specific lane — meaning two of your Starbases in adjacent systems
that are directly connected by a warp lane on the map. Starbases in systems that
aren't connected to each other do nothing for each other; only the lane linking two
neighbouring Starbase systems comes alive. When both endpoints are yours, the
resonance is fully restored: that lane wakes up, glows mint
green on your star map, and becomes an Active Warp Lane.
Once a lane is active, any of your ships can travel along it freely — no Cruiser
required, no escort needed. A lone Freighter, a single Missile Ship, a stray
Destroyer, or any mixed group can move from one end to the other on its own. The gate
itself does the work, exactly as the ancients intended. Build out a network of Starbases
at adjacent owned systems and you progressively restore the ancient highway, removing the
Cruiser bottleneck across more and more of your empire. Full details are in
section 3h below.
3a. Warp-Capable Ships
Not every ship carries a warp field generator. A valid move order requires at least one
ship equipped with a generator to activate the gate:
Ship
Warp Field Generator
Can Gate Others
Notes
Cruiser (CR)
Full-size
Yes
Primary fleet mover — activates the gate for any number of ships
Destroyer (DD)
Micro
No
Can activate a gate alone as a probe (see below); cannot gate other ships
Nova (N)
Small
No
Has a small warp field generator that can only move itself through a gate
Carrier (CV)
Small
No
Self-propels like a Nova — moves itself through a gate, but cannot gate other ships. (A Carrier given a move order also can't launch fighters that turn.)
Missile Ship (Mi)
None
No
Requires a Cruiser to activate the gate
Freighter (Fr)
None
No
Requires a Cruiser to activate the gate
Starbase (SB)
None
No
Cannot move once placed
Defense Sat (DS)
None
No
Stationary; cannot move
Key rule: Cruisers are the backbone of fleet movement. A single Cruiser's warp
field generator can activate the gate for any number of Freighters, Missile Ships,
and other ships without generators in the same move order. Novas and Carriers carry a
small generator that can only move themselves — they cannot gate other ships through.
3b. Destroyer Probes
Destroyers carry only a micro-scale warp field generator — not powerful enough for
sustained gate travel. When a lone Destroyer activates a gate by itself (without a Cruiser
in the same move order), it overloads its power plant to force the gate open.
The surge generates just enough field strength to hurl the ship through, but the strain
is catastrophic: the Destroyer's systems burn out shortly after arrival. In its final
moments, the ship transmits a full sensor sweep back through the gate before breaking
apart. This is a probe — a one-way reconnaissance mission:
The Destroyer reaches the target system and burns up — it is destroyed
before combat round 2.
It transmits full intel on the destination system (fleets, owner, minerals,
population) except the names of systems connected beyond it.
The defending player is not notified of the probe.
The probe does not engage in combat and is not affected by ambush.
Tip: Probes are cheap (1 BP) and expendable. Use them to scout unknown
systems before committing your main fleet. A single DD can reveal everything you need
to know about a system without risking a fight.
3c. How to Issue Move Orders
There are three ways to initiate a fleet move from the player portal:
Move link: Click the "Move" action link on any system card where you
have warp-capable ships. This opens the move modal with that system as the origin.
Dropdown menu: Click the menu icon on a system card header and select
"Move" from the dropdown. Same result as above.
Drag and drop: Drag a CR or N ship chip from the
ships section of a system card and drop it onto one of the warp lane pills
(the destination system names shown on the card). The move modal opens with the
destination and ship type pre-filled.
All three methods open the same move modal, where you choose exactly which ships and
cargo to send.
3d. Cargo & Transport
Ships can carry cargo during movement. Each ship type has different capacity:
Ship
Cargo Capacity
Freighter (Fr)
3 minerals OR 1 population OR 1 starbase (mutually exclusive)
All others
None
One cargo type per Freighter: each Freighter's hold carries a single
kind of cargo — up to 3 minerals, OR 1 population unit, OR 1 Starbase package. A
Freighter carrying a Starbase package or a population unit has no room for anything else.
Losing Freighters loses cargo: when Freighters are destroyed — by
enemy fire, Nova ships, fighters, ambush, withdrawal fire, or asteroids — the destroyed
Freighters are picked at random from the group, and whatever they were
carrying is destroyed with them. Your turn report names exactly what was lost. Minerals are
spread as evenly as possible across your free Freighters; Starbase packages and population
each ride a dedicated Freighter. Example: 4 Freighters carrying 1 Starbase package — if
a Nova destroys one Freighter, there is a 1-in-4 chance the Starbase dies with it.
Cargo must be explicitly included in the move order — ships don't
automatically carry what's at a system.
Use Load/Unload orders to transfer cargo between ships and systems
before issuing move orders on the same turn.
Population works immediately: Population unloaded into a system you own
is put to work the same turn — unloading happens in Phase 1, before Production and
Mining, so new arrivals count for both that very turn.
The move modal shows how much cargo your moving ships can carry and prevents
overloading.
A Freighter that is placing a Starbase this turn cannot move or load any cargo —
it is fully committed to the placement operation.
Pirate raid lockout: Load and Unload orders at a system are blocked
while a Pirate Raider fleet is over it with that system as its
target. You can't lift minerals onto freighters to evacuate them ahead of a raid.
3e. What Happens When You Move
Movement is processed as Phase 3 of the turn, between the two rounds of combat.
Here's the sequence:
Combat Round 1 — Your ships that are staying behind fight normally. Ships
marked for movement do not fire in round 1 (they're preparing to jump). If
enemies destroy all your staying ships, overflow damage hits the departing ships
as withdrawal fire.
Movement — Surviving ships warp to the destination.
Arrival checks — If the destination is an asteroid field, each ship has
a 5% chance of being destroyed by debris on arrival. If it's an independent system
you haven't visited, a reaction roll is triggered.
Combat Round 2 — Ships that just arrived have arrival immunity:
they cannot be targeted by normal fire (only ambush fire can hit them).
Withdrawal fire: If you're leaving a system where enemies are present, your
departing ships are at risk. They don't shoot in round 1, and if your staying ships
are wiped out, the enemy's remaining hits carry over to your moving ships. Moving
out of a contested system is dangerous.
Tip: Newly arrived ships are protected from normal combat fire in round 2.
This means moving into an enemy system is safer than you might expect — your
fleet gets a turn to settle in before taking fire. Only ambush stances can hit
arriving ships.
3f. Black Holes
If you move a fleet into a black hole, all ships and cargo are
instantly destroyed. There is no combat, no intel gained — just total loss.
Black holes are visible on the map, so this is entirely avoidable.
3g. Stranded Fleets
Only a Cruiser can tow other ships through a warp gate. If the last Cruiser at
a system is destroyed — by combat, debris, or withdrawal fire — any
Freighters and Missile Ships left there are stranded: they have no
way to activate the gate and cannot leave until a Cruiser arrives to tow them out.
Destroyers fare little better: a lone Destroyer can overload its micro
generator for a one-way probe jump — it escapes, but is destroyed on
arrival — while two or more Destroyers without a Cruiser (or an
active warp lane) cannot move at all. Only Novas and
Carriers carry a generator strong enough to leave on their own and survive the trip
— though they can't take anyone else with them.
Trap warning: This is especially dangerous at asteroid fields, where debris
can randomly destroy your only Cruiser. Always keep a spare Cruiser alongside
any fleet that includes Freighters or Missile Ships.
3h. Active Warp Lanes (Starbase Network)
The warp gates of the ancients were never designed for individual ships. They were built as
a permanent network — pairs of gates locked in a continuous resonance, the warp lane between
them held open by a vast computer intelligence calibrating both ends in real time. When the
ancients vanished, the calibration computers fell silent and the lanes collapsed back into
dormant rings of metal — passable only by ships equipped with their own warp field generator.
A Starbase is the only modern structure massive enough to host the AI cores
and reactor banks needed to wake a gate and hold it open. Activating a lane requires
two of your Starbases in adjacent systems — that is, in the two systems sitting at
opposite ends of the same warp-lane line on your star map. Starbases in systems that
aren't directly connected to each other don't form a lane; only a pair of neighbouring
Starbase systems does. When both endpoints of a lane are yours, the resonance is restored:
the lane snaps alive, glowing on your star map in mint green. While that lane
is active, any of your ships — in any combination, with or without a Cruiser
— can travel along it freely. Lone Freighters, lone Missile Ships, mixed groups,
anything goes.
The rule: A warp lane is active for you when the two systems
it connects both contain one of your Starbases. The two Starbases must be in
adjacent systems (directly linked by that warp lane on the map) —
Starbases in non-adjacent systems have no effect on each other. No Cruiser is needed to
escort ships through an active lane; the gate itself does the work.
Same empire only: Both Starbases must belong to you. An ally's
Starbase does not count.
Lane timing: A Starbase placed this turn does not activate a new lane until next turn. If a Starbase supporting a lane is destroyed in combat Round 1, the lane collapses immediately — any fleet relying on that lane without a Cruiser may have its move order canceled and be stranded in system.
Cargo rules unchanged: Freighters still respect their cargo capacity.
Active lanes only remove the Cruiser requirement — they do not increase what a ship can carry.
Ambush still applies: Defenders ambushing the lane still get their
free round on incoming ships, exactly as with a Cruiser-led move.
Black holes and Ion Nebulas cannot host Starbases, so no active lanes are possible there.
Enemy active lanes are rendered on your star map in red
(visible only when both endpoints have been scouted). A red lane signals strategic threat:
an enemy with a working Starbase logistics network can move freight and combat ships freely
along it without needing Cruisers, and is dangerous. Cutting an enemy's network by destroying one of their
Starbases will instantly collapse every active lane that depended on it.
Lore: A Cruiser can’t hold a gate open the way a Starbase can. What it
carries instead is a tactical warp field projector — a clever hack that briefly tricks the
gate’s beacon data into wrapping the Cruiser and any ships flying in its formation in a
localized warp envelope. The lane never truly opens; the fleet just rides a temporary bubble
along the same ancient routing. A Nova carries a one-shot version of the same hack, small
enough to envelop only itself.
Tip: Build your Starbase network outward from your home system, placing
Starbases at adjacent owned systems to chain active lanes together. A single new Starbase
can light up two or three lanes at once if it sits between existing Starbase systems.
Every inhabited system has its own merchant captains, bush pilots, and gray-market haulers.
They don’t report to Fleet Command, they don’t take orders, and they don’t
file manifests. Give them a safe warp lane and a buyer on the other side, and a handful of
mineral crates find their way across every week. It isn’t a supply line — it’s
a rumor that happens to be true. When fighting breaks out, they vanish until the shooting stops.
Once you have active warp lanes (see 3h above), local traders will
automatically move a small trickle of minerals along each active lane every turn —
no orders required, no cost, fully passive.
The rule: For each of your active warp lanes, one mineral moves one
direction per turn. Minerals flow mostly toward your home system, and also
toward other systems that are running low on stockpile. Traders never leave your
empire's network. Captured Dead Systems with a Starbase participate too —
the Starbase warehouse holds the minerals and acts as a normal node in the network.
Only on active warp lanes. Plain (inactive) warp lanes and disrupted
lanes never carry traders. If a lane doesn’t glow mint green for you, it doesn’t trade.
Home comes first. Most trader movement flows toward your home system
— that’s where your empire’s commerce centers on.
Running-low systems get help. Traders also redirect some minerals
to systems that are burning more than they mine and have a low stockpile.
Enemy ships block the lane. If an enemy fleet is at either endpoint
of an active lane, no mineral moves on that lane this turn. The lane itself stays lit
— ships still move through it normally — but the civilian traders wait out
the trouble.
Freighters still do the heavy lifting. Traders are a trickle, not a
supply line. Freighters remain strictly better for bulk hauling and long-range moves.
Traders just reduce the micromanagement burden on short, well-connected stretches of
your empire.
You can take manual control. Click the Starbase icon on any
of your owned systems (other than your home) to open a trade-route panel and
pick which neighbors that system sends a trader to each turn. The first time you
change a checkbox, your empire switches to manual mode for the rest of the
game — the auto algorithm stops adjusting routes for you and your stored
selections drive every shipment from then on.
Losing your home matters. Trader flow is loyal to your ancestral home
— the system you started the game in — not any re-anchored capital. If your ancestral
home is captured, the entire Local Traders network goes dark for your empire until you recapture it.
Freighters and other mechanics still work normally, but the civilian trade network stays loyal
to the original.
Tip: A long, connected chain of active warp lanes reaching back to your
home is a quiet economic multiplier. Systems in the interior stay fed without you spending
a single Freighter order on them, freeing your shipping orders for the front line.
economymineralstradewarpactive-lanesstarbasehome
4. Combat
RULE-004
Combat occurs when hostile fleets share a system. Each turn has two rounds of
combat (Phases 2 and 4), with fleet movement happening in between. Understanding
stances, firing order, and screening is key to winning battles.
4a. Combat Stances
Every fleet has a combat stance that determines when and how it fights:
Stance
Behavior
When It Fires
Conditional
Default stance. Only fires if attacked first.
Both rounds, but only in retaliation
Attack
Actively targets a named enemy empire. Initiates combat.
Both rounds
Ambush
Lies in wait watching specific warp lanes. Fires on ships arriving from
those lanes.
Round 2 only
Conditional is the default for all fleets. Your ships won't start a fight
on their own, but they'll fight back if attacked. Two Conditional fleets sharing a
system will coexist peacefully.
Attack requires you to select one or more enemy empires to target.
You can set this via the Attack action on a system card. Your fleet will fire on all
selected targets in both combat rounds.
Ambush requires you to select one or more adjacent warp lanes to watch.
Your fleet does not fire in round 1 — it waits. In round 2, if enemy ships
arrive from a watched lane, your fleet opens fire on them. Warning: your
fleet's firepower is split evenly across all watched lanes — the more
gates you cover, the less damage you deal at each one. Watching a single lane
concentrates your full ambush firepower on that gate.
Ambush restrictions: Ambush cannot be set in nebula or
ion nebula systems. Additionally, Freighters, Defense Satellites, and
Starbases do not participate in ambush fire — only combat ships (CR, DD, Mi, N, and
Carriers) can ambush.
Tip: Conditional is often the safest stance. If no one attacks you, you don't
waste ships in unnecessary fights. Switch to Attack only when you intend to conquer a
system or destroy an enemy fleet.
4b. Turn Structure & Two Rounds
Combat fits into the broader turn sequence like this:
Phase 1 — Load/Unload cargo, place Starbases
Phase 2 — Combat Round 1 — opens with the fighter
battle (if fighters are present, all launches, dogfights, flak, and fighter strikes
resolve first — see Appendix C), then fleets fire; moving ships
take withdrawal fire (see below)
Phase 3 — Movement — Surviving ships warp to their destinations
Phase 4 — Combat Round 2 — Fleets fire again; ambush fires; newly
arrived ships have arrival immunity; invasion resolved
Phases 5–15 — Pirate activity, production, mining, growth,
ownership changes, etc. (see Turn Order)
Key insight: Because movement happens between the two combat rounds,
you can move ships out of a system after round 1 (risking withdrawal fire) or move
ships into a system before round 2 (gaining arrival immunity).
4c. How Firing Works
Each ship rolls a d10 to hit. If the roll meets or exceeds the ship's
to-hit number, it scores a hit. Modifiers can make hitting harder.
Ship
To-Hit (base)
Shots per Round
Notes
Starbase (SB)
3+
2
Best accuracy, fires twice
Missile Ship (Mi)
5+
1
Fires first in sequence
Cruiser (CR)
5+
1
Carrier (CV)
3+
1
Fires after Cruisers; also launches fighters (see Appendix C)
Defense Sat (DS)
5+
1
Destroyer (DD)
6+
1
Nova (N)
8+
1
Hard to hit with, but instant-kill on hit
Freighter (Fr)
10
1
Almost never hits
To-hit modifiers (each adds +1 to the number needed, making it harder):
Nebula / Ion Nebula: +1 (interference makes targeting difficult)
Outnumbered 2:1: +1 (see section 4g)
Ambush fire: +1 (firing from concealment is less precise)
Asteroid field (Missile Ships only): +5 (Missile Ships need 10 to hit, nearly useless)
Modifiers stack, but the final to-hit is capped at 10. A natural 10 always
has a chance to hit.
4d. Fire Order
Fighter strike combat always takes place first (see Appendix C for
more about carriers and fighters). But for standard combat (Rounds 1 and 2) each ship rolls a
d10 to hit during each combat round.
Ships don't all fire simultaneously. They fire in a strict sequence, and hits are
applied immediately — meaning early-firing ships can destroy enemies before
those enemies get a chance to shoot.
The firing sequence during Rounds 1 and 2 is:
Missile Ships — fire first, can eliminate threats before they shoot
Starbases — fire twice (2 shots)
Cruisers
Carriers — 3+ to hit, one shot (their fighters already struck in the pre-combat phase)
Destroyers
Defense Satellites
Novas
Freighters — fire last
Tip: Missile Ships fire first — but they're easily destroyed once your
Destroyer screen is wiped out. Keep a balance of Destroyers and Missile Ships in your fleets.
4e. Screening Order & Damage
When your fleet takes hits, damage is absorbed by ships in screening order.
The front-line ship absorbs all incoming hits until it's destroyed, then the next ship
type in line takes over.
Priority
Ship
Hit Points
Role
1st
Destroyer (DD)
2 HP
Expendable screen
2nd
Nova (N)
2 HP
3rd
Missile Ship (Mi)
1 HP
4th
Cruiser (CR)
3 HP
Tough, protected by screen
5th
D-Sat / Starbase
3 / 10 HP
Heavily armored
6th
Freighter (Fr)
1 HP
Nearly last
7th
Carrier (CV)
10 HP
Screens last of all
Hits are applied one at a time. Each hit reduces the front-line ship by 1 HP. When a
ship reaches 0 HP, it's destroyed, and the next hit moves to the next ship in the
screening order.
Example: Your fleet has 2 DD (2 HP each) and 2 CR (3 HP each) and takes 7 hits.
The DDs absorb the first 4 hits (2 × 2 HP), then the CRs start taking damage —
the first CR takes 3 hits and is destroyed. Total losses: 2 DD + 1 CR, with 1 CR
undamaged.
4f. Nova Instant-Kill
The Nova-class warship represents the cutting edge of military technology. Its
anti-matter beam weapon is a breakthrough that will eventually make conventional
armaments obsolete — a single focused beam can annihilate any vessel, regardless of
size or armor. Military strategists agree that Novas will one day become the standard
warship in every fleet. But that day hasn't arrived yet. The technology is still new,
the beam targeting systems are unstable, and the anti-matter containment required makes
them significantly more expensive to produce than conventional ships. For now, Novas are
built for specialty roles — high-value strikes where one perfect shot can change the
course of a battle.
In game terms: when a Nova scores a hit, it instantly
destroys one random enemy ship, regardless of how many hit points that ship has.
The target is chosen randomly from all enemy ships in the system (weighted by count).
A Nova hit can destroy even a Starbase and a Carrier (10 HPs each) in a single strike.
Target selection ignores screening order — any ship can be hit.
Novas are hard to hit with (need 8+ on d10), but devastating when they connect.
High risk, high reward: Novas are expensive (2 BP) and have the worst accuracy
in combat, but a single lucky hit can take out the most valuable ship in an enemy fleet.
A Nova strike on an enemy Starbase (10 HP, worth 4 BP) is one of the most
devastating outcomes in the game. A Nova strike on an enemy Carrier (10 HP, worth
5 BP) is just as crushing — it destroys the carrier and every fighter aboard in a single shot.
Even more tactically, Novas can destroy enemy
Cruisers — the only ship with a full-size warp field generator. If all
of an enemy’s Cruisers are destroyed, most of their remaining ships become
stranded with no way to activate the gate and leave the system.
4g. Outnumber Penalty
If your combat ships are outnumbered more than 2-to-1 by enemy combat ships,
all your ships receive a +1 to-hit penalty (harder to land hits).
Not counted: Freighters, Defense Satellites, Starbases
The ratio must be strictly greater than 2:1 to trigger. Exactly 2:1 does
not trigger the penalty.
The penalty applies to all your ships for that round.
Example: You have 3 combat ships facing 7 enemy combat ships. 7 > 3×2 = 6, so
the penalty applies. All your ships get +1 to their to-hit number. Your Cruisers now
need 6+ instead of 5+.
4h. Withdrawal Fire
When ships are ordered to move out of a system where combat is happening, they face
withdrawal fire in round 1:
Moving ships do not fire in round 1 — they're preparing to warp.
Your staying ships fight and absorb hits normally (using standard screening order).
If all staying ships are destroyed, overflow hits carry over to the departing
ships.
If staying ships survive, the moving ships escape unharmed.
Warning: Moving out of a contested system is risky. Your moving ships can't
shoot back, and if your rear guard falls, the departing ships take the remaining fire.
Make sure you leave enough staying ships to absorb damage, or accept the risk.
4i. Arrival Immunity
Ships that arrive at a system during the movement phase (Phase 3) receive
arrival immunity in combat round 2:
Arriving ships cannot be targeted by normal fire in round 2.
The only exception is ambush fire, which specifically targets arriving ships.
Arriving ships also do not fire in round 2 — they're reforming after the jump.
Strategy: Arrival immunity makes offensive movement relatively safe against
normal defenders. But beware of ambush — a well-placed ambush fleet can fire on
your arriving ships before they can react.
4j. Defense Satellites & Starbases
Defense Satellites (DS) are fixed defenses attached to a system (not a fleet):
3 HP, to-hit 5+, 1 shot per round.
Fire on attackers of their system automatically — even if the owner has no ships present. A world defended only by D-Sats (and its Planetary Defense) still fights back.
Cannot move, cannot ambush.
Not counted for the outnumber penalty.
Never Out of Ion-9 supply. A D-Sat is a fixed installation, not part of a
fleet's supply chain, so it never pays the out-of-supply to-hit penalty.
Starbases (SB) are the most powerful defensive unit in the game — massive
orbital cities housing weapons platforms, command centers, repair bays, and the millions
of crew and their families needed to keep them running. Constructing a Starbase is a
monumental undertaking that permanently draws workers and their dependents away from the
planet below.
10 HP, to-hit 3+ (best accuracy), 2 shots per round.
One Starbase per system maximum.
Costs 1 population from the system when built (crew, engineers, and their families relocate permanently to the station).
Cannot be placed in nebula, ion nebula, or asteroid field systems.
Cannot ambush, not counted for outnumber.
Never Out of Ion-9 supply. Like D-Sats, a Starbase is a fixed installation
off the fleet's supply chain, so it never pays the out-of-supply to-hit penalty.
Can be destroyed by a Nova instant-kill despite having 10 HP.
Damage persists between turns. Starbases accumulate hull damage
from combat hits and carry it across rounds and turns — they do not snap back
to full HP at turn's end. Onboard repair crews mend 1 hit point at the
start of each turn until the Starbase is back to full strength. A wounded
Starbase still fights at full effectiveness — both shots, full accuracy,
full firepower — right up until its last hull point falls.
Tip: A Starbase turns a system into a fortress. With 10 HP it's extremely hard
to destroy through normal fire, and its 2 shots at 3+ accuracy make it a consistent
damage dealer every round. Prioritize building one at key defensive positions — but
remember the population cost. Building a Starbase at a small colony will noticeably
reduce its future production capacity.
Immobile platforms cannot initiate combat. Starbases and D-Sats are
fixed installations locked to a system's orbital infrastructure — they cannot
maneuver to engage hostile fleets. Enemy ships in the same system can simply keep their
distance, staying beyond effective weapons range of stationary platforms. However, the
moment an enemy fleet commits to an attack, they must close range and
enter the platforms' engagement envelope — at which point Starbases and D-Sats
fire back with full force. To dislodge an enemy fleet camping in a system defended only
by fixed platforms, you must send in mobile warships to force the engagement.
4k. Invasion & Conquest
One invasion round per turn: There is only ever a single invasion round in a turn,
and it happens in place of Combat Round 2. If conditions for invasion aren't met,
Round 2 plays out as normal combat instead and the invasion is deferred to a later turn.
Note: Invasions are only ever resolved during Round 2 —
even if there was no ship combat in Round 1. An invasion is a complex operation that, in theory,
plays out across the entire turn, but the game rolls the dice and distributes all invasion damage in
a single round (Round 2).
Invasion happens in Combat Round 2, but only when the system has
no active defenses capable of firing at the start of the round.
Specifically, an invasion begins when:
The defender has no non-arrived ships (ships that just arrived this turn
cannot fire and do not count as defenders).
The system has no Starbase and no Defense Satellites.
If the defender has anything that can fire at the start of Round 2 — ships,
a Starbase, or D-Sats — Round 2 is spent on normal combat. The invasion is
deferred until next turn. Your fleet was engaged fighting active defenses
and could not simultaneously bombard the planet.
Once the invasion begins, your ships fire at the system's
Planetary Defense (PD) to take control:
Invasion Rating
Ships
To-Hit vs PD
Damage Per Hit
Collateral Damage
A (best)
CR, Nova
6+
1
None
A (best)
Freighter
6+
2
None
B
Destroyer
8+
1
On hit: chance of industry or population damage
C (worst)
Missile Ship
9+
1
On hit: higher chance of collateral damage
Each PD unit has 2 hit points and must absorb that much damage before it is destroyed.
Freighters deal 2 damage per hit — enough to take out a PD unit in a single shot.
All other ships deal 1 damage per hit and need two successful hits per PD unit.
Reviled empires fight dirtier — on both ends. An empire at
Reviled reputation invades with Shock Troops (its
Freighters deal +1 damage per hit, so 3 instead of 2) and defends with a
Fearless PDF (its PD units take +1 HP to destroy, so 3 instead
of 2). Both bonuses stack with the Elite Troops advantage card.
Not all ships are created equal when it comes to ground operations:
Cruisers (A) carry dedicated orbital bombardment batteries designed to
strike hardened planetary defense emplacements with surgical precision, leaving civilian
infrastructure untouched.
Freighters (A) — best invaders harbor multiple marine divisions in their vast cargo bays
— trained ground forces who deploy via drop pods to neutralize PD installations
from the surface. Each Freighter hit deals 2 damage, destroying a full PD unit in one shot.
The fastest, cleanest way to take a planet.
Novas (A) can direct their antimatter beam at pinpoint defensive targets
from orbit. Devastating accuracy, zero collateral — though one wonders what happens
to the planet if the targeting drifts.
Destroyers (B) were built for ship-to-ship combat, not planetary
operations. Their light weapons can be turned against surface targets, but they lack the
targeting systems for precision strikes. Expect some stray fire hitting factories and
population centers.
Missile Ships (C) are the worst invaders in the fleet. Their long-range
warheads were designed to track engine signatures in open space, not strike fixed ground
positions. Against planetary targets they are wildly inaccurate, and when a warhead
designed to kill a starship hits a city block instead of a defense battery, the results
are catastrophic.
Close Air Support — Carriers & Fighters
Fighters lend a hand to a ground
assault — not by landing troops (only marine-laden Freighters do that), but by flying cover
that suppresses the defenders and clears the marines' approach. The carriers themselves never
invade; the whole air battle is abstracted into a single bonus to your Freighter
to-hit rolls against PD.
Compare the fighters in the sky over the target — your invading carriers' fighters versus
the defending system's Fighter Base:
Net air advantage = (total fighters aboard all your invading
Carriers) − (fighters in the defending system's Fighter Base).
Net 6–11: Freighters gain +1 to hit (6+ becomes 5+)
— the marines have sufficient close air support.
Net 12 or more: Freighters gain +2 to hit (6+ becomes 4+)
— the marines have massive close air support.
Net 5 or less: no bonus.
Only the defending system's Fighter Base offsets your fighters — a defending Starbase's or
carrier's fighters do not. When it applies, the bonus shows as a Close air support modifier
line on the Freighter group in the invasion report. (Full carrier rules: Appendix C.)
Each PD unit has 2 HP. Damage accumulates; a unit is destroyed when it absorbs 2 total damage.
When PD reaches 0, the system is conquered. PD resets to 1 and the
system enters unrest under your control.
Collateral damage from Destroyers and Missile Ships can destroy industry and
kill population during the invasion. Cruisers, Freighters, and Novas cause no collateral
damage.
Invasion tip: Freighters are your best invasion ships — their marines deal
2 damage per hit, taking out a full PD unit in a single shot. Cruisers and Novas (also rating A)
need two hits per PD unit but cause no collateral damage. Missile Ships are the worst: their
warheads weren't meant for ground targets, so they rarely hit (need 9+) and devastate everything
around the impact zone. Destroyers fall in between — more accurate than missiles (8+) but
still rough on the local infrastructure.
4l. Special Terrain Effects
Nebula:
+1 to-hit penalty for all ships (interference).
No ambush allowed.
No Starbases allowed.
All fire is resolved simultaneously — ships destroyed in a round still get
to fire that round (hits are pooled and applied at the end).
Ion Nebula:
Same rules as nebula (no ambush, no Starbases, +1 to-hit).
The intense ion storms in these nebulae disable ship shields entirely,
reducing all ships to 1 HP regardless of their normal hit points.
A single hit destroys any ship.
Asteroid Field:
Missile Ships receive +5 to-hit (need 10 to hit — nearly useless). The spinning iron-nickel cores of asteroids generate chaotic magnetic fields that overwhelm missile guidance systems, causing targeting locks to break and munitions to veer off course into the rocks.
No Starbases allowed.
Debris damage applies to all ships each turn (see Asteroid Fields).
Ion nebula warning: Ion nebulae are the deadliest combat terrain. Every ship
has 1 HP, meaning a single hit destroys even a Cruiser. Battles here are fast and
brutal — bring numbers, not expensive ships.
combatstancesambushinvasionscreeningnovastarbase
5. Pirates
RULE-005
Pirates are a hostile faction that, by default, threaten all players equally. They answer
to no government and can never be controlled — but they can be bargained with.
Tribute buys their patience, standing with the brethren earns real privileges (raids that skip
your worlds, fleets that hold their fire, even hired raids against your rivals), and one
advantage card puts an old debt of theirs in your pocket — see
5i. Pirate Diplomacy. Pirate fleets appear in red on the map and
in ship reports. There are two types of pirate activity: local pirate fleets that
lurk in dangerous locations, and raider fleets that actively hunt player
systems for plunder.
5a. Local Pirate Fleets
Pirate fleets may be present at Dead Systems and
Asteroid Fields. There is no way to know whether pirates are waiting at
one of these locations until you arrive. A typical pirate fleet consists of a Cruiser and a
group of Destroyers. They will remain in the system and fight any player ships that enter.
Rogue independent fleets (from failed diplomacy) may also end up joining pirate forces,
merging into any existing pirate fleet at their destination.
5b. Pirate Raiders
Beginning in the early turns of the game, organized Pirate Raider fleets will begin
launching raids from Asteroid Fields, targeting player-owned systems that have accumulated
mineral stockpiles. Raids become more frequent as the game progresses.
Pirate Raiders appear as a separate fleet from any local Pirates in a system. You may see
both “Pirates” and “Pirate Raiders”
listed under Ships Present — they are tracked independently.
When a raider fleet enters civilized space, all players will receive a
warning: “Traders are reporting a large Pirate Raiding fleet approaching civilized
space.” If you have ships present at the asteroid field where the raiders
originate, you will receive a more specific sighting report.
5c. Raider Targeting
Pirate Raiders will head toward the closest player-owned system that has a meaningful
mineral stockpile. They move one system per turn along a direct path, avoiding Black Holes.
If the raider fleet arrives at its target and finds the minerals have been depleted
(fewer than 5 remaining), it will redirect to the next closest eligible target. Systems
that have already been plundered will eventually become valid targets again if no fresh
targets remain.
Strategic note: Raiders move one hop per turn, so you have a window to
respond — if you see them coming. Station a Destroyer or Starbase in the systems
one and two hops out from your home world. If a raider fleet passes through, you’ll
get a sighting report and a turn or two to react. The moment you spot them, recall your
ships home and set the fleet to Ambush. Raiders arriving into a prepared
defense will walk straight into a trap of your choosing.
5d. Plundering
If a Pirate Raider fleet has been at a system for at least one full turn (it cannot
plunder on the turn it arrives) and there are no owner ships, Defense Satellites, or
Starbases to oppose them, they will attempt to plunder the system instead of fighting.
The outcome of a plunder depends on your Planetary Defense (PD) relative
to the size of the raider fleet:
If your PD equals or exceeds the raider fleet’s Destroyer count:
Your defenders fight off the raiders — no minerals are stolen
and the system does not enter unrest.
Your PD still takes losses from the fighting (reduced by half).
Production is disrupted for the turn due to the chaos of the raid.
The raiders withdraw regardless.
If the raider fleet overpowers your PD:
Minerals are stolen — the amount depends on how much the raider fleet’s
strength exceeds your PD.
For each mineral stolen, the raider fleet gains an additional Destroyer —
hired mercenaries paid from the plunder. Smugglers, deserters, and desperate
freelancers flock to any pirate captain who can pay, and stolen minerals are as good
as currency on the black market. The fleet leaves larger than when it
arrived.
Your PD is reduced by half from the fighting.
The system enters a state of unrest and loses all production for
the turn.
The raider fleet then withdraws and heads home, re-plotting the shortest route each turn
— the way home is not necessarily the way it came.
Blocking Raids with Fleet Defense
Stationing your own ships at a threatened system is the strongest defense against a
raid. The rules are strict:
Pirates cannot plunder on the turn they arrive — you always
get at least one turn’s warning to react after a raider fleet drops in.
Any surviving owner ships, Defense Satellites, or a Starbase at the system
will block the plunder attempt entirely. The raiders sit overhead and try
again the following turn.
Only the system owner’s ships count. Friendly or allied
fleets passing through do not defend a system against pirate plunder.
Ships that arrive on the same turn as the plunder attempt do not block
it — defenders must already be on station from a prior turn. Move your
fleet in before the raider arrives, not the same turn.
If you keep defenders alive for two full turns of blockade, the raiders
give up and head home with nothing stolen. Combat still happens each turn
— you don’t have to wipe the raiders out, you just have to survive.
Defense playbook: When the raid warning fires, identify the likely
target (your richest exposed system, one or two hops from the asteroid field), then
get a fleet there this turn — before the raider arrives. Even a modest
screen of Destroyers will block plunder and force a stand-off. If your fleet outlives
two turns of pirate combat, the raid ends with zero minerals lost. A Starbase is even
better — it permanently blocks plunder until destroyed.
You will receive a detailed report when raiders attempt to plunder one of your systems,
whether they succeed or are repelled.
No last-minute evacuations: Once a pirate raider fleet has arrived over a
system and that system is its target, Load and Unload orders at that system are
blocked until the raid resolves. You cannot lift minerals onto freighters to evacuate
them ahead of a raid — the minerals on hand are what the raiders have come for, and the
raiders get a shot at taking them.
Tip: A strong PD garrison can completely block a plunder and prevent
unrest. Investing in PD at mineral-rich systems is one of the best defenses against
pirate raids, even if you cannot station a fleet there.
5e. Pirate Combat
Pirates fight using standard combat rules with some important differences:
Ship capture: Half of all ships destroyed by pirates —
rounded down — are captured instead; they are added to the
pirate fleet and can be used against you in the very next combat round. Defense Satellites and
Starbases cannot be captured. Rounding is per ship type, so a lone ship of a type is destroyed
rather than captured (e.g. 3 Destroyers lost → 1 captured, 2 sunk).
Cargo plunder: When pirates capture Freighters, they seize the mineral
cargo. For each mineral captured, the pirate fleet recruits one additional Destroyer
— mercenary crews bought with the stolen goods.
No invasion: Pirates do not invade or take ownership of systems. They
raid for resources, not territory. Planetary Defense may be damaged but the system remains
under your control.
Asteroid immunity: Pirate ships are immune to asteroid field debris
damage.
Warning: The capture mechanic makes pirates especially dangerous. A fleet
that is barely strong enough to win may find itself losing as the pirates grow mid-battle
by capturing your ships. Bring overwhelming force when engaging pirates, or you risk
feeding them reinforcements.
5f. Raider Growth
The brethren do not breed in their lairs. Every Destroyer that flies the Black Flag was
bought with someone’s coin, dragged out of a smoking wreck, or sailed home with a hold
full of plunder. There is no quiet, automatic build-up between turns — the pirate
war chest grows only when the galaxy feeds it. Three streams do that feeding, listed in
order of how much they actually move the needle:
Tribute and bribes — the primary engine. This is by far the
largest source of pirate growth, and the one most under the empires’ own control.
Every mineral pressed into a pirate captain’s palm is poured straight back into
shipyards, powder, and fresh crews. The brethren do not save; they spend. Each
Pay Tribute payment, each Bribe to Raid fee, and every peace offering
swells the next raid that launches — often onto a neighbor, sometimes back onto
the empire that paid. The galaxy that pays the most pirates is the galaxy with the most
pirates in the air. (See 5i. Pirate Diplomacy.)
Returning raids after a plunder. When a raider fleet finishes a
successful plunder and warps back to its asteroid lair, its surviving ships and stolen
minerals are folded back into the pirate reserve. The cargo hires mercenary captains
from the lawless fringes — smugglers running from debts, disgraced naval officers,
opportunists who will fly for whoever pays — and the survivors re-fit for the next
contract. Each mineral that makes it home buys roughly one fresh Destroyer crew. Catch a
raid on its return leg and you remove both the ships and the loot from the brethren’s
books for good.
Captured ships in combat. Half (rounded down) of all ships destroyed by pirates in
a fight are seized rather than sunk and added to the pirate fleet on the spot. Defense
Satellites and Starbases cannot be captured. This is a smaller stream than the other two
in aggregate, but it can swing a single battle hard — a fleet that is barely strong
enough to win can find itself losing as the brethren grow mid-engagement.
Two consequences fall out of these rules. First, raider fleets do not grow
while sitting idle — if no one feeds them, they do not strengthen. Second, every
raider you destroy before it returns home is a permanent loss to the brethren’s
war chest, ships and loot both. Early-game raids are manageable threats; if the galaxy keeps
paying, late-game raids can field substantial fleets that require coordinated defense.
5g. Defending Against Pirates
Effective pirate defense strategies include:
Build a tripwire network. Station a Destroyer or Starbase in the
systems one and two hops from your home world. Raiders move one hop per turn, so a
sighting report from an outlying system gives you a turn or two of warning — enough
time to recall your fleet, set it to Ambush, and make your home system
a very unpleasant destination.
Build up Planetary Defense. A PD force that equals or exceeds the
raider fleet’s Destroyer count will completely block plundering and prevent unrest.
Even partial PD reduces the amount stolen.
Maintain garrison fleets. Even a small defensive force of ships or
D-Sats will prevent plundering entirely, since raiders only plunder when no enemy ships,
D-Sats, or Starbases are present.
Intercept raiders in transit. If you spot a raider fleet moving through
systems you control, you can position ships to engage them before they reach their
target.
Destroy returning raiders. Raiders head home after a raid, re-plotting
the shortest route each turn — they will not necessarily come back the way they went in,
so watch every lane toward their origin. Engaging them on the return trip prevents their
strength from being recycled into future raids.
5h. Rewards for Fighting Pirates
Empires that fight valiantly against pirate forces earn tangible rewards. The galaxy
remembers those who stand against lawlessness, and independent systems take notice when
nearby empires show the courage to engage pirates in battle.
Reputation Boost: Your galactic reputation improves by one step each time your
lifetime tally of destroyed pirate ships crosses a milestone — at
10, 25, 50, and 100 pirate ships destroyed across the whole game. Every pirate
hull your forces kill counts toward the running total (it does not matter whether you wipe out a
whole fleet or pick off ships one at a time, nor where the fighting happens). A single big battle
can cross more than one milestone at once and improve your reputation several steps in
one turn. Reputation from pirate-hunting can carry you all the way up to Revered
(the floor for this bonus).
Diplomatic Relations Boost: If your fleet deals significant damage to
pirate forces during a turn, nearby independent systems that are currently Neutral toward
you will warm to your empire. Their diplomacy level improves by one step as word of your
campaign against the pirates reaches their councils. Only independent systems within a
couple of warp lane hops of your battle sites are affected — and only
Highly Civilized and Neutral race worlds.
Lawless races never warm to pirate-hunting: the brethren are kindred spirits,
and gunning them down impresses no one on the lawless fringe. The boost is also capped at
Friendly (level 8) — admiration alone never hands you the system; the
final push to a join must come from ongoing diplomacy or a favor.
Defending a Host: If you fire on pirates inside an independent
system's home space, the grateful host improves its relations with you by one step that turn
— again, only if the host is a Highly Civilized or
Neutral race world. Merely being shot at earns nothing; you must shoot back.
Cooperation Pays: If multiple empires fight the same pirate fleet together,
each empire can earn these rewards independently. Independent systems respect any empire
willing to take the fight to the pirates, and joint operations are no exception.
The brethren keep their own ledger. While the independent races and your
galactic reputation reward you for hunting pirates, the brethren themselves do not forgive
it. Combat with a pirate fleet inside an Asteroid Field costs you −2 pirate
diplo points per engagement; combat in a Dead System costs −1.
Fights anywhere else — open space, your own systems, or in transit — carry no
pirate-diplo penalty, and an Ambush leaves no witnesses to report it. If you are climbing
toward Tolerated Patron, Marked Friendly, or Brother of the Black Flag, raiding the
brethren’s lairs will drag you back down even as your reputation rises. (Full rules:
5i. Pirate Diplomacy — Attacking Pirates in Their
Lairs.)
5i. Pirate Diplomacy
For all their bluster about answering to no one, the brethren of the Black Flag are
merchants in the end. They have favored ports, captains they trust, and old debts they
honor. An empire that approaches them with the right coin — and the right
reputation — can buy a measure of peace, perhaps even a measure of cooperation.
But every coin pressed into a pirate captain’s palm sails right back out as
powder, sail-cloth, and crews. Tribute does not buy the brethren’s silence; it
buys their patience, and pays for the next raid landing somewhere down the lane.
This section covers your standing with the pirates — how it is earned, what
it grants, and what it costs.
First Contact
You begin the game with no relationship to the pirates and you will hear nothing
from them until your ships have crossed paths with one of theirs. The first turn after
any of these events:
One of your ships ends a turn in the same system as a pirate fleet (a lone probe
Destroyer doesn't count — it burns up before anyone trades names).
A pirate fleet — raider or otherwise — ends a turn at one of your systems.
… a contact message arrives from the Black Flag, and a Pirate Diplomacy panel
appears at the top of your diplomacy view. Until first contact the panel is hidden
— you do not yet exist to them.
Diplomacy Tiers
Your standing with the pirates is measured in diplomacy points.
Every empire begins at 0. Crossing certain thresholds promotes you to a named tier
with its own protections and privileges:
Tier
Name
Threshold
What it grants
0
Strangers
0 points
No relationship. Pirates raid your worlds and fire on your ships normally.
1
Tolerated Patrons
10 points
Pirate raids skip your worlds and target other empires instead.
2
Marked Friendly
20 points
Pirate fleets will not fire on your ships in shared systems. You may build a Starbase at a pirate-occupied Dead System without first destroying the pirate fleet.
3
Brother of the Black Flag
30 points
Pirate fleets in your systems fight on your side against your attackers. You may bribe the brethren to raid another empire. Other empires cannot bribe a raid against you.
Points come from two sources: tribute (one mineral paid = one
point, banked permanently) and reputation (your standing with the
independent races shifts how the pirates see you — see below).
Reputation Caps Your Standing With the Brethren
Pirates respect outlaws and brawlers. They do not trust saints. The cleaner you
look to the independent races, the lower the ceiling the pirates will let you climb
to:
Reputation
Maximum pirate tier reachable
Revered, Honored
Tolerated Patrons (Lvl 1)
Trustworthy, Neutral, Questionable, Dangerous
Marked Friendly (Lvl 2)
Menacing, Reviled
Brother of the Black Flag (Lvl 3)
Reputation also adjusts your point total directly. The more feared you are, the
better the pirates like you — Menacing and Reviled reputations grant a standing
bonus toward your pirate diplo total, and Honored and Revered reputations carry a
penalty. Your banked tribute is never lost when reputation shifts; only the displayed
tier and the reputation portion of your total move.
If your reputation rises high enough to drop the cap below your current tier, the
higher tier’s privileges are revoked at end of turn. Lower your reputation back
into the eligible band and the tier returns to whatever your points support. (See
Section 2d. Reputation for the full reputation chart.)
Pay Pirate Tribute
The Pay Pirate Tribute button on the Pirate diplomacy card opens a
modal where you choose how many minerals to send. Each mineral paid is +1 to your
pirate diplo points, banked permanently.
Source. Tribute can only be paid from your original
home system — the world you started the game on, even if you have since moved
your capital. If your original home is lost or held by another empire, you cannot
pay tribute.
Production reserve is protected. The modal’s Available
figure already subtracts what is needed to keep your home system’s production
running this turn. You cannot stall production to bribe the brethren.
One payment per turn. Pay the amount you want to pay; you
cannot split it across multiple orders.
Effects apply at end of turn. Tribute paid this turn does not
protect you from a raid landing this turn — it sets your tier going into next
turn’s targeting decisions.
Mid-flight grace. If word reaches a raid in transit that its
target has paid the brethren, the captain will swing onto a new heading rather than
honor a void contract.
Of the empires that have not paid the brethren at all, those who have given the
least are first to feel the brethren’s hunger. And when every empire has
bought peace, the brethren turn back to the independents until fresh marks emerge.
Tribute is a dangerous path. The brethren do not hoard the coin you
send them. Every mineral you pay is poured into shipyards, powder, and crews —
fueling new raids on the next mark down the lane. The empire you saved with tribute
today may pay for the raid that lands on your neighbor next turn, or back on your
own worlds the turn after. The galaxy that pays the most pirates has the most pirate
raids in the air.
Bribe to Raid
At Brother of the Black Flag (Lvl 3) you unlock the Bribe to Raid
button: pay the brethren a small fee and the next pirate raid is redirected onto an
empire of your choosing.
Cost. The fee is computed from the current raid size at roughly
one mineral per five raider ships. The exact cost is shown in the modal at the moment
you open it.
What a bribe actually does. A bribed raid is not a new
raid. It is the brethren’s next scheduled raid, pulled forward and aimed at
your chosen target. The raid after that one still fires on its normal
schedule, so the gap between this raid and the next regular raid is larger than
usual. Bribing buys timing and target selection — not extra pirate activity.
Source & reserve rules. Same as tribute — minerals
come from your original home system, the production reserve is protected, and the
button is disabled if your original home is lost.
Targets. Empires you have met. The brethren refuse to turn
blades on a Brother of the Black Flag, so any target empire currently at Lvl 3 is
greyed out in the dropdown. The Retired Pirate Empire Advantage card grants the
same protection — a former captain of the Black Flag is never on the
contract list, regardless of their current pirate-diplo standing.
Reputation gate. Empires at Honored or Revered reputation cannot
Bribe to Raid at all — the Council of Captains refuses their coin.
“Your hands are too clean for our work,” the messenger replies.
“Find another knife — or dirty your own.”
Early-game lock. Bribes are unavailable until the brethren’s
first two raids of the game have launched — those raids are reserved for the
independent races. Early in the game, the brethren stick to the independents; they
will turn their attention to empires soon enough. (No empire can plausibly reach
Lvl 3 before then anyway, but the affordance exists for the rare edge case.)
Once paid, a bribe is final. If your target reaches Lvl 3
mid-flight, is eliminated mid-flight, or your own empire falls before the raid
lands, the brethren still complete the contract. Coin has changed hands; the work
gets done.
The strongest practical reward for climbing all the way to Lvl 3:
no other empire can bribe a raid against you. The brethren do not raise blades against
their own.
Attacking Pirates in Their Lairs
The brethren take it personally when their old anchorages are violated. Combat with
pirate fleets in their home turf carries a permanent diplomacy cost:
In an Asteroid Field: −2 pirate diplo points per combat
event. Asteroid fields are pirate homes — the Drift — and the
brethren never forget who came hunting.
In a Dead System: −1 pirate diplo point per combat event.
Anywhere else (regular space, your own systems, in transit):
no penalty.
Ambush is exempt. An ambush leaves no witness reports. The
brethren cannot pin the engagement on you, so no penalty fires.
The penalty applies to every player who participated in the combat, not
just the empire that fired first. Two empires fighting the same pirate fleet in an
Asteroid Field both pay −2.
At Lvl 0 or Lvl 1 you do not need to give attack orders to incur this penalty:
pirates in their lairs are hostile on sight and will fire on you even at Conditional
stance. Combat happens whether you wanted it or not, and the rule is “had
combat with pirates,” not “chose to fight pirates.” Friendlier tiers
(Lvl 2+) are spared this trap because the pirate fleet will not fire on them —
combat only occurs if the player gave explicit attack orders, and the penalty applies
for that choice.
Common Cause
If your fleet fires on another player’s fleet that the pirates are also
firing on — and you do not trade fire with the pirates yourself — the
brethren reward the courtesy with +1 pirate diplo point, capped at
+1 per turn no matter how many qualifying combats you fought. The Council of Captains
marks the shared target.
Practical access usually requires Lvl 2 standing or higher (otherwise pirates fire
on your ships on sight and the “no exchange of fire with pirates” condition
collapses). One useful exception: in a system where pirates are mid-raid, they fire
only on the system owner. An opportunistic attacker showing up to fight that owner
— not the pirate fleet — can earn the bonus even at Lvl 0 or
Lvl 1.
Permanent Decay
Captains die. New captains demand fresh tribute. Every 8 turns,
every empire’s pirate diplo points fall by 1 — a slow, permanent erosion
that cannot be prevented. The brethren’s leadership is fractious; standing slips
just by sitting still. Plan to top up your tribute periodically if you want to hold a
tier long-term.
Starbases at Pirate-Held Dead Systems
At Marked Friendly (Lvl 2) and above, you may place a Starbase at a Dead System
garrisoned by a pirate fleet without first destroying that fleet. The brethren let a
Friend set up shop. (Previously this perk required the Retired Pirate Empire
Advantage card; it is now folded into the tier system, and Retired Pirate inherits the
ability via their Lvl 2 floor — see Appendix A.)
Reading the Pirate Diplomacy Card
Your total pirate standing is shown in white
when nothing is shifting it. Amber means a
transient modifier (usually your reputation) is dragging your total down;
green means it is lifting you up. Hover the
modifier list under the progress bar for the per-source breakdown and a “what
if?” preview of how a reputation shift would change the picture. A red vertical
line on the progress bar marks a tier border you cannot currently cross because of
your reputation cap.
If You Reach for the Crown
Lead at your peril. The pirates have one rule above all others: no
banner shall fly over the entire galaxy. If your empire grows powerful enough that
the brethren see a Galactic Sovereign on the horizon, no payment, no friendship, and
no flag will keep them from coming for you. Brother of the Black Flag is the
strongest practical safeguard against this late-game crackdown; the Retired Pirate
Empire Advantage card grants the same lifelong pact. Outside those two protections,
the strongest empire in the galaxy will always be the brethren’s next mark.
Your empire runs on three interconnected resources: population,
industry, and minerals. Mastering the economy is just as important
as winning battles — fleets must be built, systems must grow, and resources must flow
where they're needed most.
6a. Build Points (BP)
Everything you build costs Build Points. Each BP requires:
1 population (workers)
1 industry (factories)
1 mineral (raw materials)
Your BP output at a system equals min(population, industry, minerals on hand),
rounded down for fractional industry — if you have 5 population, 3 industry, and 10
minerals, you produce 3 BP that turn. Of the three, only minerals are actually
spent: each BP used consumes 1 mineral from the stockpile. Population isn't consumed
— but every worker on the production line is tied up for the turn and cannot mine
(see Mining). Industry is never used up at all; the factories keep
standing.
Key: Minerals unloaded at a system during Phase 1 (Load/Unload) are available
for production that same turn — and so is population: colonists unloaded
onto a system you own go straight to work, counting toward both production and mining that
very turn. Time your freighter deliveries to maximize output.
Tip: You can add an additional BP on any turn at a home system by using the
Forced Labor option. This will consume an extra mineral. The cost of doing this
is that your reputation will drop one level.
6b. What You Can Build
Item
BP Cost
Notes
Destroyer (DD)
1
Missile Ship (Mi)
1
Freighter (Fr)
1
Defense Satellite (DS)
1
Immobile system defense; max varies by quality (A:20, B:15, C:10, D:8, E:5)
Cruiser (CR)
2
Nova (N)
2
Starbase (SB)
4
Max 1 per system; requires empty Freighter; removes 1 population. The Freighter placing the Starbase cannot move or load cargo that turn.
Carrier (CV)
5
Available once you unlock Carriers (place a Starbase on a Dead System). Carries 10 fighters; +1 Ion-9 crystal/turn upkeep.
Fighter Base
2
Max 1 per system. A fixed installation that launches fighters to defend the system.
Planetary Defense (+1 PD)
1
Capped at population limit + 4
Industry Upgrade (+0.2)
1
Gradual factory expansion
Ion-9 Crystal
1
Fleet supply. Build only at original home systems and Gaia (Quality-A) systems — see Fleet Maintenance.
Tip: If you don't issue build orders at a system, it will automatically
build Destroyers with its available BP. This ensures idle systems still contribute
to your fleet strength.
6c. Mining
Population not used for production automatically mines minerals:
Mined minerals are added to the system's stockpile and available next turn.
Systems with high minerals/turn but low industry will stockpile resources quickly. Use
Freighters to transport those minerals to your production centers.
6d. Population Growth
Population grows each turn based on system quality:
Quality
Growth Rate
A (Gaia)
10% per turn
B
8% per turn
C
6% per turn
D
4% per turn
E
2% per turn
Minimum growth is always 0.1 per turn, even at low populations.
Population cannot exceed the system's population limit.
Systems in unrest grow at only 0.1 per turn regardless of quality.
6e. Unrest
Systems enter unrest when conquered or when population significantly exceeds
planetary defense. During unrest:
Industry output is halved (rounded in the system's favour — a
5-industry system still produces 3, and 1 industry never drops to 0).
Minerals per turn is halved (rounded down, minimum 1).
Population growth drops to 0.1 per turn.
Unrest clears gradually as you build up Planetary Defense relative to population. Keeping
PD close to your population level prevents unrest from triggering.
Warning: Unrest is triggered when population exceeds PD + 2. Each point
above that threshold has a 10% chance of sparking unrest each turn. Build PD alongside
your population to keep systems stable.
6f. Production Disruption
Production is cancelled if an enemy fleet with ATTACK orders is present at
your system and you have no defending ships, D-Sats, or Starbases. Your workers cannot
operate factories under threat of orbital bombardment.
6g. Fleet Maintenance — Ion-9 Crystals
Every ship in your fleet is powered by Ion-9 crystals — rare, high-energy
lattices refined at your home world's processing facilities. Ion-9 crystals degrade with each
warp jump and every weapons discharge. Without regular replacement, a ship's power core loses
output: targeting systems drift, shield generators falter, and weapons fire weakens. A fleet
running on stale crystals is a fleet fighting at a disadvantage.
Ion-9 crystals are a stockpile resource — a discrete, per-system count
that you produce, hold, and draw down. They are not automatically refined from minerals
each turn. You must deliberately build crystals, just as you build ships, and store them at the
systems where they are produced.
Producing Crystals
Crystals are produced through the Build modal at any
original home system or Gaia (Quality-A) system you control.
Each crystal costs 1 Build Point, drawn from the same pool you use for ships,
PD, and industry upgrades. No other system type can produce or hold Ion-9 crystals.
Capturing an enemy's home system grants you crystal production there too — the new
owner can build crystals on any captured original home, exactly as they would on their own.
Existing crystal stockpiles transfer with the system on conquest.
Supply Cost
Each turn your fleet consumes a fixed number of crystals based on its size:
Fleet Size (total ships)
Ion-9 Cost (crystals/turn)
1–50
1
51–100
2
101–150
3
The cost increases by 1 crystal for every additional 50 ships. Only your mobile
fleet counts toward this total — Cruisers, Destroyers, Missile Ships, Novas, and
Freighters. Starbases and D-Sats do not count: they are fixed installations
running on their own onboard power, not the fleet's Ion-9 supply chain.
Each Carrier you field adds
+1 Ion-9 crystal per turn on top of the cost above — an irreducible
surcharge that Revered reputation and the Ion-9 Catalyst do not reduce.
Supply is all-or-nothing. Each turn the game sums your crystal stockpile
across every system you own. If the total is at least the supply cost, you pay it and
your fleet is in supply. If the total is less than the cost, no crystals are spent and
your fleet goes unsupplied for that turn. There is no partial payment.
Combat Penalty
If your fleet is unsupplied (maintenance unpaid), your ships suffer a
10% combat penalty (to-hit number increased by 1) until supply is restored.
Ships with degraded Ion-9 crystals simply cannot aim or fire as effectively. Note the timing:
the supply check runs after each turn's battles, so a shortfall detected this turn
degrades your fire starting with next turn's combat — and restoring supply
likewise takes effect a turn later.
Starbases and D-Sats are exempt from this penalty. They are static defenses
with their own onboard power, not drawn from the fleet's Ion-9 supply chain, so their anti-ship
fire stays at full accuracy even when your fleet is out of supply.
Stockpile & Deduction Order
Crystals are stored on the system where they were built. They cannot be loaded onto
Freighters and cannot be moved between systems — the lattices are too unstable to
ship. To keep a forward outpost stocked, you must build crystals there directly (which means it
must be a home or Gaia system you own).
When the supply cost is paid, crystals are drawn down starting from the systems
furthest from your original home system first, working back toward the core.
This naturally consumes crystals at distant outposts before depleting your main reserve, and
leaves your strongest stockpile defended at the heart of your empire.
Holding Multiple Producers
Any home or Gaia system you own contributes to your supply. If you control more than one
— for example, your starting home plus one or more Gaia systems — their stockpiles
are pooled for the supply check, and the deduction order described above governs which systems
are drawn from first.
If you lose your home world entirely, owned Gaia systems can keep the fleet
supplied. You can also produce crystals at any Gaia you hold, so a Gaia stockpile can serve as
long-term insurance against losing your capital. If you control no home and no Gaia, your fleet
will run dry and fight at reduced effectiveness until you recapture a producer.
Key: Crystals are produced and stored only at original home
systems and Gaia (Quality-A) systems. They cannot be transported.
Your fleet’s supply each turn is the sum of crystals across every such system
you own — if that sum is below the supply cost, your whole fleet fights at reduced
effectiveness until you build more.
Maintenance Reductions
Two effects can reduce your Ion-9 crystal cost below the standard table:
Revered Reputation: When your reputation reaches Revered, allied traders and independent system councils begin routing surplus Ion-9 feedstock directly to your refineries. Your fleet maintenance cost is reduced by 1 crystal per turn (minimum 1). This bonus applies automatically each turn you hold Revered status and stacks with other reductions.
Precursor Ion-9 Catalyst (temporary relic): A cache of ancient catalytic material discovered in Dead System ruins doubles the efficiency of your Ion-9 crystals, so each crystal powers 100 ships instead of 50. Once your fleet exceeds 50 ships this reduces the crystals you spend each turn (below that, a single crystal already covers your fleet). This bonus lasts 6 turns and then expires.
When both are active simultaneously, the Catalyst divisor is applied first, then the Revered flat reduction is subtracted, floored at 1 crystal.
Checking Your Supply Status
Your current crystal stockpile is shown directly on each home or Gaia system card —
look for the Ion-9 crystal icon in the Economy stats bar. The system card also shows a usage
line indicating how many crystals you spend per turn and roughly how many turns of supply you
have remaining (which pulses Amber at 2 turns or fewer, and Red when you are out of supply).
Your per-turn supply cost is also displayed in the top bar next to your
total ship count — for example, Ships 73 (2×crystal/turn) means a 73-ship
fleet consumes 2 crystals per turn. The Ships Present box on every system card shows a small
crystal icon next to each empire that is currently in supply, or a pulsing “–1 to
hit” indicator if that empire’s fleet is unsupplied.
Tip: Treat crystals as a strategic reserve. Producing one costs the same Build
Point as a Destroyer, so each crystal you build is a ship you didn’t. Keep a buffer of
several turns’ supply at all times — running out before a major battle can turn a
winning fleet into a losing one. Owning a Gaia System gives you a second producer and a second
stockpile, valuable insurance if your home world is besieged. Watch the Amber pulse on your
system card and Build modal — that is your warning that supply is about to run dry.
economyproductionminingpopulationunrest
7. Ships Reference
RULE-007
Your fleet is composed of seven core ship types, each with distinct roles. Understanding
their strengths and limitations is the foundation of effective strategy. An eighth class — the
Carrier and its fighter wing — joins the fleet once you unlock it midway through
the game (described below; full rules in Appendix C).
Ship
HP
To-Hit
BP Cost
Role
Cruiser (CR)
3
5+
2
Fleet backbone — gates other ships through warp lanes
The Cruiser is the backbone of every interstellar navy. It carries a full-size
warp field generator — the only ship class powerful enough to activate the
ancient gates for an entire fleet. Without a Cruiser, no fleet can move. With one,
an unlimited number of ships can ride its warp field through the gate in a single
movement order.
In combat, Cruisers are tough and reliable: 3 hull points absorb sustained punishment,
and their twin-battery turrets hit on 5+ (60%). They sit in the middle of the screening
order, shielded by Destroyers and Novas but protecting the Freighters and fixed defenses
behind them. Every ton of hull is given over to the warp field generator and weapons
— a Cruiser carries no cargo; hauling is Freighter work.
When the fleet turns to ground operations, Cruisers excel. Their precision orbital
bombardment platforms (Invasion Rating A) can knock out planetary defense
installations with surgical strikes and zero collateral damage. A Cruiser over your
world is both a shield and a scalpel.
Tip: Lose your last Cruiser at an asteroid field and every ship
without its own generator is stranded. Always keep a spare.
Destroyer (DD)
Cheap, fast, and expendable — the Destroyer is the workhorse of the fleet.
At just 1 BP each, Destroyers are built in volume and thrown into battle as the
first line of defense. In the screening order they absorb hits before
any other ship type, buying time for heavier vessels to fire.
Destroyers carry a micro-scale warp field generator — not powerful
enough to gate other ships, but just enough to activate a gate for themselves alone.
This makes them ideal for probe missions: a lone Destroyer overloads
its power plant to force the gate open, hurling itself through in a blinding surge.
The strain is catastrophic — the ship's systems burn out shortly after arrival
— but in its final moments it transmits a full sensor sweep back through the gate:
fleet composition, population, industry, defenses. The defending player never knows
the probe was there. One ship sacrificed for intelligence that can change a war.
In ground operations (Invasion Rating B), Destroyers can manage rough surface
strikes but lack precision targeting — a hit on 8+ with a chance of collateral
damage to industry or population. Use them to invade only when better options aren't
available.
Tip: Every home system starts with 5 Destroyers. They're
your scouts, your shields, and your first line of expansion. Don't neglect them.
Missile Ship (Mi)
Missile Ships carry long-range guided warheads and one critical advantage:
they fire first. Before Starbases, before Cruisers, before anything
else — Missiles launch. A coordinated salvo can eliminate fragile targets before
they ever get a shot off, making Missile Ships devastating alpha-strike platforms in
the opening moments of an engagement.
The trade-off is fragility. At just 1 HP, a single hit destroys them. And they
carry no warp field generator — a Missile Ship requires a Cruiser to activate
the gate for it. In asteroid fields, spinning iron-nickel asteroid cores
create chaotic magnetic fields that overwhelm their guidance systems, raising their
to-hit from 5+ to a near-useless 10.
On the ground they're the worst option (Invasion Rating C). Their warheads
were designed to track ships in open space, not hit fixed ground installations —
and a missed warhead can level a city block. Avoid using Missile Ships for invasion
if you want anything left to conquer.
Tip: Missiles excel in early-game fleet actions where the enemy
lacks heavy armor. A Missile-heavy fleet wins the first volley — but struggles
if the battle drags on.
Nova (N)
The Nova-class warship represents the cutting edge of military technology
— a breakthrough so profound that strategists agree it will one day become the
standard bearer of every civilized navy. Its weapon: an anti-matter beam,
a needle-thin lance of absolute destruction capable of annihilating any vessel
regardless of size or armor. When a Nova scores a hit, the target is
instantly destroyed — hull points are irrelevant. A single beam
can vaporize a 3-HP Cruiser or even a 10-HP Starbase in one shot.
But the technology is still new, unstable, and expensive. Anti-matter containment
systems are finicky (2 BP to build), and the beam's targeting arrays are maddeningly
unreliable — the worst accuracy in the fleet at 8+ (30% hit chance). Novas also
fire last among combat ships, meaning they must survive the opening volleys before they
can return fire. And their targeting is indiscriminate: a Nova hit strikes a
random enemy ship, weighted by ship count. You cannot choose the target.
Novas carry a small warp field generator — enough to move themselves through a
gate, but not to carry others. In ground operations (Invasion Rating A), their
pinpoint antimatter beams excel at neutralizing planetary defense with zero collateral
damage.
Tip: Novas bypass the normal screening order entirely —
their beam strikes a random target in the enemy fleet. Even a small Nova contingent
is feared because any hit is catastrophic.
Freighter (Fr)
Freighters are the economic lifeline of your empire. Their cavernous cargo
bays can carry 3 minerals, 1 population unit,
or 1 Starbase (mutually exclusive) — making them the only ship
that can transport population to new colonies, deliver minerals to production centers,
and deploy Starbases to claim Dead Systems.
In asteroid fields, Freighters become miners. After sitting stationary
for one full turn, each Freighter with free cargo space extracts +1 mineral per turn
— a dangerous but lucrative operation in the debris-strewn belts. Smart commanders
build supply chains: Freighters shuttling minerals from asteroid mines and Dead Systems
to home worlds and factories. A powerful fleet without minerals behind it is a fleet
on borrowed time.
In combat, Freighters are nearly helpless — 1 HP, to-hit of 10 (10%), and they
fire dead last. But the screening order protects them behind every other ship type,
and they are excluded from ambush calculations. Lose a Freighter, though, and you
lose its cargo with it.
Freighters are actually your best invasion ships (Invasion Rating A).
Their vast cargo bays harbor multiple marine divisions, and their drop pods deliver
precision landings on defense installations with zero collateral damage. Critically,
each Freighter hit deals 2 damage to Planetary Defense — enough to
destroy a full PD unit in a single shot. Cruisers and Novas only deal 1 damage per hit
and need two hits per PD unit. When conquest is the mission, load up on Freighters.
Tip: Don't just build fleets — build supply chains. A
Freighter hauling 3 minerals per trip is the engine that keeps your shipyards running.
Defense Satellite (DS)
Defense Satellites are immobile orbital platforms anchored to a system's
gravity well. They cannot move, cannot be transported, and cannot participate in invasion
or ambush fire. What they can do is fight. At 3 HP and a to-hit of 5+
(60%), a Defense Satellite hits harder and survives longer than most mobile warships
— and they cost just 1 BP.
D-Sats are generated automatically when the galaxy is created, their numbers determined
by system quality. You can also build more D-Sats using Build Points, up to the maximum
for that system's quality class:
Quality
Max D-Sats
A (Gaia)
20
B
15
C
10
D
8
E
5
The pirate homeworld fields a formidable
ring of 8. Once in place, D-Sats fire alongside the owning player's fleet — a
permanent garrison that never needs reinforcement.
In the screening order, D-Sats sit deep behind mobile ships, meaning attackers must
chew through your fleet before reaching them. Like all fixed platforms, D-Sats cannot
initiate combat — enemy fleets can maneuver to avoid stationary defenses —
but they fire back with full force the moment an attacker commits to an engagement.
They are the silent guardians of your empire — always watching, always ready.
Starbase (SB)
The Starbase is the most powerful unit in the game — a massive
orbital fortress, a large city in space. Starbases offer the following benefits:
Determines system ownership of Dead Systems (DS and DS+).
Can send search parties to search for ancient wonders in Dead Systems + (DS+).
Can rapidly repair Carriers and rapidly replace their fighters.
Have 2 massive beam weapons as well as 5 Fighter Squadrons for defense.
Can activate a Warp gate connecting an adjacent system with a Starbase.
Can collect minerals from Dead Systems (allowing Freighters to move them to other
systems). (DS and DS+)
At 10 HP, a to-hit of 3+ (80%), and two shots per combat round,
a single Starbase can shred attacking fleets. It costs a steep 4 BP to build and
consumes 1 population from the system during construction (there are over a million
engineers and crew permanently stationed aboard).
Starbases are immobile — once placed, they cannot be moved. They
must be built via a build order, then loaded onto a Freighter for transport and placement
at their destination. Only one Starbase may exist per system. They are the
only way to claim ownership of a Dead System, making them essential for
accessing those irradiated mineral stockpiles left over from the ancient war.
Because a Starbase is locked to its orbital position, enemy fleets in the same system
can keep their distance and avoid engagement — but the moment they attack,
they enter the Starbase's devastating weapons envelope.
For all their power, Starbases have a terrifying vulnerability: a single Nova hit
— that needle-thin anti-matter beam — destroys a Starbase instantly,
regardless of its 10 hull points. Every fortress, no matter how mighty, has a weakness.
Against ordinary weapons fire, however, Starbases are remarkably resilient. Hull damage
accumulates between rounds and between turns — a battered Starbase
does not magically heal — but the onboard repair bays mend
1 hit point at the start of every turn until the station is back to full
strength. Throughout that recovery, the Starbase keeps fighting at full capability: both
shots, full accuracy, undiminished firepower right up until its last hull point falls.
Tip: Place Starbases at Dead Systems to claim their minerals,
at strategic chokepoints to control warp lanes, and at your home world for a nearly
impenetrable defense. But always keep Nova-hunters nearby — one lucky beam hit from
a Nova ship can destroy the Starbase instantly.
Carrier (CV)
Carriers become available midway through the game — you unlock the technology
empire-wide by placing a Starbase on a Dead System. A Carrier
is a flagship-class command ship with a hangar of 10 fighters. At 10 HP and
a to-hit of 3+ (one shot per round, firing right after Cruisers) it is a capable gun platform in
its own right — but its real weapon is its fighter wing, which strikes before the
normal combat rounds begin.
A Carrier self-propels like a Nova (it can warp alone, but carries no cargo and cannot tow),
costs 5 BP, and adds +1 Ion-9 crystal per turn in upkeep. Its hull damage and
combat experience persist between turns, it is screened last (so it dies only once
the rest of the fleet is gone), and it cannot be captured — a Carrier
self-destructs rather than fall into enemy hands. See Appendix C for the
full carrier and fighter rules.
Fighters
Fighters are never built or moved on their own — they live inside Carriers, Fighter Bases,
and fighter-equipped Starbases, and launch automatically when battle is joined. Each fighter has
1 HP and flies in one of two roles: CAP (a defensive screen
that intercepts enemy fighters and soaks hits for your fleet) and Strike
(offensive fighters that fly out and attack a chosen enemy ship type). The whole fighter exchange
— launch, dogfight, flak, and strike — resolves in a pre-combat phase before
Round 1. See Appendix C for the full rules.
7a. Invasion Ratings
When invading a system, different ship types have different effectiveness against
Planetary Defense. Each PD unit has 2 hit points and must absorb that much
damage before it is destroyed. Freighters deal 2 damage per hit — the
only ship type that can destroy a PD unit in a single shot. All other ships deal 1 damage
per hit.
Rating
Ships
To-Hit vs PD
Damage/Hit
Collateral
A (best)
CR, Nova
6+
1
None
A (best)
Freighter
6+
2
None
B
Destroyer
8+
1
May damage industry/pop
C (worst)
Missile Ship
9+
1
Higher collateral risk
Note:Fighter superiority provides a bonus to Freighter die rolls (either +1 or +2).
Note: A Reviled empire's Freighters deal +1
invasion damage (Shock Troops) and its own PD units take +1 HP to destroy (Fearless PDF); both
stack with the Elite Troops card. See
Invasion & Conquest.
Tip: Freighters are your best invaders — their marines deal 2 damage per
hit, taking out a full PD unit in one shot. Cruisers and Novas are clean too (no collateral)
but need two hits per PD unit. Avoid Missile Ships if you want anything left to conquer.
shipsfleetcombatinvasion
8. Turn Order
RULE-008
Each turn is processed in a fixed sequence. Understanding this order helps you
time your actions — minerals and population unloaded in Phase 1 are available
for production and mining the same turn, and ships that move in Phase 3 arrive before Combat
Round 2 in Phase 4. (The list below shows the major phases a player sees; the engine runs many
smaller housekeeping passes between them.)
Phase 1 — Load / Unload / Place Starbases (placements are recorded now but only finalized in Phase 15)
Phase 1.5 — Local Traders (passive mineral flow along your active warp lanes — see §3i)
Phase 2 — Combat Round 1 (opens with the fighter battle — launches, dogfights, flak, strikes — then withdrawal fire and phased ship fire)
Phase 3 — Movement (fleets warp to destination systems)
Phase 4 — Combat Round 2 (pirate plunder resolves just before; then ambush fire, phased ship fire, and invasion)
Phase 5 — Pirate Activity (pirate captures of destroyed ships; new raids launch; rewards for fighting pirates)
Phase 6 — Production (build ships, PD, industry), then Fleet Maintenance (Ion-9 crystals deducted from your stockpile, farthest systems first)
Phase 7 — Mining (population not used for production mines minerals)
Phase 8 — Population Growth
Phase 9 — Unrest Check
Phase 10 — Asteroid Damage
Phase 12 — Ownership Changes (invaded systems transfer to their conquerors; lost capitals are reassigned)
Phase 13 — Independent System Join Transfers (independent systems that voted to join complete the handover)
Phase 14 — Independent System Diplomacy (ongoing relations rolls, missions, and the turn's relations reports)
Phase 15 — Finalize Starbases (pending Starbase placements land on their systems)
Key insight: Movement happens between the two combat rounds. Ships
leaving a system face withdrawal fire in round 1 but escape before round 2. Ships
arriving at a system skip round 1 entirely and have arrival immunity in round 2
— unless the defending fleet has ambush fire set on the gate they arrived from.
Timing your movements around this sequence is critical.
turnsphasestimingstrategy
9. The Star Map
RULE-009
The star map is your primary strategic view of the galaxy. It displays all known
systems, the warp lanes connecting them, fleet positions, and empire territories.
Learning to read the map quickly is essential.
System Symbols
Each system is drawn as a circle on the map. Inside the circle, a letter or short
code tells you the system type at a glance:
Symbol
Meaning
Color
A
Quality A (Gaia) star system (best)
Green
B
Quality B star system
Lime
C
Quality C star system
Amber
D
Quality D star system
Orange
E
Quality E star system
Red
AF
Asteroid Field
Black
N
Nebula
Hot pink
Ion
Ion Nebula
Magenta
BH
Black Hole
Red
DS
Dead System
Gray
If you haven’t fully explored a star system yet, the quality letter may not appear.
Star system circles also scale in size based on population limit — larger circles
mean bigger worlds.
Circle Colors (System Ownership)
The fill color of each system circle tells you who controls it:
Your empire’s color — a system you own
Another empire’s color — an enemy-controlled system
Muted blue-gray — an independent system
Very dark / dim — a system in the fog of war (unexplored)
System Name Labels
The name label below each system is also color-coded:
Empire color — any owned system is labeled in its owner's empire color — both yours and your rivals'. (You tell your own systems apart by your color and the star outline on your capitals.)
Muted gray — an independent system
Dim / default — unexplored
Home System Star
Home systems are marked with a five-pointed star outline drawn
around the circle, in the empire’s color. This makes capitals easy to spot at
any zoom level.
Warp Lanes
Thin lines connecting systems represent warp lanes — the only routes your
fleets can travel. The galaxy is displayed on a sphere, so lanes wrap naturally
around the globe with no artificial edges.
Fleet Orbit Dots
Small colored dots orbiting a system show fleets present there. Each dot represents
one empire’s fleet at that system.
Your empire’s color — your fleet
Another empire’s color — a foreign fleet
Red — pirate or hostile fleet
Gray — neutral fleet
If a fleet has more than one ship, the count appears inside the dot.
Pulsing Threat Alerts
Systems under threat display a pulsing ring around the circle:
Red pulse — hostile fleets (pirates or enemies) are present at this system right now
Amber pulse — the system is threatened but no hostile fleet is on-site yet
Empire Borders
Soft, glowing colored blobs in the background show approximate empire territory.
These borders connect your owned systems along warp lanes, giving you a quick sense
of where each empire’s space begins and ends.
Fog of War
You can only see systems you have explored. Unexplored systems appear very dark
and dim, with muted warp lanes. A system becomes visible when:
You own it or have owned it previously
Your fleets have visited or passed through it
You have probed it
It is adjacent (one lane away) to any system you currently have intel on — one you own, have visited, or have probed — not only systems you own
Using the Map
Hover over any system to see a tooltip with details: system name, type,
owner, population, industry, minerals, and your fleet composition (if present).
The tooltip appears after a brief delay.
Click a system to select it. The selected system gets a bright ring
highlight, and its detail card opens in the side panel.
Search using the search box at the top of the map. Type a system name
and matching systems will highlight. Press Enter to jump to the best match and
center the map on it.
Zoom with the +/− buttons, or use your mouse scroll wheel.
Rotate the globe by clicking and dragging on empty space. The Reset
button rotates back to your home system and restores the default zoom.
Quick navigation: Use the search box to jump to any system instantly
rather than scrolling around the map. This is especially useful in large galaxies
with many systems.
mapnavigationsymbolsfog-of-warinterface
10. Missions
RULE-010
Missions are short-term objectives handed to your empire by one of four galactic
factions. Completing them earns you ships, minerals, and Victory Points — and at
the highest tier, permanent empire-wide bonuses that can swing the entire game.
Every game deals you up to 19 missions across four tiers:
Tier
Slots Dealt
VP Each
Unlock Condition
Tier 1 — Early Empire
5 (drawn from a pool of 7)
0 VP
Active from Turn 2
Tier 2 — Rising Power
5 (fixed)
1 VP
Complete any 3 of 5 Tier 1
Tier 3 — Galactic Dominion
5 (drawn from a pool of 10)
2 VP
Complete any 3 of 5 Tier 2
Tier 4 — Legacy
4 fixed (one per faction type)
0 VP
Complete any 3 of 5 Tier 3
Maximum mission VP in a game is 15 (5 + 10 from Tiers 2–3).
Tier 4 awards no VP — the permanent reward is the payoff.
Tip: You don’t need to clear a tier to advance. Three completions out
of the five active missions in any tier is enough to unlock the next tier. Pick the
three that best fit your strategy.
Mission progress is retroactive. Progress is tracked from the start of
the game, not from the moment a mission becomes active. Pirate kills already count
toward Pirate Hunter, Defense Satellites built early count toward
Outer Bulwark, systems explored count toward Warp Cartographer,
player-empire kills count toward War Toll and Conqueror’s Crown,
and so on across every tier. When a mission’s tier unlocks, the mission completes on
its first eligible check (the turn after the tier opens, not the same turn).
Sole exception:Industrial Supremacy (Tier 4 Trade) measures
a single turn’s mineral output and only counts turns that occur strictly after
Tier 4 is reached. Production from before Tier 4 unlocked does not carry forward.
10a. Faction Types
Every mission is sponsored by one of four faction types. The type is shown by a colored
dot on the mission card and dictates the flavor of the mission, the named faction sending
it, and (at Tier 4) which permanent reward you can claim.
Faction Type
Color
Theme
Military
Red
Naval establishment, defense, offense, fleet power
Science
Blue
Exploration, scientists, discovery, archaeology
Trade
Amber
Merchants, logistics, industry, commerce
Political
Green
Diplomacy, alliances, expansion through influence
Each faction draws its named sponsor from a pool of in-game factions (e.g. the Iron
Talon Marshals for Military, the Helion Conclave for Science). You see the faction
name in flavor text; the colored dot tells you the underlying type.
10b. The 26 Missions
Mission
Tier / VP
Objective
Reward
Faction
Tier 1 — Early Empire (5 of 7 dealt per game, 0 VP each)
Colony Ship
T1 / 0
Transport population to a non-home system using a Freighter.
+1 CR
Trade
Supply Run
T1 / 0
Deliver minerals to your Home System via Freighter.
+1 FR, +2 Min
Trade
First Contact
T1 / 0
Reach diplomacy level Warm with any Independent system.
+2 DD
Political
First Expansion
T1 / 0
Control one star system other than your Home System.
+1 DD, +1 Min
Military
Diplomatic Outreach
T1 / 0
Conduct diplomacy at 2 different Independent systems in a single turn.
+1 CR
Political
Far Horizon
T1 / 0
Have a ship reach a system 3+ warp lane hops from your Home.
+2 Min
Science
Fleet Muster
T1 / 0
Have at least 30 ships across all your fleets.
+3 Ion-9
Military
Tier 2 — Rising Power (1 VP each, unlocks after any 3 T1)
Outer Bulwark
T2 / 1
Build 6 Defense Satellites at any systems other than your Home System.
+4 Min
Military
Peaceful Annexation
T2 / 1
Convert an Independent system to your empire via diplomacy (level 9+).
+3 Min
Political
Iron Conquest
T2 / 1
Capture an Independent system by force.
+5 Mi
Military
Lane Awakening
T2 / 1
Activate a warp lane by holding two linked Starbases.
+3 FR
Trade
Bones of the Ancients
T2 / 1
Haul 3+ minerals from a Dead System back to your Home System.
+3 Ion-9, +3 Mi
Science
Tier 3 — Galactic Dominion (5 of 10 dealt per game, 2 VP each, unlocks after any 3 T2)
Pirate Hunter
T3 / 2
Destroy 25 pirate ships (cumulative).
+8 Min
Trade
Warp Cartographer
T3 / 2
Explore 15 unique systems (visit or probe).
+4 CR
Science
Expansive Empire
T3 / 2
Control 9 systems simultaneously.
+10 Mi
Political
Build a Carrier
T3 / 2
Build a Carrier in any system you own.
+5 Ion-9
Science
Ancient Secrets
T3 / 2
Plant a Starbase on a pirate-held Dead System to start an archaeological dig.
+3 N
Science
Asteroid Extraction
T3 / 2
Mine 10 minerals from asteroid fields (cumulative).
+4 FR, +1 CR, +3 DD
Trade
Raid Annihilator
T3 / 2
Destroy an entire Pirate Raid fleet without help from other players.
+3 N, +3 CR
Military
Hostile Takeover
T3 / 2
Conquer a star system from another player empire by force.
+10 DD
Political
War Toll
T3 / 2
Destroy 30 ships belonging to other player empires (cumulative).
+5 N
Military
Invasion Force
T3 / 2
Have 60+ combat ships (excl. Starbases & D-Sats) at a non-owned system at end of turn.
+10 Min
Military
Tier 4 — Legacy (4 fixed, exclusive race, 0 VP — reward is the payoff)
Conqueror’s Crown
T4 / 0
Capture and hold another player empire’s Home System AND destroy 65+ ships belonging to other players (excludes Pirates and independent systems; cumulative over the game).
Permanent: All your ships fire +1 accuracy
Military
Cultural Hegemony
T4 / 0
Own a Quality A (Gaia) system plus one additional Quality A or B system (not your Home).
Permanent: All independents (incl. Gaia) join with their fleet on contact
Political
Industrial Supremacy
T4 / 0
Produce or mine 25+ minerals in a single turn from all sources. Must occur after reaching Tier 4.
One-time: +50 minerals, +50 Ion-9 crystals, and +2 industry at Home System
Trade
Dead System Network
T4 / 0
Have 4 Starbases stationed on Dead Systems simultaneously.
One-time: Full galaxy map charted from Turn-1 records (no fleet data)
Science
Reward abbreviations: CR Cruiser, DD Destroyer,
FR Freighter, N Nova, Mi Missile,
Min Minerals, Ion-9 Ion-9 crystals.
10c. Tier 4 — Legacy Missions (Exclusive Race)
Tier 4 is fundamentally different from the lower tiers. It is a race —
the first empire to complete a Tier 4 mission of a given faction type claims that type’s
reward, and no other empire can ever claim it for the rest of the game.
Exactly 4 missions are dealt — one per faction type. Every player
sees the same 4.
The first Tier 4 mission you complete triggers that type’s reward. Your other 3
Tier 4 missions immediately close (status: “Path Chosen — you have claimed
a different legacy.”).
For every other player, the Tier 4 mission of that same type is locked out
forever (status: “Another Empire has completed this path.”).
In an 8-player game, at most 4 players can ever earn a Tier 4 reward.
If multiple players complete different Tier 4 types on the same turn, all of them
claim their respective rewards.
If two or more players complete the same Tier 4 type on the same turn, only
one can claim it — decided by tie-break, not by luck of processing order:
Conqueror’s Crown goes to the player with the most enemy-player ship
kills (then, if still tied, the most Victory Points); the other three types
go to the player with the most Victory Points. A dead-even tie on those
values is broken at random. The losing contenders are locked out of that type for the rest
of the game, the same as any other empire.
Auto-complete protection: If you already met the condition for a Tier 4
mission before Tier 4 unlocked (for example, you were already holding a captured
enemy Home System when your third Tier 3 cleared), the mission auto-completes the
following turn — not the same turn it activates. This gives every
player one full turn to react before the race begins. Exception: Industrial
Supremacy must happen strictly after Tier 4 is reached — minerals produced before
Tier 4 unlocked do not count.
The Four Legacy Rewards
Conqueror’s Crown (Military) — Permanent. Every ship in your
fleet, present and future, fires with +1 accuracy. Your battle-hardened crews have
forged elite officers in the fires of conquest, and morale across your armada has
never been higher. This stacks with all other to-hit modifiers (advantage cards, ship
type bonuses, etc.). A natural roll of 1 on the d10 still always misses, regardless
of stacked bonuses.
Cultural Hegemony (Political) — Permanent. Every Independent system
you have already met, and every Independent you contact in the future, immediately
begins joining your empire with their fleet (a positive Join event, not Rogue
Join). This is the only mechanism in the game that can acquire a Quality A
(Gaia) system without conquest — Cultural Hegemony overrides their normal join
immunity (see Section 2c).
Industrial Supremacy (Trade) — One-time. 50 minerals and
50 Ion-9 crystals are delivered to your Home System, and 2 permanent industry slots
are added. The new industry is normal — it still needs population and minerals
to produce.
Dead System Network (Science) — One-time. The ancient network charts
the full galactic map for you — every star system and warp lane you had not yet
discovered becomes visible, with each newly charted system card showing the galaxy
as it was recorded at Turn 1 (marked "Last Seen: Turn 1"). It is an
archive, not a live feed: current defenses and fleet compositions remain
hidden — charted systems show "Deep space network — no ship data" in the
fleet section, the same pattern used by Ancient Archives — and any system you already
have fresher intel on (visited, probed, spied, or otherwise known in detail) keeps that
better information untouched.
Reputation Gating — Cultural Hegemony
Cultural Hegemony is the one Tier 4 mission affected by your reputation. As your
reputation worsens, the system requirement increases — and at Reviled,
the mission becomes impossible:
Reputation
Cultural Hegemony Requirement
Neutral or better
1 Quality A + 1 additional A or B (target = 2)
Questionable
+1 extra high-quality system (target = 3)
Dangerous
+2 extra high-quality systems (target = 4)
Menacing
+3 extra high-quality systems (target = 5)
Reviled
Blocked entirely — cannot complete
This makes Cultural Hegemony a path that doves and statesmen can pursue but tyrants
cannot. See Section 2d — Reputation for the full
reputation table.
Galaxy-Wide Announcements
When a Tier 4 mission is completed, every other player in the game receives a turn
report entry naming the empire and the legacy they have claimed. Once the announcement
fires, that path is closed for everyone else.
Strategy: Pick your Tier 4 path early in the game and orient your
Tier 1–3 choices toward it. The Trade and Science legacies have one-time
payoffs that can be game-changing if you reach them first. The Military and Political
legacies confer permanent advantages that compound every turn for the rest of the
game. There is no “safe” choice — the right legacy depends on which
path the rest of the galaxy is sleeping on.
missionstierslegacyfactionsvictory-points
Appendix A — Empire Advantage Cards
APPENDIX-A
At the dawn of each game, fate deals you two Empire Advantage cards. You must choose one —
and that choice will define your empire’s identity for the entire war. These are not minor bonuses;
they are fundamental asymmetries that shape your strategy, diplomacy, and destiny. Choose wisely.
There are no second chances.
Cards fall into four categories:
Combat (red),
Economic (amber),
Intelligence (blue), and
Command (purple).
Each category reflects a different philosophy of empire-building. There are 21 cards in total
— two of them, the carrier cards Advanced
Fighter Design and Armored Carriers, reward
empires that invest in a Carrier fleet.
Your planetary defenses are fortified — each PD unit takes 3 hits to destroy
instead of 2. Your Freighters carry elite marines that deal 3 damage per hit instead
of 2, making them the most effective invasion force in the galaxy. Upon capturing systems, the
conquered population does not start the next turn in a state of unrest. Unrest is less likely and
recovers faster when it does occur. Pirates plunder only half of the minerals.
Deeper Understanding
Normal PD takes 2 hits to destroy. Your Elite Troops PD takes 3 hits — enemies need 50% more firepower to crack your defenses.
Normal Freighters deal 2 damage per invasion hit. Your Elite Freighters deal 3 damage — enough to one-shot even enemy Elite PD (which also has 3 HP).
When you capture a system through conquest, it normally enters unrest the following turn (population refuses to work, no production). Elite Troops completely negates this penalty — your troops are so disciplined that conquered populations fall in line immediately.
Beyond conquest, random unrest events from other causes (pirate raids, etc.) are also less likely to trigger, and when they do occur, your systems are more likely to recover each turn (+1 to the recovery roll — a probability boost, not a guaranteed turn saved).
When pirates raid your systems, they steal only half the minerals they normally would. This stacks well with large mineral stockpiles.
Lore — “The Iron Legions”
Long before the warp lanes connected the galaxy’s great empires, your people fought a hundred colony wars across their home cluster. Generation after generation was forged in the crucible of planetary assault — orbital drops into hostile atmospheres, urban warfare through alien megacities, the grim calculus of occupation.
Other empires rely on automated defenses and orbital bombardment. Your soldiers do the work face-to-face. They’ve learned how to pacify a world in days rather than months, how to turn a conquered population into productive citizens before the smoke clears. Your planetary defense garrisons dig in so deep and fight so ferociously that attackers often break before the fortifications do.
Even the pirates have learned: raiding your worlds yields slim pickings. The garrisons are ready, the stockpiles are hidden, and the local population fights alongside their occupiers rather than against them. Your people have made an art of holding ground.
Nova Research
Card Text
Nova ships get a +1 to-hit modifier (d10), lowering the required roll by 1.
Deeper Understanding
Nova ships normally hit on specific d10 rolls depending on the target (see the Combat section). This card lowers the required roll by 1, meaning your Novas hit more often in every engagement.
This applies to all combat phases — whether your Novas are firing first in an ambush or exchanging fire normally.
Novas are already the most powerful combat ship; this card makes them devastating. Even a small Nova fleet becomes a serious threat.
Lore — “Project Helios”
The anti-matter beam was the most destructive weapon ever conceived — a lance of annihilation that could crack a starship’s hull in a single discharge. But the technology was crude, wasteful. Most of the beam’s energy scattered into space, lighting up entire sectors with each firing.
Your empire poured three generations of research funding into Project Helios, a classified weapons program buried deep in an asteroid laboratory. The breakthrough came from an unlikely source: a junior physicist studying Precursor artifacts recovered from a Dead System. She discovered that certain crystalline lattice structures could focus an anti-matter beam with almost zero energy loss.
The result was terrifying. Where other empires’ Nova ships fire a blinding flash that might hit its target, yours fire a needle-thin beam of absolute destruction. Your Nova captains don’t hope to hit — they choose where to hit.
Bastion Protocol
Card Text
Starbase and D-Sat get a +1 to-hit modifier (d10), lowering the required roll by 1. Starbases
have +3 hit points, making them significantly harder to destroy, and they self-repair
twice as fast — 2 HP per turn instead of the usual 1.
Deeper Understanding
Both your Starbases and your Defensive Satellites benefit from the +1 to-hit accuracy bonus.
Starbases normally have a base HP. This card adds +3 HP on top, making your Starbases require significantly more firepower to bring down.
This is a defensive card — it doesn’t help your attacking fleets at all. Its value comes from making your systems extremely costly to assault.
A system with a Bastion-buffed Starbase plus a few D-Sats becomes a fortress. Attackers need overwhelming force to crack it, buying you time to reinforce or counterattack.
Consider building Starbases at key chokepoint systems where warp lanes converge — the card makes them nearly impregnable.
Lore — “The Doctrine of the Anvil”
Your empire’s military philosophy was born from necessity. Surrounded by hostile neighbors in the early expansion era, your admirals couldn’t afford to project power — every ship sent raiding was a ship not defending the homeland. So they built walls instead.
The Bastion Protocol began as a set of defensive engineering standards: reinforced hull plating, redundant shield generators, predictive targeting arrays that could track and destroy incoming ordnance before it reached the station. Over centuries, these standards evolved into a doctrine. Your Starbases aren’t just orbital platforms — they’re self-sustaining battle stations with armored cores designed to absorb punishment that would vaporize lesser structures.
“Let them come,” the old admiral’s saying goes. “The anvil does not fear the hammer.” Your enemies have learned the hard way that assaulting a Bastion station is like throwing ships into a furnace. The targeting arrays lock on faster, the guns hit harder, and the station is still firing long after it should have been destroyed.
Shield Harmonics
Card Text
Cruisers and Nova ships absorb 1 extra hit before being destroyed.
Deeper Understanding
Cruisers and Novas each gain +1 HP, meaning they take one additional hit to destroy in combat.
Destroyers and other ship types are not affected — only your capital ships (Cruisers and Novas).
This is a straightforward but powerful durability buff. In a fleet-on-fleet engagement, your ships survive longer, which means they get more rounds of firing. The extra HP compounds — a ship that survives one more hit might fire two or three more times before going down.
This card is excellent for aggressive, fleet-heavy strategies. It makes your attack fleets significantly more resilient when pushing into defended systems.
Lore — “The Resonance Discovery”
Standard shield technology works on a simple principle: a projected energy field absorbs incoming weapons fire until it collapses. Every empire uses the same basic design, and every empire’s shields fail at roughly the same threshold.
Your scientists discovered something different. By synchronizing multiple shield generators to oscillate at precisely matched frequencies, they created a resonance effect — a harmonic standing wave that reinforced itself. When one generator weakened under fire, the others compensated, pouring energy into the gap faster than weapons could drain it.
The synchronized shields shimmer with an iridescent quality that enemy captains have learned to dread. A ship wreathed in harmonic shields can wade through fire that would shred an unprotected vessel, absorbing hit after hit while its own weapons continue to fire.
Focused Beam Research
Card Text
All your Destroyers have a +1 modifier to hit, striking with surgical precision.
Deeper Understanding
Every Destroyer in your fleet gets +1 to hit on all combat rolls.
Destroyers are your most numerous combat ship — they’re cheap to build and you’ll have many of them. A +1 bonus across your entire DD fleet adds up to significantly more damage per engagement.
This card is especially strong in the early game when fleets are mostly Destroyers, and remains relevant all game because DDs continue to form the backbone of your navy.
Pairs well with aggressive expansion strategies — your cheap, accurate DDs can overwhelm independent-system defenders and rival fleets cost-effectively.
Lore — “The Kessler Doctrine”
Admiral Kessler was a heretic. While every other military mind in your empire obsessed over bigger ships — heavier armor, more powerful Nova beams — Kessler argued that the future of naval warfare was the Destroyer.
“Give me a hundred precise knives over ten blunt hammers,” she famously told the War Council. She redirected your empire’s entire military-industrial complex toward a single goal: perfecting the Destroyer’s beam weapon.
Kessler’s program produced a focused-aperture beam with a targeting system so precise it could hit a specific hull plate from across a system. Your Destroyers don’t fire salvos and hope — they fire single, surgical shots that find their mark. A swarm of Kessler-doctrine Destroyers fills space with a web of perfectly aimed beams, each one threading through shield gaps and striking critical systems. Quantity has a quality all its own — especially when every shot counts.
Advanced Fighter Design (Carrier card)
Card Text
All fighter rolls — CAP, dogfight, and Assault strike — get a +1 to-hit, and
fighter critical hits land one step easier, so more strikes punch through for extra hull
damage. Stacks with Elite carriers.
Deeper Understanding
The +1 applies to every fighter to-hit roll: CAP intercept (normally 8+), Strike return
fire (9+), and the Strike-on-ship attack (7+). Each becomes one step easier across the board.
It does not touch your flak rolls — this card sharpens your
fighters, not your anti-fighter gunnery.
The critical-hit table also shifts one step easier: a Strike that hits normally deals 2 HP on a 9 and 3 HP
on a 10. With this card those crit bands widen, so your fighters carve through hulls noticeably faster.
Stacks with an Elite Carrier’s own −1 to-hit (XP ≥ 25) and with
the 2:1 outnumber bonus — an Elite, outnumbering, Advanced-Design strike is brutally accurate.
Only pays off once you field Carriers — unlock them by placing a Starbase on a Dead System, then build a fighter wing to put it to work.
Lore — “The Razor Wings”
Your scientists developed far more agile Fighters and installed advanced targeting systems, making your
Fighter Squadrons the deadliest in the Galaxy.
Where rival hangar crews bolt a gun to a thruster and call it a fighter, your engineers obsessed over every
gram and every microsecond. Reflex-linked canopies, predictive lead-computers, frames that turn tighter than
physics should allow — your pilots don’t chase a target, they simply arrive where it will be. When
your wings launch, the enemy’s screen breaks before the first pass is over.
Armored Carriers (Carrier card)
Card Text
Your Carriers are hardened warships: +2 hull (12 HP), fire their gun at 2+ instead
of 3+, and ignore the 80% self-repair cap — they repair to full anywhere, not just at a Starbase.
A Nova that would one-shot a Carrier instead deals only half its hull.
Deeper Understanding
Every Carrier is built with 12 HP instead of 10. This stacks with the
permanent Veteran/Elite +2, so a veteran Armored Carrier reaches 14 HP.
The Carrier’s own gun fires at 2+ (a +1 to-hit on its ship-combat shot, after
Destroyers). Note this is a ship-fire bonus — it does not change your
fighter or flak rolls.
Out of combat the normal rule pauses hull repair once a Carrier is back above 80% unless it sits at a
friendly Starbase. Armored Carriers ignore that cap and repair all the way to full anywhere
they hold station.
Novas one-shot ordinary Carriers (a Nova hit can erase a 10-HP hull outright). Against an Armored Carrier
that lethal hit is halved, routinely leaving the Carrier alive to keep launching.
Only pays off once you field Carriers — unlock them by placing a Starbase on a Dead System, then build a fighter wing to put it to work.
Lore — “The Ironbacks”
Reinforced spinal plating and redundant reactor shielding — your Carriers were built to take a
beating and keep launching.
Other admirals treat the carrier as a fragile queen to be hidden behind a wall of escorts. Your shipwrights
refused the premise. They wove armor through the keel, tripled the damage-control runs, and hardened the
hangar decks so a breached bay could still cycle fighters. Your Carriers wade into the line and stay there,
guns barking, flight decks roaring — the anvil and the hammer in a single hull.
Economic Cards
Merchant Economy
Card Text
Freighter deliveries add 50% more minerals (minimum +1). A full freighter is worth more
in your empire.
Deeper Understanding
When your Freighters unload minerals at a system, the delivered amount is increased by 50%, with a minimum bonus of +1 mineral.
Example: if your Freighters drop off 4 minerals in a single delivery, the system receives 6 instead (4 + 50% = 6).
The bonus is calculated per unload order, not per individual Freighter. If a fleet of three Freighters carrying 6 minerals total unloads at once, the bonus is applied to the full 6 (bonus = 3, total = 9).
The minimum +1 bonus means even a single mineral delivery yields 2. Small deliveries are proportionally more efficient than large ones.
This only applies to Freighter unload orders — it does not affect natural mineral production from systems.
The card rewards active logistics play. Players who efficiently shuttle minerals from rich systems (like Asteroid Fields) to industrial centers will get dramatically more value.
Lore — “The Guild Compact”
While other empires built warships, yours built trade routes. The Merchant Guilds were the true power in your civilization long before the first warp lane was mapped — vast trading houses that controlled the flow of every mineral, every resource, every finished product across your home cluster.
When the warp lanes opened and the galaxy beckoned, the Guilds saw not an empty frontier but the greatest marketplace in history. They invested heavily in Freighter technology: optimized cargo holds, mineral compression techniques, automated loading systems that could strip-mine an asteroid and have the cargo moving within hours.
A Freighter bearing your empire’s Guild insignia carries more than raw materials. It carries an entire logistical ecosystem — traders who know how to extract maximum value from every ton, compression technology that packs more into every hold, and trade networks that ensure nothing is wasted. Where other empires move rocks, your Guilds move wealth.
Industrious
Card Text
Systems with 4 or more factories produce +1 Build Point per turn (no extra minerals needed).
Deeper Understanding
Any system you own with 4 or more Industry generates 1 extra Build Point each turn for free — no mineral cost.
This effectively means those systems can build slightly more each turn than their mineral input would normally allow.
The threshold is 4 Industry — lower-industry systems don’t benefit. This makes the card stronger on high-quality systems (A and B) that naturally have higher industry.
Over the course of a game, that +1 BP per qualifying system per turn adds up enormously. If you have 5 qualifying systems, that’s 5 free BP every turn — equivalent to 5 free minerals of production.
Encourages investing in factory construction to push systems to the 4-industry threshold.
Lore — “The Builder Caste”
Your people are born builders. It’s in the blood — literally. Three thousand years of selective social structure created a civilization where the most respected members of society aren’t warriors or politicians, but engineers and fabricators.
Your orbital shipyards run triple shifts around the clock. Where other empires lose efficiency to shift changes, maintenance downtime, and bureaucratic delays, your factories hum with a continuous rhythm of production. Quality never drops because the workers take personal pride in every hull plate welded, every circuit board placed.
Visitors to your industrial worlds describe it as almost eerie — the perfect choreography of thousands of workers moving in synchronized efficiency, the complete absence of idle machinery, the relentless pace that never seems to exhaust anyone. Your people don’t work hard because they’re forced to. They work hard because building things is who they are.
Asteroid Immunity
Card Text
Immune to asteroid damage. Mine 2 minerals per turn (instead of 1) for each freighter present.
Deeper Understanding
Asteroid Fields normally damage ships that enter them. With this card, your ships take zero damage from asteroids — you can move through and station fleets in Asteroid Fields freely.
Each Freighter in an Asteroid Field normally mines 1 mineral per turn. With this card, each Freighter mines 2 minerals per turn — double output.
This makes Asteroid Fields go from dangerous hazards to your personal gold mines. You can park multiple Freighters safely and extract resources at twice the normal rate.
Other players still take asteroid damage, so your Asteroid Fields are naturally defended — enemies need to accept losses to contest them.
Strategically, this card incentivizes you to locate and control Asteroid Fields early. They become some of the most valuable systems on the map for you.
Lore — “Children of the Debris Field”
Your ancestors didn’t evolve on a planet. They evolved in the Shattered Ring — a vast debris field left behind when an ancient moon was torn apart by its gas giant’s tidal forces. For millennia, your people lived among tumbling rocks the size of continents, navigating by instinct through fields of spinning death that would pulverize any outsider’s ship.
What other species see as an asteroid field — a navigation hazard to be avoided — your pilots see as home. They read the spin patterns of thousand-ton boulders the way a sailor reads ocean swells, threading through gaps that close in seconds with a casual confidence that terrifies their passengers.
Your mining technology is equally advanced. Where other empires carefully extract minerals from a single asteroid at a time, your extraction rigs clamp onto multiple rocks simultaneously, processing ore at speeds that would be suicidal for anyone else. The galaxy’s asteroid fields aren’t obstacles for your empire. They’re the foundation of your economy.
Salvage Experts
Card Text
After surviving a battle where enemy ships are destroyed, gain 20% of the total value of
all ships destroyed in the battle — every side’s losses, including your
own — as minerals. At your own systems, minerals are added directly. At other systems, requires
freighters with available cargo space.
Deeper Understanding
When you survive a battle in which the enemy lost at least one ship, you recover 20% of the total build cost of every ship destroyed in that battle — enemy wrecks and your own. Your recovery teams don’t care whose hull it was.
An enemy must lose at least one ship for the salvage operation to trigger — you can’t salvage a battle where only your own ships died. Hulls captured by pirates are excluded (they sail away; nothing to strip).
At your own systems, salvaged minerals are added directly to the system’s stockpile — no Freighter needed.
At enemy or neutral systems, you need Freighters with available cargo space present at the battle to collect the salvage. No Freighters means no salvage at foreign systems.
The salvage is based on the total value of destroyed ships — expensive wrecks (Novas, Cruisers, Starbases) yield more than Destroyers.
This card rewards aggressive, combat-heavy play. The more you fight and win, the more your economy benefits. Wars partially pay for themselves.
Tip: bring Freighters along with your attack fleets to capitalize on salvage at enemy systems.
Lore — “The Wreck Walkers”
Every battle leaves a field of twisted metal, vented atmosphere, and drifting hulls. Most empires see a graveyard. Your recovery teams see a warehouse.
The Salvage Corps evolved from your empire’s early days, when resources were so scarce that every scrap of metal was precious. Specialized recovery vessels would follow your war fleets into battle, hanging back at safe distance until the shooting stopped, then swarming the debris field with cutting torches and tractor beams.
Over centuries, salvage recovery became a science. Your teams can strip a destroyed cruiser to its frame in hours, sorting useful components from irradiated waste with practiced efficiency. Hull plating gets reforged. Intact circuits get repurposed. Even the exotic alloys in Nova beam focusing arrays can be reclaimed and recycled.
“War is expensive,” your Fleet Marshal once observed, “unless you’re shopping in the debris.” Your enemies have learned that defeating your empire in battle doesn’t just cost them ships — it funds your next fleet.
Intelligence Cards
Galactic Spy Network
Card Text
Auto-plant spies at Independent systems whenever you have at least 1 ship over the system and
is not given move orders that turn. Permanent intel even after withdrawal. 50% spy loss on
ownership change. 50% chance gain a spy when you lose a system to another Empire. Your spies
also report on pirate-diplomacy activity galaxy-wide —
you learn the named details of every other empire’s payments, tier crossings, and bribes
to the brethren. Your spies will alert you of all incoming Pirate raids! Your spies will also
obtain and report each turn some important intel about other players and/or the Pirates.
Deeper Understanding
Whenever you have any ship stationed at an Independent system and that fleet has no move orders for the turn, a spy is automatically planted there at the end of the turn.
Once planted, the spy provides permanent intel on that system — you continue to see its status even after you move your ships away.
If the system changes ownership (another player conquers it), there’s a 50% chance your spy is discovered and eliminated.
This effectively gives you a free, passive intelligence-gathering network. Just by parking ships at Independent systems for a single turn, you build up a web of informants across the galaxy.
The intel persists through fog of war — you’ll see fleet movements and system changes at spied systems even if they’re far from your borders.
Works well with a scout-heavy early game strategy: send ships to many systems, pause for a turn, then move on. The spies remain behind.
Pirate-diplomacy intel. Your network has ears in the Drift as well. Each turn, an event-log entry tells you when any other empire pays tribute to the pirates, crosses a tier threshold up or down, or bribes the brethren to raid a target — complete with names and amounts. Other empires only see anonymized rumors of these events; you see the ledger.
Lore — “The Whispering Web”
Your empire’s intelligence services don’t operate like other nations’ spy agencies. There are no dramatic infiltrations, no single master spies risking everything behind enemy lines. Instead, your operatives work like a fungal network — quiet, patient, everywhere.
Wherever your fleets linger, even for a single rotation, agents slip into the local population. They set up shop as traders, mechanics, bartenders — unremarkable people in unremarkable positions who happen to notice everything. They recruit locals with modest payments and smaller promises. They tap into communication networks with devices no larger than a grain of sand.
The brilliance of the Whispering Web is its persistence. Long after your warships jump to the next system, the agents remain. They report through encrypted subspace bursts disguised as background radiation — invisible to anyone not listening for them. A system you visited three turns ago still whispers its secrets to you.
Even when empires change hands, the Web endures. Agents go dark, wait for the occupation forces to settle in, and resume their work. Only the most thorough purges root them out — and even then, only about half the time.
The Web reaches further than the independents. Your operatives have followed the coin into pirate ports too — the dock-masters who tally tribute, the bookkeepers who record bribes, the crews who whisper over their cups about which captain is sailing for which patron. Every payment passed across a pirate captain’s palm is logged twice: once by the brethren, once by you.
Enhanced Sensors
Card Text
Your ships detect stargate activations on the far side of each warp lane. When ambushing, you may safely select all lanes — fire only splits across lanes where fleets actually arrive (not all watched lanes). Additionally, your ambush fire suffers no accuracy penalty since your crews know precisely when and where to expect arrivals. Ships normally immune to ambush fire (e.g. cloaked ships) retain their immunity.
Deeper Understanding
Normally, ambush fire is divided equally across all watched lanes, even empty ones. With Enhanced Sensors, your fire is only split across lanes where enemies actually arrive. If you watch 4 lanes but enemies only come through 1, you concentrate 100% of your firepower on that gate.
Normally, ambush fire suffers a +1 to-hit penalty (firing from concealment is less precise). Enhanced Sensors removes this penalty entirely — your crews know exactly when and where ships will emerge from the stargate.
This means you can safely select “All lanes” without any downside — you get full firepower on whatever actually shows up, at full accuracy.
If fleets arrive from multiple lanes simultaneously, your fire splits across only those active lanes (not all watched lanes). You still benefit from no accuracy penalty.
Ships that are immune to ambush fire (e.g. fleets with Nebula Cloaking exiting a nebula) retain their immunity. Enhanced Sensors does not override other cards’ protections.
All other ambush rules still apply: ambush fires in Round 2 only, cannot be set in nebula systems, and Freighters/D-Sats/Starbases do not participate.
Lore — “The Resonance Arrays”
Standard ambush tactics are a gamble. You pick the lanes you think the enemy will use, spread your guns across them, and hope you guessed right. Get it wrong, and half your firepower is pointed at empty space while the real attack comes from the other side.
Your scientists solved this problem by studying the subspace resonance patterns that propagate along warp lanes when a stargate activates. Every gate activation sends a distinctive energy pulse back along the lane — a signature your tuned arrays can detect in the seconds before ships emerge. Your ambush crews don’t have to guess anymore. They know exactly which gate is about to open, exactly when the first ship will materialize, and exactly where to aim.
The result is devastatingly efficient ambush fire. While other empires scatter their guns and fire blind into the flash of an opening gate, your crews are already locked on target, timing their volleys to the millisecond. Nothing gets through your lanes unannounced.
Ancient Archives
Card Text
Start with full intel on all systems within 2 hops. Get waypoint trails toward nearest Asteroid
Field and Gaia System.
Deeper Understanding
At game start (Turn 1), all systems within 2 warp lane hops of your home system are fully revealed — you see their type, name, and all details as if you’d visited them.
You also receive waypoint trails — directional hints pointing toward the nearest Asteroid Field and the nearest Gaia System (the most valuable system type in the game).
The 2-hop reveal gives you a massive head start on exploration. You can see your immediate neighborhood and plan your first several turns of expansion with full information.
The waypoint trails don’t reveal the destination systems directly — they show you which direction to travel. Think of them as breadcrumb trails on the map pointing toward strategic objectives.
This card is strongest in the opening turns and on larger maps where blind exploration is costliest. Its value diminishes as the game progresses and exploration fills in naturally.
Lore — “The Precursor Vault”
Deep beneath your home world’s oldest mountain range, your archaeologists discovered something that changed the course of your civilization: a Precursor data vault, sealed for longer than your species has existed.
The vault contained star charts — not of the galaxy as it is now, but as it was when the Precursors walked among the stars. Most of the data was corrupted beyond recovery, eaten by entropy over the eons. But the charts of your local region were still readable, preserved in crystalline storage matrices that defied time itself.
More intriguing were the navigation logs. The Precursors had marked certain systems with priority designations — resource caches and what the translation algorithms rendered as “garden worlds.” By cross-referencing the ancient coordinates with modern stellar cartography, your scientists identified probable locations of Asteroid Fields rich in minerals and Gaia Systems teeming with life.
The archives don’t provide complete maps — too much has shifted in the intervening millennia. But they provide something almost as valuable: direction. While other empires stumble blindly into the void, your ships launch with ancient wisdom guiding their course.
Nebula Cloaking
Card Text
Invisible in Nebula systems. Cannot fire or be fired upon. Full intel on all ships present
while cloaked. Ambush immune when exiting a nebula. Can still search and claim/repair derelict
ships in Nebulas even when hostile ships are present.
Deeper Understanding
When your ships are in a Nebula or Ion Nebula system, they become completely invisible to all other players. No one can see your fleet there.
While cloaked, you cannot fire and cannot be fired upon — you are completely removed from combat. This means you can’t be attacked, but you also can’t defend or attack.
While cloaked, you gain full intel on every other fleet in the same system — you can see exactly what ships everyone has there, even though they can’t see you.
When you leave a Nebula system, you are immune to ambush at your destination. Enemies cannot ambush-fire on your arriving fleet.
This card turns Nebulas into safe havens and forward observation posts. You can park ships in a contested Nebula, watch enemy fleet movements with impunity, and leave when the time is right — ambush-proof.
Be aware: while cloaked you cannot defend the Nebula system. You’re a ghost — present but powerless. (You can, however, decloak just long enough to claim a Lost Fleet — see below.)
Your invisibility makes you the perfect salvager of Lost Fleets: because nothing can see or shoot you, you can keep searching a Nebula — and even claim and repair a derelict fleet — while hostile ships are present, when any other empire would be driven off. If you decloak to restore a wreck while a rival watches, all they’ll glimpse is a freighter flickering into view, claiming the ships, and vanishing again.
Ion Nebulas (which normally scramble sensors) work the same way for you — your cloaking technology uses the ionization to your advantage.
Lore — “The Ghost Fleet Doctrine”
Nebulas are anathema to most navies. The ionized gas clouds wreak havoc on sensors, scramble communications, and play tricks on navigation systems. Standard military doctrine is simple: avoid nebulas when possible, transit them quickly when not.
Your engineers saw something else entirely. They discovered that your hull alloy — a composite developed centuries ago for a completely different purpose — resonated with nebula ionization fields in a peculiar way. Instead of reflecting sensor pulses, your hulls absorbed them, scattering the energy harmlessly into the surrounding gas.
The effect was absolute invisibility. Not reduced sensor signatures, not electronic countermeasures — true disappearance. A fleet sitting in a nebula becomes indistinguishable from the gas cloud itself. No scanner in the known galaxy can find them.
The downside was equally absolute: the same resonance effect that hid your ships also scattered your own weapons fire. You couldn’t shoot while cloaked. But your sensors worked perfectly — better than perfectly, in fact, since the nebula’s energy amplified your passive detection arrays.
“The ghost fleet sees everything,” the saying goes. “And nothing sees the ghost fleet.”
Command Cards
Appealing Race
Card Text
+1 to initial Independent System starting diplomatic level. +1 to ongoing diplomacy rolls. Rivals who
attack you without first declaring war suffer double the reputation loss (−2 instead of −1). You begin
the game halfway to Tolerated Patrons standing with the
pirates — word of your charm has reached the Drift, and the brethren are inclined to
give you the benefit of the doubt.
Deeper Understanding
When your fleet first arrives at an Independent system, your starting diplomatic level gets a +1 bonus, making positive first impressions more likely.
Once diplomacy is ongoing, your species’ natural charm really shines: you get a +1 bonus to all ongoing diplomacy rolls, accelerating the path to integration.
You also start the game with a head start on pirate diplomacy — banked points equal to half the threshold for Tolerated Patrons (Lvl 1). One modest tribute payment finishes the climb to Lvl 1 and earns you raid immunity. Other empires need to pay the full threshold from scratch.
The +1 ongoing diplomacy bonus compounds over the course of a game. Independent systems progress toward joining your empire faster than for other empires.
Your good name is also a deterrent: any rival who fires on you while you are not at war (a surprise attack, with no declaration of war in effect) takes a doubled reputation penalty — −2 instead of the usual −1. Because your card is recognised the moment another empire meets you, would-be attackers are warned of the steeper cost before they strike.
The pirate head start does not grant raid immunity by itself — it shortens your path to it. Until you actually reach Lvl 1, raids can still target you. Pay tribute early to lock in the protection.
This card rewards a diplomatic playstyle — building your empire through negotiation rather than conquest, with the pirates and the independents alike.
Lore — “The Golden Ambassadors”
Something about your species puts other races at ease. Xenobiologists have debated the reason for centuries — is it your body language, your vocal harmonics, the subtle pheromone signatures that even alien biochemistry seems to respond to? Whatever the cause, the effect is undeniable: doors open for your ambassadors that remain firmly shut for everyone else.
Independent systems that would greet other empires with suspicion or hostility receive your envoys with curiosity and cautious optimism. Trade negotiations that would take other species months conclude in days. Even the most isolationist worlds find themselves warming to your overtures, as if some deep evolutionary instinct recognizes your people as… safe.
Word of your charm has even reached the Drift. Pirate captains who would shake down anyone else’s envoys instead pour your delegates a drink and ask after their health. “The pretty ones are easy to talk to,” the saying goes in the brethren’s ports. “Hear them out before you reach for the knife.” Your captains arrive at the Black Flag’s table with a measure of goodwill already extended — nothing earned, nothing owed, just an opening hand the rest of the galaxy will not be dealt.
Retired Pirate
Card Text
You begin the game at Marked Friendly (Lvl 2) with the
pirates, and your standing with the brethren can never
fall below this floor. You also begin with 10 points of banked tribute
— old debts the brethren have not forgotten — trimming the climb toward
Brother of the Black Flag. Pirate raids skip your worlds, pirate fleets will not fire
on your ships, and you may build Starbases at pirate-occupied Dead Systems without
first destroying the garrison. The brethren consider you one of their own — even
should your empire come to dominate the galaxy, the Black Flag will not turn on you.
Your Reputation starts at Dangerous (−2 to diplomatic rolls)
and can never rise above Neutral — no matter what good you do,
the independent races will never trust a former Brethren captain that far.
Deeper Understanding
Tier 2 floor. You start the game at Marked Friendly, and your pirate-diplomacy tier can never drop below Lvl 2. Reputation deltas and standing penalties still affect your underlying point counters, but the displayed and applied tier is clamped at Marked Friendly. You inherit all Lvl 2 protections automatically: raids skip you, pirate fleets will not fire on you, and you may build Starbases at pirate-held Dead Systems without first clearing the garrison.
10-point tribute head start. You begin the game with 10 banked pirate diplo points — exactly at the Tolerated Patrons threshold. Combined with the Tier 2 floor, you only need to earn another 20 points (through tribute or a Menacing/Reviled reputation bonus) to reach Brother of the Black Flag, instead of the 30 every other empire faces.
Path to Lvl 3. Pay tribute or earn reputation bonuses to push past 30 banked points and you reach Brother of the Black Flag with all its privileges — bribe-to-raid, active pirate defense in your systems, and immunity from being bribed against by other empires.
Immune to the late-game crackdown. Other empires that grow too powerful become a target the brethren will cross any tier to break. Not you. The lifelong pact protects you even at the height of empire — the Black Flag does not raise blades against one of their own.
Reputation starts at Dangerous, capped at Neutral. The −2 diplomacy penalty applies on all independent-system rolls from turn 1. Worse, your reputation can never rise above Neutral — pirate kills and independent-system joins still recover lost ground, but any event that would push you into Trustworthy or higher is silently dropped. The galaxy will never grant a former Brethren captain Honored or Revered standing.
Strategic implication. The reputation cap means peaceful integration of independents is harder, and the maintenance / unrest perks of Honored and Revered are off the table for you. Conquering Independent systems by force or buying them with prolonged diplomacy at Neutral is the realistic path. In exchange, the pirates are a permanent ally rather than a permanent threat.
Synergy with the tier system. The card’s Tier 2 perks — raid skip, no-fire, Starbases at pirate Dead Systems — are now the same effects every empire can earn by climbing pirate diplomacy normally. What Retired Pirate uniquely guarantees is that you start there from turn 1 with a head start banked, you cannot fall back to Lvl 0 or Lvl 1 no matter what happens, and you cannot be the target of another empire’s bribed raid.
Lore — “Drake Remembers”
You were once feared across a dozen systems. Before your empire discovered the warp lanes, before diplomacy and governance replaced plunder and intimidation, your people were raiders. Your ancestors boarded merchant ships, sacked orbital stations, and held entire colonies for ransom.
Those days are over — officially. Your empire has reformed, built legitimate institutions, joined the galactic community as a respectable power. But the pirate clans remember. Captain Drake, the ancient AI that coordinates the pirate empire’s endless raids, has your species flagged in its deepest protocols: “Do not engage. Former kin. Standing truce.” The Council of Captains will never raise a blade against you, and the brethren extend the courtesies due a Friend — their fleets stand down at sight of your hulls, their dock-masters wave your Starbases through to anchor at the old Dead Systems they hold.
This cuts both ways. Every Independent system in the galaxy also remembers what you were. Your ambassadors arrive at independent worlds and find cold shoulders, locked doors, and trade terms weighted against you. No matter how many decades pass, no matter how many good deeds your envoys can list, the door to genuine trust never opens past Neutral. “Once a pirate, always a pirate,” they mutter, and they will not be moved.
And maybe they’re right. But when your fleets glide past pirate armadas without a shot fired, when Dead Systems other empires wouldn’t dare approach become anchorages for your Starbases, when the brethren stand by you even as the rest of the galaxy turns against your rising banner — it is hard to argue that the old ways don’t still have their advantages.
Advanced Starbases
Card Text
Dead Systems with Starbase gain +1 mineral/turn. Gain free probe reports every turn from any
systems adjacent to your systems with Starbases.
Deeper Understanding
Any Dead System you own that has a Starbase generates +1 mineral per turn. Dead Systems normally produce nothing — this card turns them into modest resource generators.
Every turn, you automatically receive free probe-level intelligence on all systems adjacent to any system where you have a Starbase. This happens passively — no probe ships needed.
The mineral bonus on Dead Systems incentivizes building Starbases at Dead Systems you control — turning empty territory into productive assets.
The free probe intel makes your Starbases function as sensor platforms. Place Starbases at strategic locations and you get persistent, free surveillance of the surrounding area.
This card rewards building Starbases widely, not just at your most important systems. Each Starbase extends your sensor network.
Combines well with defensive strategies — your Starbases both defend key systems and provide early warning of approaching threats.
Lore — “The Sentinel Stations”
Other empires build Starbases as weapons platforms — floating gun emplacements to defend key systems. Your engineers had grander ambitions.
Your Starbases are engineering marvels — self-sustaining platforms packed with mineral recyclers, subspace telescope arrays, and autonomous maintenance systems. When deployed at a Dead System — a blasted, lifeless ruin that other empires write off as worthless — your Starbases can extract trace minerals from the debris field, recycling the remnants of whatever catastrophe killed the world into usable resources.
More impressively, each Starbase bristles with long-range sensor arrays that continuously sweep adjacent warp lanes. The data these arrays collect is equivalent to a full probe report — fleet compositions, system status, ownership changes — all gathered passively and beamed back to your command network in real time.
Your empire doesn’t just control the systems where your Starbases orbit. You see everything around them, turning each station into a node in a vast surveillance web. An approaching enemy fleet might pass through three or four sensor zones before reaching your borders — giving you ample warning to prepare your defense.
Call in a Debt
Card Text
Once per game: call in a Pirate reinforcement fleet of 2 Cruisers + (5 + 2 per turn after
turn 2) Destroyers to a system where you are present. Fleet arrives next turn. This Pirate fleet
will attack all ships except your own and cannot be moved.
Deeper Understanding
One-time use — once activated, the card is spent for the rest of the game.
You choose a system where you have at least one ship. The pirate fleet arrives there on the next turn.
Fleet size scales with the game turn: 2 Cruisers plus 5 + 2×(current turn − 2) Destroyers. Examples: Turn 3 = 2 CR + 7 DD. Turn 5 = 2 CR + 11 DD. Turn 10 = 2 CR + 21 DD. The later you wait, the bigger the fleet.
The pirate fleet attacks all ships except yours at that system. It treats every other empire’s ships as hostile.
The fleet cannot be moved — it stays at the summoned system permanently, acting as a garrison that attacks anyone who enters.
This is a devastating defensive or offensive tool. Use it to break a siege on your system, crush an enemy fleet at a contested location, or create an impregnable fortress.
Timing is key: using it early gives a smaller fleet; waiting gives a bigger one, but you might need it before then. The strategic tension is real.
The pirate fleet is a separate entity — it fires independently in combat and can be destroyed by concentrated enemy fire.
Lore — “Drake’s Marker”
Before you built an empire, before the warp lanes and the diplomacy and the grand strategy — you did someone a favor. A very dangerous someone.
The details are classified at the highest levels of your government. The official record simply notes a “strategic intervention” during the Pirate Consolidation Wars, when the scattered pirate clans were being unified under a single AI coordination network. What actually happened involved your special forces, a stolen encryption key, and a desperate rescue operation deep in hostile space.
Captain Drake — the ancient tactical AI that now commands the pirate empire — doesn’t forget debts. It can’t; debts are tracked in its core priority matrix alongside targeting solutions and raid schedules. Your empire holds the only outstanding marker in Drake’s ledger.
One transmission on a specific encrypted frequency is all it takes. Drake will marshal a personal fleet — Cruisers from the elite guard, Destroyers pulled from a dozen raid groups — and dispatch them to any system you specify. They’ll arrive fast, they’ll attack everything that isn’t you, and they’ll hold position until they’re destroyed.
It’s a one-time deal. Once the marker is called, the debt is paid. Use the marker wisely. You only get one.
Wormhole Technology
Card Text
Once per game: activate a permanent wormhole between any two systems where you have at least
one Cruiser. The two systems become neighbors for all purposes (fleet movement, probe detection,
map rendering). This connection is usable by all factions.
Deeper Understanding
One-time use — once activated, the card is spent for the rest of the game.
You must have at least one Cruiser in each of the two systems you want to connect.
Both Cruisers cannot move on the turn you activate the wormhole. They must remain stationary while the wormhole forms. You can move them freely on subsequent turns.
The wormhole creates a permanent warp lane between the two systems. It functions exactly like a natural warp lane — ships can travel through it, probes detect through it, it appears on the map.
All factions can use it — this is not a private connection. Once the wormhole exists, any empire (including pirates) can move ships through it. Think carefully about what routes you’re opening up.
This can be used to create strategic shortcuts across the map, connecting distant parts of your empire, bypassing chokepoints, or opening surprise attack routes.
Defensive consideration: you might accidentally create a highway for your enemies. The wormhole benefits everyone, so plan accordingly.
The wormhole is permanent — it cannot be closed or destroyed once activated.
Lore — “The Precursor Key”
In the cold vault of a Dead System orbiting a fading red dwarf, your archaeologists found it: a device of terrifying elegance, wrapped in stasis fields that had held for longer than your star had been burning.
The Precursors — that ancient, vanished race whose ruins litter Dead Systems across the galaxy — had mastered technologies that modern science can barely comprehend. Warp lanes, the galaxy’s great highways, are believed to be their creation. But this device was something more: a key to creating new lanes.
Your scientists spent decades studying the artifact, and their conclusions were both thrilling and sobering. The device could punch a permanent hole in the fabric of space-time, linking two distant points as if they were neighbors. A wormhole — stable, traversable, eternal. But the device would burn out after a single activation. The Precursors built it to last forever, but they built it to fire once.
Activating the device requires an immense energy anchor at both endpoints — only the reactor core of a Cruiser-class warship can provide sufficient power. The two Cruisers must remain stationary during activation, channeling their entire energy output into the forming wormhole. The process takes a full turn cycle, during which both ships are completely vulnerable.
The result is a shimmering tear in space — a permanent gateway that any ship from any faction can traverse. The wormhole doesn’t care about politics or allegiance. It is a door, and doors open both ways. Choose the moment wisely. The galaxy’s geography is about to change — permanently — and not just for you.
Warp Lane Disrupter
Card Text
Select a system where you have a Cruiser with no move order, then choose one of its warp lanes.
When the turn processes, the targeted stargate is infected and the connection is destroyed permanently.
Any fleet caught mid-transit across the lane loses its lead Cruiser and its move is canceled.
The warp lane is gone forever. One-time use.
Deeper Understanding
One-time use — once activated, the card is spent for the rest of the game.
You must have at least one Cruiser at the activating system, and that Cruiser cannot have a move order this turn. If you add or edit a move order on that system after activating, the card activation is automatically canceled (the card remains available for later use).
The Cruiser must survive to turn processing. If it is destroyed in combat before the movement phase, the virus is never deployed and the card is expended without effect.
Resolution happens at turn change, before the movement phase. The targeted warp lane is severed permanently — no fleet, yours or anyone else’s, can ever transit it again.
Fleet interception: if any fleet (yours, another empire’s, independent, or pirate) had a move order crossing the disrupted lane this turn, that fleet loses 1 Cruiser (the ship generating the warp field) and its move is canceled. The remainder of the fleet falls back to its origin.
Any lane is a valid target — natural warp lanes and Wormhole Technology lanes alike. The virus infects the stargate at the endpoint; once in, it cannot be removed.
The map will no longer render the severed lane. Both systems’ adjacency chips retain the partner’s name with a red strikethrough and a tooltip explaining the severance — a permanent historical record of your act.
Reports are generated for the activator, for any empire whose fleets were caught mid-transit, and for the far system’s owner (if any).
Lore — “The Lattice Virus”
It came to you in a sealed containment case, carried by a xeno-archaeologist whose name you were never told. She would not let the case out of her sight, would not let you photograph its markings, and she disappeared the moment the transaction cleared.
Inside, suspended in null-gravity and shielded by fields whose principles your engineers could only partly reconstruct, was a single shard of crystalline code. Not data — something older. Something written in the same substrate the Precursors used to build the stargates themselves. A virus. A key turned backwards.
Your scientists dared not fully reverse-engineer it. They understood enough to know what it did, and enough to know they should be afraid. Once deployed into a stargate’s lattice, the virus will spread through the gate’s core in seconds — every shred of its structural code rewritten into null-state, every anchor point to the adjoining warp corridor unraveled. The gate doesn’t explode. It simply ceases to be a gate. The lane it anchored collapses after it, unravels, and is gone.
This is the only one. There will be no second. Choose the target with cold precision — the virus will reshape the galaxy’s map, and whatever lane you sever will never be reopened by any hand, now or ever.
W.E.B. integrates with Discord to give players a direct communication channel
during active games. While the in-game Comms panel provides canned
diplomacy messages delivered on turn boundaries, Discord channels allow
free-form, real-time conversation between the players in a game.
How It Works
Link your Discord account on your W.E.B. profile page before
joining a game. You only need to do this once.
When a game starts, if more than half the players have linked
Discord accounts, the system automatically creates a semi-private
text channel on the official W.E.B. Discord server.
Only players in that game (who have linked Discord) can see and post in the
channel. Other server members cannot access it.
The bot posts a welcome message with the game name, player list, and a link
to the game.
What You Can Use It For
Negotiate non-aggression pacts, trade agreements, and ceasefires in your own words
Coordinate joint military operations with pact partners
Bluff, deceive, and engage in the full spectrum of diplomacy
Discuss strategy and share intel (or disinformation)
Tip: The in-game Comms panel sends pre-written diplomatic messages
that are delivered when the turn processes. Discord lets you write your own messages
in real time — use both for maximum diplomatic leverage.
Limitations & Policies
Discord linking is optional. Players who haven’t linked
their Discord account before the game starts will not have access to the game
channel. Link your account before joining your next game to ensure access.
Threshold required: A channel is only created if more than half
the players in the game have linked Discord. In small games where few players
have linked, no channel is created.
AI takeover / departure: If your empire is taken over by the AI
or you leave the game, you retain read/write access to the channel. You can
still chat about the game with the remaining players.
Auto-deletion: Game channels are automatically deleted
48 hours after the game ends. This gives players time to discuss
the final outcome, congratulate the winner, and debrief — but channels
do not persist indefinitely.
Private games: When creating a private game, the host can
check the “Create Discord channel” option to guarantee a
channel is created regardless of how many players have linked Discord.
Privacy Notice
Important: Discord game channels are semi-private,
not fully private. While only game participants can see the channel, be aware:
W.E.B. server administrators and the bot have access to all channels.
Discord itself retains message data per its own privacy policy.
Channels are deleted 48 hours after the game ends — messages are not
archived or backed up by W.E.B.
Do not share sensitive personal information in game channels.
For full details, see the Discord Integration page linked from
your portal menu, and review Discord’s own
Privacy Policy.
Notifications via Discord
Separately from game channels, W.E.B. can send you direct messages
on Discord for game events — turn reminders, new turn results, diplomacy
messages, and more. Configure which notifications you receive on your
Profile page under Discord Notifications.
discordcommunicationdiplomacy
Appendix C — Carriers & Fighters
APPENDIX-C
Carriers add a whole pre-combat fighter phase on top of the normal two rounds of
fleet fire. You unlock them partway through the game by placing a Starbase on a Dead System, after which
any system can build them.
When fighters are in play, every battle gains an extra phase that resolves before Round 1:
the fighter pre-combat round. Carriers and fighter-capable bases launch fighters,
fighters dogfight and strike, defending ships throw up flak, and any ship that survives a fighter
strike can be left too rattled to fire in Round 1. Then the normal two-round battle plays out.
Carriers (CV)
A Carrier is a flagship-class command ship with a hangar bay. It carries fighters into battle but
is a soft target itself if its escort is stripped away.
Build cost
5 BP
Hit points
10 HP (a Veteran/Elite Carrier gains a permanent +2 → 12 — see Experience below)
To-hit (its own gun)
3+ (80%), one shot per round, fires after Cruisers
Hangar
10 fighters
Movement
Self-propels like a Nova — a Carrier can warp itself (alone, or alongside other Carriers/Novas) with no Cruiser needed, but it carries no cargo and cannot tow other ships. To move a Carrier with an escort or cargo, include a Cruiser. A Carrier given a move order can't launch fighters that turn (ships ordered to move out can't fire in Round 1).
Upkeep
+1 Ion-9 crystal per turn, per Carrier (see Maintenance below)
A Carrier's hull damage and experience persist between turns — a battered
Carrier stays battered until it repairs, and a veteran Carrier keeps its record. Each Carrier is given
its own name and a permanent slot number so you can track it across the campaign.
Carriers cannot be captured. If pirates or an invader would seize a Carrier, it
self-destructs instead, taking its fighters with it.
Fighters — CAP and Strike
Fighters are not built or moved individually — they live inside a Carrier's hangar (or a
fighter-capable base) and launch automatically when battle is joined. Each fighter has 1 HP.
When fighters launch, they split into two roles:
CAP (Combat Air Patrol) — a defensive screen. CAP launches whenever
your side is in the fight (the same engagement rule as Strike — a battle
raging nearby that doesn't involve you keeps your fighters in the hangar). Once up, CAP
intercepts incoming enemy fighters and then stays on station to absorb hits
for your fleet in both Round 1 and Round 2 (CAP fighters soak damage but do not fire the main
guns).
Strike — offensive fighters that fly out and attack one chosen enemy ship type.
Strike fighters only launch when your side is actually in combat (you are attacking, or
being attacked) — simply naming a strike target does not start a fight.
Close air support — during an invasion, the fighters aboard your invading Carriers give your Freighters a to-hit bonus against Planetary Defense (Carriers themselves never land troops). See Invasion & Conquest.
A Carrier's default split is 5 CAP / 5 Strike. Click a Carrier in the Ships Present
panel to change its split or set a strike target. Fighter-capable Starbases and Fighter Bases default to
all CAP (5/0).
Fighter roll
Hits on
Notes
CAP intercept (dogfight)
8+ (30%)
Shoots down incoming Strike fighters
Strike return fire (dogfight)
9+ (20%)
Strike fighters fight back through the CAP screen
Strike on ships
7+ (40%)
Surviving Strike fighters attack their target
When a Strike fighter hits a ship, roll again for damage: 1–8 deals 1 HP,
9 deals 2 HP, and 10 deals 3 HP (a critical hit). Critical damage is
capped at the target's maximum HP — a crit cannot spill over to a second ship.
Flak — Shooting Down Fighters
Defending ships throw up anti-fighter flak against each incoming Strike wave, up to a
maximum of 5 flak shots per wave. How well a ship shoots down fighters depends on its
class:
Ship
Flak to-hit
Carrier, Starbase
4+ (70%)
Cruiser
8+ (30%)
Destroyer, Nova, Defense Satellite, Missile Ship
9+ (20%)
Freighter
10 (10%)
When fighters strike a single big target (a Carrier or Starbase), that target fires its own flak plus up
to four of the best-shooting escort ships present. Defense Satellites and Starbases never lend their flak to
protect another ship — they only defend themselves.
The Round-1 Lockout
Strike fighters that get through the flak and reach their target don't just deal damage — they keep
the defending ships busy dodging and evading. Any ship left distracted by a fighter strike
is locked out of firing in Round 1 of the battle that follows. The ships recover and fire
normally again in Round 2.
This makes fighters a soft counter to Novas and other heavy hitters: a well-aimed strike can take an enemy
Nova out of the opening exchange entirely.
Fighter-Capable Bases
Carriers aren't the only way to put fighters in the air. Two fixed installations can also launch them:
Starbases — an existing Starbase holds 5 fighters (default all CAP).
Fighter Bases — a dedicated installation built for 2 BP. It holds
5 fighters (default all CAP), one per system. A Fighter Base cannot be targeted directly in
battle — it is only lost if the system changes hands.
Both bases rearm +2 fighters per turn (capped at 5). Because they draw on the system, not
your fleet, their rearming is not affected by Ion-9 supply — but a base rearms nothing
on a turn its owner fought a battle at that system. A battle fought there purely between other
empires does not interrupt rearming.
Repair, Rearm & Experience
Out of combat, a Carrier slowly repairs its hull and rearms its hangar. Both rates depend on what the
Carrier did that turn (a Carrier that fought a battle repairs and rearms nothing that turn):
Situation
Hull repair
Fighters rearmed
Moved this turn
+1 HP
+1
Stayed put
+2 HP
+2
Stayed put at a friendly Starbase
+4 HP
+4
While Out of Ion-9 supply, every one of these rates drops by 1 (never below 0). Away from a
Starbase, hull repair pauses once a Carrier is back above 80% HP; at a friendly Starbase it repairs all the way
to full.
Carriers earn experience from the enemy units their fighters destroy, weighted by
what they kill — an enemy Carrier is worth 10 XP, a Starbase 4, and any other ship 1 (independent-system and
pirate kills are worth a flat 0.5 each, and stop counting once the Carrier is a Veteran). A Carrier becomes a
Veteran at 10 XP and an Elite at 25 XP,
and a Veteran repairs its hull +1 faster at every supply tier (an Elite repairs at that
same rate — the bonus doesn't grow again, and fighter rearming is not sped up by rank at
all). Reaching Veteran also permanently raises the Carrier's hull by
+2 HP (to 12), which it keeps for the rest of the campaign.
Maintenance — The Ion-9 Surcharge
Carriers are demanding to keep flying. Each Carrier you own adds +1 Ion-9 crystal per turn
to your fleet maintenance, on top of the normal cost. This surcharge is irreducible — it
is not lowered by Revered reputation or the Ion-9 Catalyst the way ordinary fleet upkeep can be. Plan
your crystal income before committing to a carrier fleet.
When Fighters Can't Launch
Heavy damage: a Carrier or base at 50% HP or worse launches only half its fighters; at
80% damage or worse it cannot launch at all.
Out of Ion-9 supply: a Carrier's launch capacity is halved (fighters still hit on their normal numbers). Starbases and Fighter Bases are exempt — they are fixed installations, not on the fleet's Ion-9 supply chain, so they launch their full complement even while your fleet is out of supply.
Ion Nebula: fighters cannot launch at all in an Ion Nebula — there is no fighter phase there.
Every fighter-phase die roll starts from its base number (see the tables above) and is then nudged by any
modifiers that apply. The three roll states are CAP (Combat Air Patrol
intercepting), STRIKE (your strike fighters — their dogfight return-fire and their
attack on a ship), and FLAK (a ship’s anti-fighter gunnery). The chart below lists every
modifier in the game and which states it touches.
Reading it:+1
to hit die roll lowers the required roll by 1; -1 to hit die roll
raises it by 1. Modifiers stack.
Modifier — source
State(s)
Effect
Notes
Elite Pilots — Elite Carrier (XP ≥ 25)
CAP and STRIKE
+1 to hit die roll
Only that Carrier’s own fighters. A Veteran (XP ≥ 10) gets faster repair/rearm and +2 hull, but no to-hit bonus.
Advanced Fighter Design — advantage card
CAP and STRIKE
+1 to hit die roll/Crit. Die roll
Also shifts the Strike critical-hit table one step easier (more 2- and 3-HP hits); does not affect flak. See card →
Outnumbering — 2:1 fighter ratio (dogfight)
CAP and STRIKE
+1 to hit die roll
In the dogfight, whichever side has at least twice the other’s fighters gets +1 — CAP outnumbering the incoming Strike, or Strike outnumbering the CAP. Locked once per attacker/defender pair before the first wave.
Multiple Strikes on same target
STRIKE
+1 to hit die roll
When one carrier-fleet sends 2 or more Strike waves at the same target, its strike-on-ship roll gains +1.
Ambush fighter fire
STRIKE
-1 to hit die roll
Fighters firing during an ambush take −1 — waived entirely by the Enhanced Sensors card.
Nebula
CAP, STRIKE, and FLAK
-1 to hit die roll
Applies to every fighter and flak roll, both sides. (An Ion Nebula is different — no fighter phase happens there at all.)
Out of Ion-9 supply
FLAK
-1 to hit die roll
Flak only. Out of supply also halves a Carrier’s fighter launch (bases exempt).
Ships firing FLAK more than once
FLAK
-1 to hit die roll
When a ship must throw flak against 2 or more Strike waves on the same target, its flak is degraded against every wave — including the first — not just the second and later ones.
Not fighter modifiers: the
Armored Carriers card buffs the Carrier’s own gun (+1, a ship
roll), its hull, repair, and Nova resistance — it does not change any CAP, Strike, or flak
roll. Ship-combat cards (Nova Research, Bastion Protocol, Focused Beam Research) and the Conqueror’s Crown
likewise never touch the fighter phase.
Two Empire Advantage Cards boost a carrier
fleet in games where they are drafted: Advanced Fighter Design
— +1 to every fighter to-hit roll (CAP and Strike) plus a sharper critical-hit table; and
Armored Carriers — +2 hull on
every Carrier (stacking with the Veteran +2 for 14 HP), +1 to the Carrier's own gun, hull repair to full even
away from a Starbase, and a Nova that would one-shot a Carrier instead deals only half its hull.
Both are listed in full in Appendix A — Empire Advantage Cards.
carrierfightersround-aion-9
Appendix D — Lost Fleets (Derelict Ships)
APPENDIX-D
Drifting in the heart of every Nebula and Ion Nebula is a Lost Fleet —
a squadron of Ancient warships, stranded during the great war long ago, their crews dead and their reactors
cold. You can’t see them at first. But if you keep ships in the cloud, your sensor crews will eventually
find them — and if you come prepared, you can bring them back to life.
Searching
While you have at least one ship in a Nebula or Ion Nebula — even on the turn it
first arrives — your crews search the cloud at the end of every turn.
Each turn there is a chance to locate the derelict fleet: a better chance in an ordinary
Nebula than in a sensor-scrambling Ion Nebula.
Hostile fleets spoil the search. If a fleet hostile to you is in the system —
pirates you can’t ignore, or a player you’re at war with — you can’t search or claim and you
receive no Lost Fleet reports that turn. (With high enough Pirate Diplomacy
standing the pirates ignore you, so they no longer block you — while a lower-standing rival in the same
cloud may still be frozen out.)
The Nebula Cloaking card lets a cloaked fleet keep searching —
and even claim and repair a wreck — while hostile fleets are present, since nothing
can see or fire on it.
Until the fleet is found you’ll see: “Sensors detecting weak drive signatures. We will search
the Nebula as long as we have at least 1 ship present.”
Discovery
The turn the fleet is located, everyone with ships in the system is told:
We have located a derelict fleet in the Nebula. They are very old and date back to the time of the Ancients,
stranded long ago during the great war, crews long dead. The ships are damaged and without power — but if
we can bring 1 Freighter with the right minerals, we should be able to restore the fleet and add
it to our own.
From that moment the Lost Fleet is visible to all players present, shown in the
Ships Present box as its own faded grey faction, “Derelict Ships.”
Claiming the wreck
To restore a discovered Lost Fleet you must, at the end of a turn:
have a Freighter present carrying enough minerals — 2 minerals in a
Nebula, 3 minerals in an Ion Nebula; and
be the only empire there with such a freighter; and
have no hostile fleets present (no pirates you can’t ignore, and no player you are at war with).
If all three hold, the ships are yours: “We have repaired and manned the derelict ships and added them
to our fleet! We used the minerals from our freighters.”
Standoff. If two or more empires each bring a loaded freighter, nobody can claim the
wreck — there is a tense standoff until only one qualifying empire remains. A
cloaked rival still causes a standoff (you’ll be warned a cloaked freighter
is present), and if a cloaked fleet snatches the prize while you watch, you’ll see only a freighter briefly
decloak, claim the ships, and vanish again.
Notes. A Lost Fleet is “present but powerless” until claimed — it never
fires, can’t be attacked, and doesn’t defend the nebula. It is usually a mix of Cruisers and Novas (an
Ion Nebula holds a larger squadron than an ordinary Nebula). Very rarely, in a
Carriers & Fighters game, an Ion Nebula wreck turns out to be a single powered-down
Ancient Carrier — restore it and it joins your fleet as a freshly christened Carrier of your
own. Lost Fleets can be turned off per game.